Nexo GEO T User Manual
Page 27
GEO
T
RIGGING PROCEDURE
Page
27/67
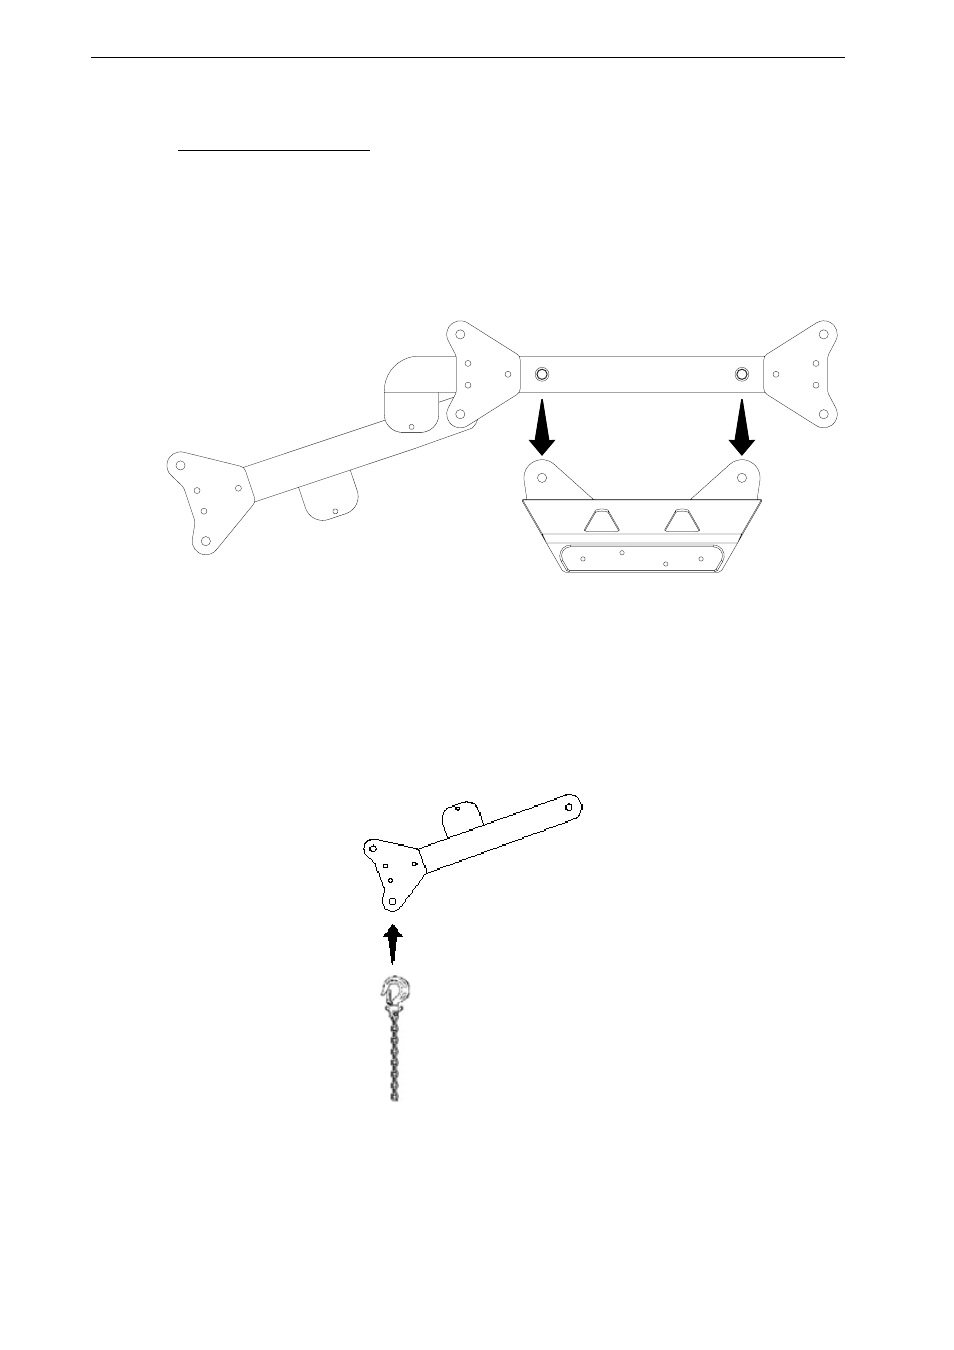
4.4.1 Kelping beam to bumper
• Link the motor hoists to the Kelping Beam using the front upper axis (fixed beam) and rear upper
axis (articulated beam), and ensure that these axes are properly locked with the “R” clips
supplied.
• Lift the Kelping Beam and position the bumper below it.
• Lower the Kelping beam so that the front beam load pin holes are aligned with the bumper load
pin holes (see drawing).
KELPING BEAM TO BUMPER SETUP
• Connect the Kelping Beam to the bumper with the two axes through the corresponding holes
(see drawing above) and ensure that these are properly locked with the “R” clips.
• Attach one end of the GEO T Kelping Chain to the Kelping Beam rear lower axis.
• NB : the GEO T Kelping chain has a clutch assembly 0.5 meter from one end. This is the end
that connects to the bottom GEO T4805, and a small bag is provided for excess chain.
ATTACHING THE GEO T KELPING CHAIN TO THE KELPING BEAM
FRONT
REAR