Ramsey Winch H930 Dow-Lok W/Counterbalance Valve, Less Brake User Manual
Page 15
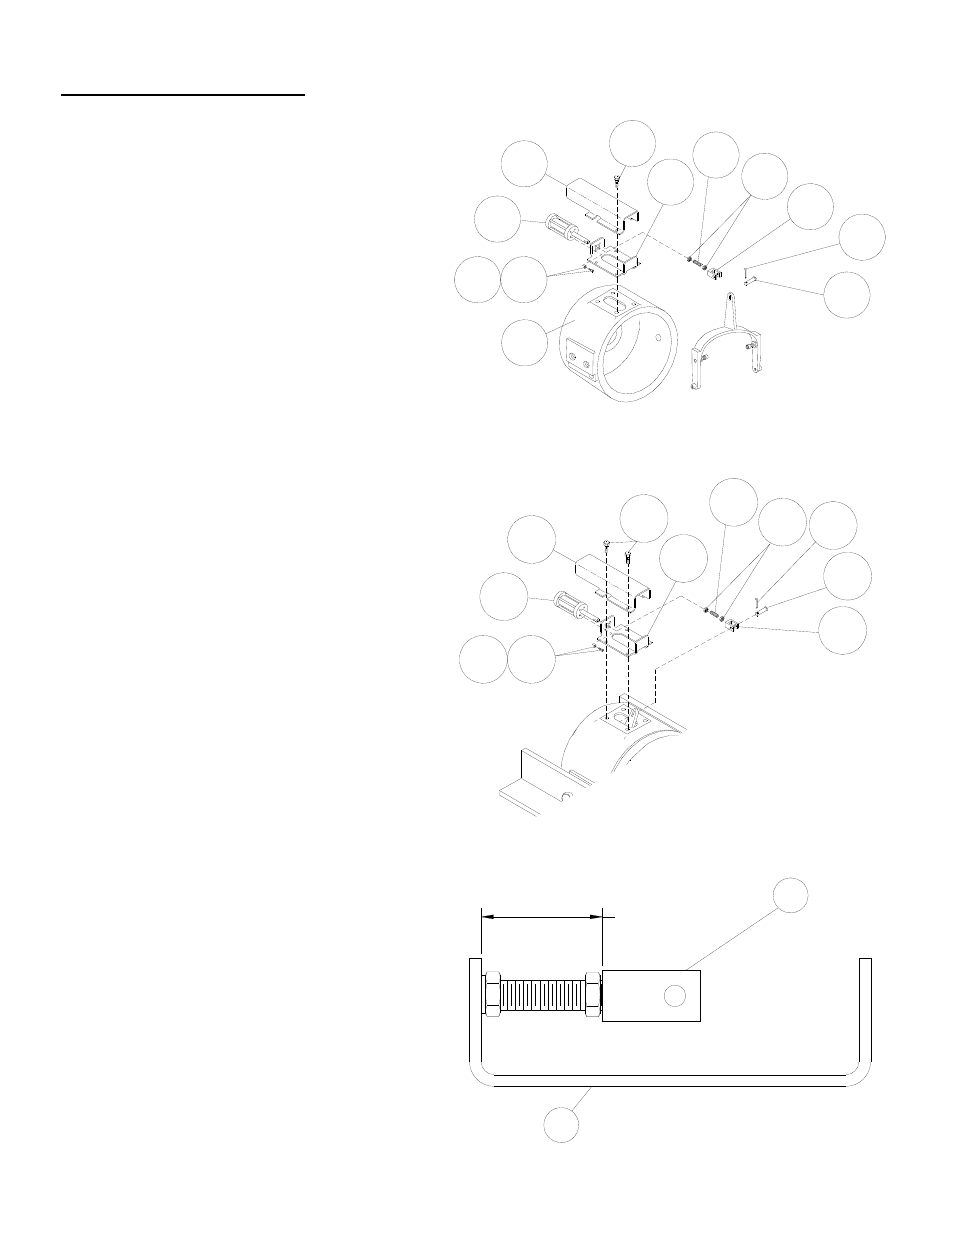
13
AIR SHIFTER OVERHAUL
DISASSEMBLY
If the air cylinder needs to be removed, remove (4)
capscrews (item #40) that hold the cover (item
#37) and bracket (item #34) onto the clutch hous-
ing (item #19). Remove cotter pin (item #65) and
clevis pin (item #66) that hold clevis (item #27) to
yoke. Loosen jam nuts (item #57) and unscrew
stud (item #88) from clevis and air cylinder (item
#67).
To remove air cylinder from bracket, remove (4)
capscrews and lockwashers (items #55 and #59).
RE-ASSEMBLY
Install bracket (Item #34) using (2) capscrews (item
#40), reserving the other (2) capscrews to install
the cover later. Tighten to 18 ft-lbs torque. Install the
air cylinder (item #67) using (4) capscrews and
lockwashers (items #55 and #59). Tighten these
screws to 45 in-lbs.
Apply Loc-tite #262 to stud (item #88). Install (2)
jam nuts (item #57) onto stud, then attach stud to
air cylinder shaft. Screw clevis (item #27) to other
end of stud and adjust stud until back of clevis is 1-
1/8” from bracket (item #34), as shown at right.
Pull yoke to fully engaged position, and attach clevis
to shifter using pin (item #66) securing with cotter
pin (item #65). Confirm that clevis pin is not in a
bind when shifter is in engaged position. Adjust stud
slightly if it is. Tighten jam nuts to keep stud in cor-
rect position.
Connect air pressure (70-90 PSI) to inlet port of air
cylinder and disengage clutch. Confirm that clutch is
fully disengaged and freespool winch. Release air
pressure and confirm that travel of air cylinder shaft
is 1/8 to 3/16”. Continue to freespool winch and
confirm that winch shifts to full engagement.
Install cover (item #37) using (2) capscrews (item
#40). Tighten to 18 ft-lbs. torque.
66
57 65
40
34
88
67
37
27
55
59
27
34
1-1/8"
59
37
67
55
40
19
57
27
65
66
88
34