Manual striping hook-up, Automatic striping hook-up – Paasche Airbrush A-US User Manual
Page 4
Page 4
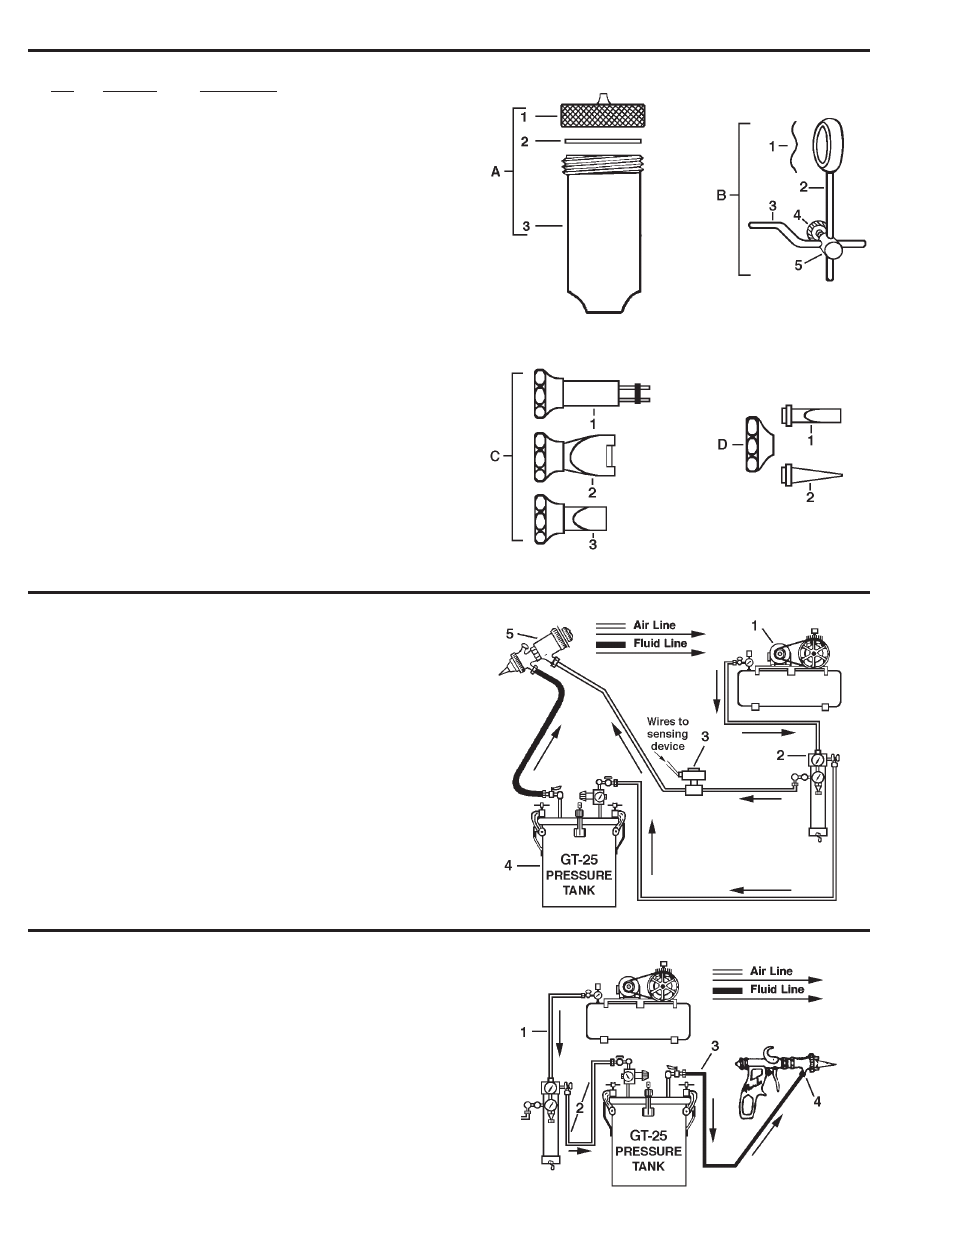
Paasche UTS, UPS-1 and A-US Manual and Automatic Stripers
No.
Part No.
Description
A.
27SC 3 OUNCE GRAVITY CUP ASSEMBLY:
1. UB-255
Cover
2. 4-G
Gasket
3. 27SCC
3 Ounce Cup
B. USG SWIVEL STRIPING GUIDE:
1. U-509
Spring Washer
2. UB-506
Guide Support
3. U-507
Guide
4. UH-298
Screw
5. UH-297A
Body
C. U-508 LOCKNUT—To be used with:
1.
SNH
Special—Needle Type Nib †
2.
SNM-2
Special—Line Striper Nib †
3.
SNF-
Select From Sizes:
3/8-1/2-5/8-3/4-7/8
D. U-373 LOCKNUT—To be used with:
1.
SNF-
Select From Sizes:
1/32 up to 5/16 Call
Factory for Available Sizes.
2.
SNR-
Select From Sizes:
-1/64-1/32-1/16-3/32-1/8
-3/16-1/4
† C1 and C2—Specially Made Nibs.
Prices furnished upon request.
Manual Striping Hook-Up
INSTRUCTIONS:
Make sure all Air and Fluid hoses are blown out to insure clean
air and fluid.
1. Attach Air line supply to Air Inlet on Moisture Condenser.
2. Attach Air Hose to Valve on line pressure Gauge and to
Tank Air Inlet Valve.
3. Attach Fluid Hose to Fluid Outlet Valve on Tank and to
Fluid Inlet Connection #4 on Manual Striping Gun.
Automatic Striping Hook-Up
INSTRUCTIONS:
Blow out all the hoses to remove foreign particles. Make Air and
Fluid connections as shown Tighten fittings securely. Strain
material before placing in tank.
1. Air Compressor must have sufficient capacity for
application.
2. Air Regulator; adjust pressure required to operate Striping
Gun, not to exceed 45 P.S.I. air and fluid pressure.
3. Explosion-proof Solenoid Valve with air dump feature,
mount as close to Gun as possible for fast on-off action.
4. Pressure Tank; adjust Regulator on Tank Unit to minimum
pressure required to deliver fluid to Striping Gun #5.