On hand, Pre-hung door assembly installation, Split jamb – ODL ON HAND In-Door Storage and Communication System User Manual
Page 6
6
DIRECTIONS
3
3
ON HAND
™
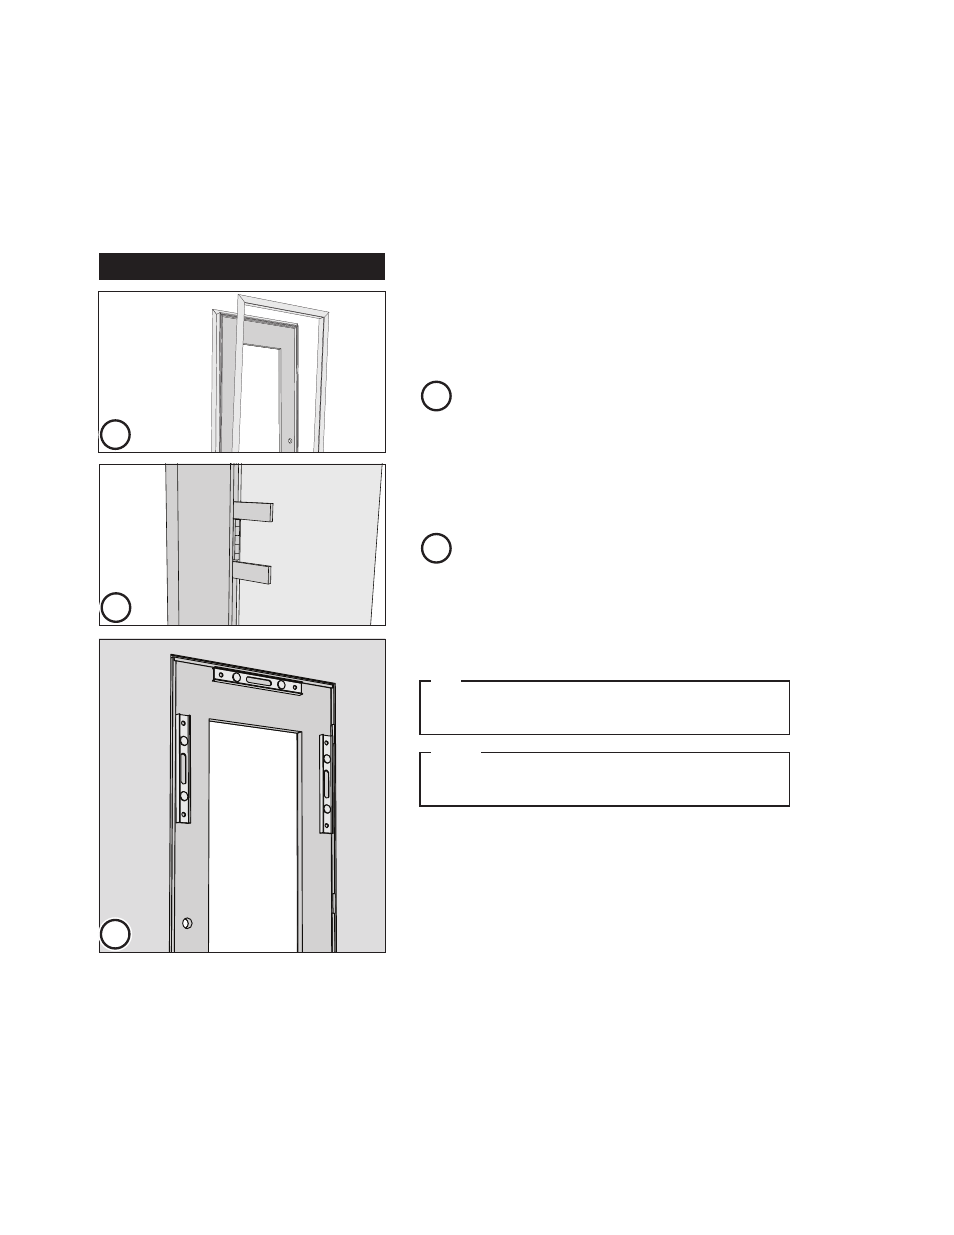
Pre-hung Door Assembly Installation
Split Jamb
Check the floor for level by laying the level on the
floor from the hinge side to the strike side of the
opening. If the floor is out of level raise the jamb on
the low side with a shim until its level with the height
of the jamb on the high side of the opening.
Cut off the bottom of door jamb if the bottom
gap to the floor needs to be adjusted: Remove all
packaging, nails or staples that hold the door closed
and any staples that hold the two sides together.
Separate the two sides of the split jamb. Remove the
middle screw from each hinge location.
Rough Opening and Door Preparation - Cont.
Position the door side of the split jamb unit into the
opening and level the hinge side of the jamb unit.
Starting at the top, shim the hinge jamb near each
hinge location and temporarily secure the hinge
jamb into the opening using #10 finishing nails. Nail
through the jamb and shims on the door side of the
stop at each shim position. DO NOT set the nails at
this time. Recheck for plumb and square.
Making sure the jamb head is level, square the strike
side of the jamb to the jamb head. Temporarily fasten
the strike side in the same manner as the hinge side
putting shims at the top, middle and bottom of the
jamb.
Shim in the middle of the jamb head and temporarily
fasten in the same manner.
3
Roughing in the Door and Door Jamb Side
A 2nd person is required to hold the door during this
step.
NOTE
2
2
Be careful not to nail through the cavity to the other side
of the split jamb.
TIP