Use & care – ODL ON HAND In-Door Storage and Communication System User Manual
Page 14
14
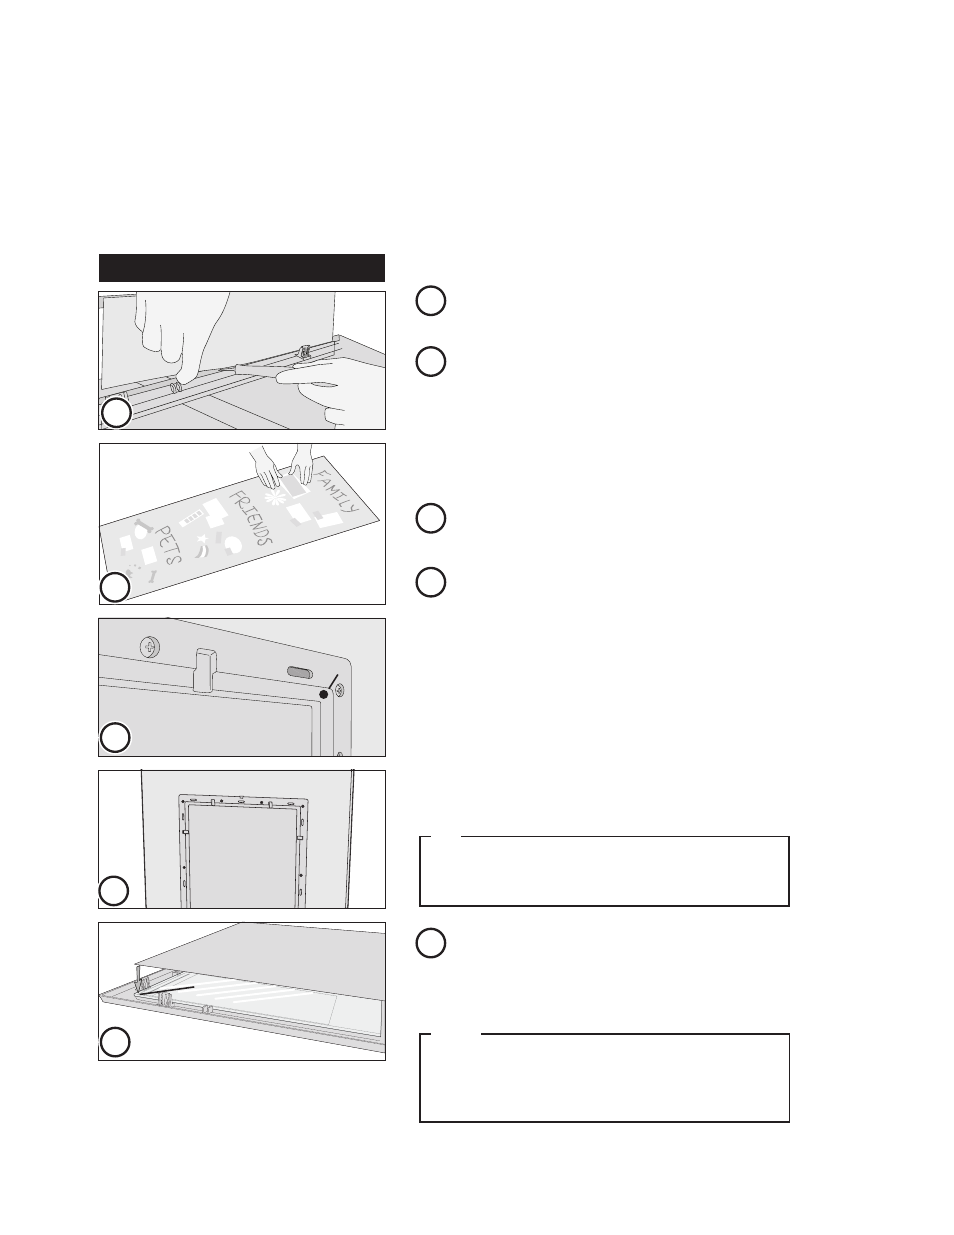
Remove the glass marker board activity panel.
See Changing the activity panel instructions on
page 13.
1
Remove deco board. Lay the activity panel, glass
down on a flat surface. Gently lift one end of the
deco board away from the glass and cut tape free
of the frame using a sharp edge. A utility knife is
recommended though scissors can also be used.
Cut as close to the edge of the deco board as
possible. Cut all pieces of tape before attempting
to remove deco board from glass.
2
ACTIVITY PANEL
We recommend using non-permanent adhesives on
backer to allow future changes without damaging the
deco board. Go to www.odl.com to find information
on replacement deco board.
NOTE
Use & Care
Personalizing the deco board on the glass marker board activity panel
The deco board behind the glass marker board can be removed and painted or personalized
with photos, stickers, scrapbooking elements, and more.
Personalize either side of deco board, as desired.
For decorating ideas visit www.odl.com.
3
Reinstall glass marker board activity panel as shown
on page 13.
Glue Dots
®
are a registered trademark of Glue Dots International,
New Berlin, WI.
5
Reinstall deco board using one of the methods
below.
Method A: Add small amount of poster putty or
removable Glue Dots
®
to each corner around frame
of inner frame as shown. Place deco board,
personalized side facing out, in frame and press
in place. Use more Glue Dots
®
as needed.
Method B: Lay glass marker board face down. Add
small amount of poster putty or removeable Glue
Dots
®
to each corner of glass. Line up deco board
with glass and press in place with personalized side
facing down. Or hold backer in place by taping along
edges.
4
Glue Dot
®
You may find Method A makes it easier to reinstall the
glass marker board, because you can see the clips as you
align them with the slots in the inner frame.
TIP
2
3
4A
4A
4B
Glue Dot
®