Disassembly, Assembly – Mr. Gasket P1820 Professional Vacuum Pump User Manual
Page 2
MR. GASKET
MR. GASKET PERFORMANCE GROUP
10601 MEMPHIS AVE #12, CLEVELAND, OH 44144
216.688.8300
FAX 216.688.8306
FORM 97140820
06/05
Made in U.S.A.
Printed in U.S.A.
2
www.mrgasket.com
Disassembly
1. First remove the pulley and key from the pump drive shaft.
2. Remove both fittings from the top of the pump, paying attention to the o-ring seals at the base of each fitting.
*Note, a short boss o-ring fitting must be installed; long fittings will collide with the vanes of the pump, locking it
up.
3. Remove all (8) allen head bolts from the front cover plate. Utilizing two of the eight bolts just removed, gently
screw them into the cover lifting holes and begin to gently tighten. This will lift the plate for internal inspection.
4. Carefully remove the rotor and vanes from the pump housing. You can use solvent or brake cleaner to clean all of
the components of the pump.
Inspect the 4 vanes, o-rings seal for the cap, rotor, and front and back bearings for wear.
Assembly
1. If all internal parts look good, then apply few drops of engine oil to the front and rear housing bearings and assem-
ble in reverse order.
2. Make sure that the flat surface of the vanes are closest to the rotor centerline, and that the rounded edges of the
vanes are pointing towards the housing.
3. Place the rotor and vanes into the housing making sure the rotor is engaged into the rear housing bearing.
4. Place the front cover and o-ring onto the shaft and align with the housing dowels.
5. Add a drop of oil to the (8) cap screws and begin to snug evenly until all of them are tight.
6. At this time, you can spin the rotor by hand to make sure everything is free and nothing is in a bind.
Install the pulley and the fittings making sure the o-ring is in good condition and will seal well with the pump housing.
*** Note every pump is run in and tested before it leaves our assembly department. ***
*** Caution, this pump, P1820, is designed and only recommended for short periods of use. This pump is a drag race
only version and is not recommended for extended operation such as street, oval or other duration events. ***
*** If the vane’s are chipped or damaged in any way, they should be replaced at this time. If they are sticking in the
rotor, they can be lightly sanded on a flat surface until free. ***
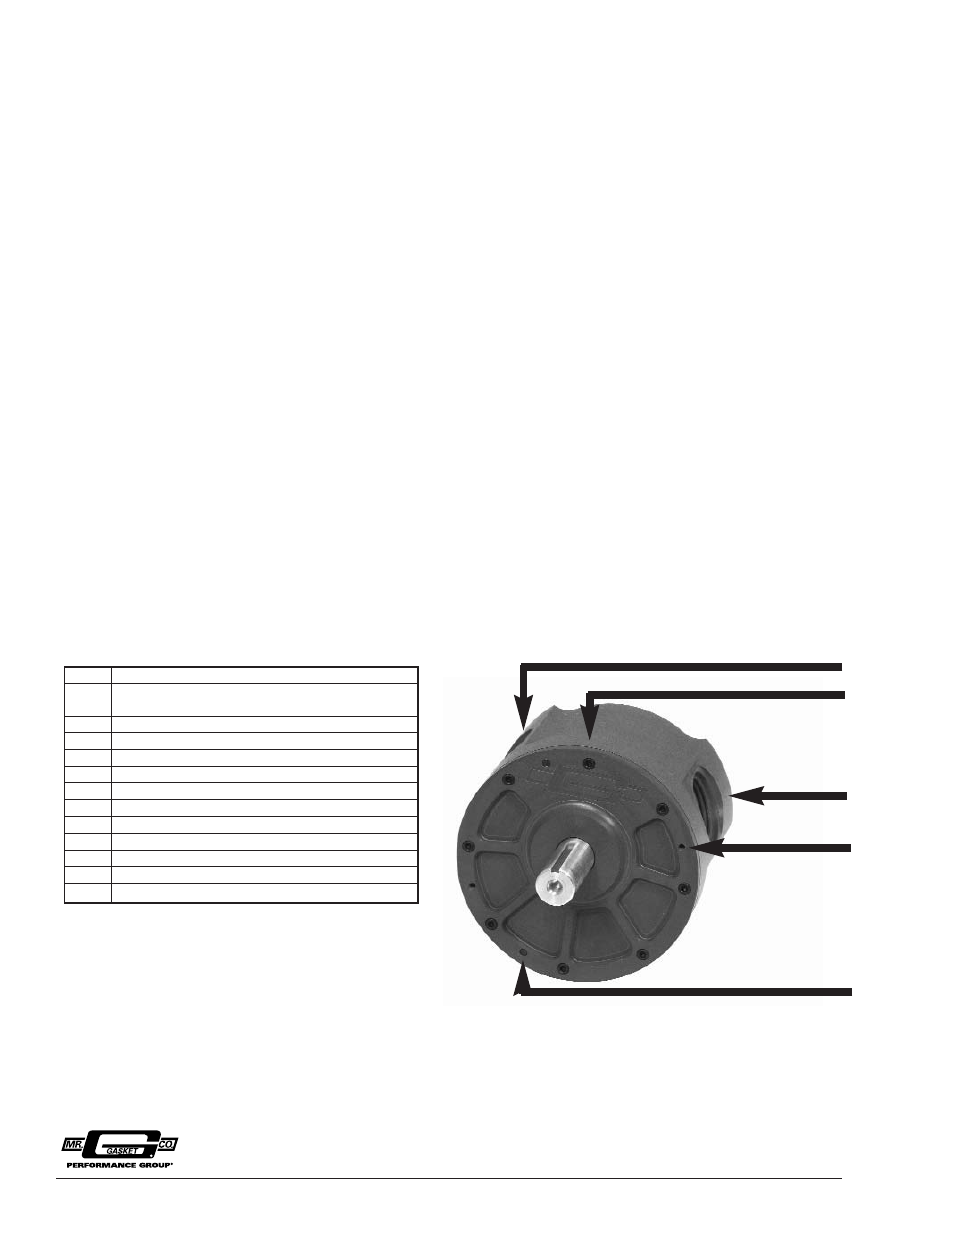
Inlet
Face Plate Lifting Holes
Allen Head Cover Bolts
Outlet
Face Plate Alignment Dowel
Part #
Vacuum Pump Accessories
P1850
Mini-Pro Mounting Bracket, SBC/BBC Low Block, or
Universal, or Motor Plate Mount
P1851
Mini-Pro Mounting Bracket, SBC Cylinder Head Mount
P1852
Mini-Pro Mounting Bracket, BBC Cylinder Head Mount
P1853
Mini-Pro Mounting Bracket, SBF Cylinder Head Mount
P7840
Mini-Pro Fittings, 12AN
P1862
SBC Vacuum Pump Drive Kit, 50%, 14 Toothx 28 tooth
P1863
BBC Vacuum Pump Drive Kit, 50%, 14 Toothx 28 Tooth
P1864
Pump Pulley, 5/8” Bore - 1/8” Key, 22 Tooth
P1865
Pump Pulley, 5/8” Bore - 1/8” Key, 24 Tooth
P1867
Pump Pulley, 5/8” Bore - 1/8” Key, 28 Tooth
P1868
Pump Pulley, 5/8” Bore - 1/8” Key, 30 Tooth
P1871
Crank Pulley, 14 Tooth