Warner Electric 5370-101-042 Conduit Box Kit User Manual
Page 3
3
Warner Electric • 800-825-9050
P-1408 • 819-0344
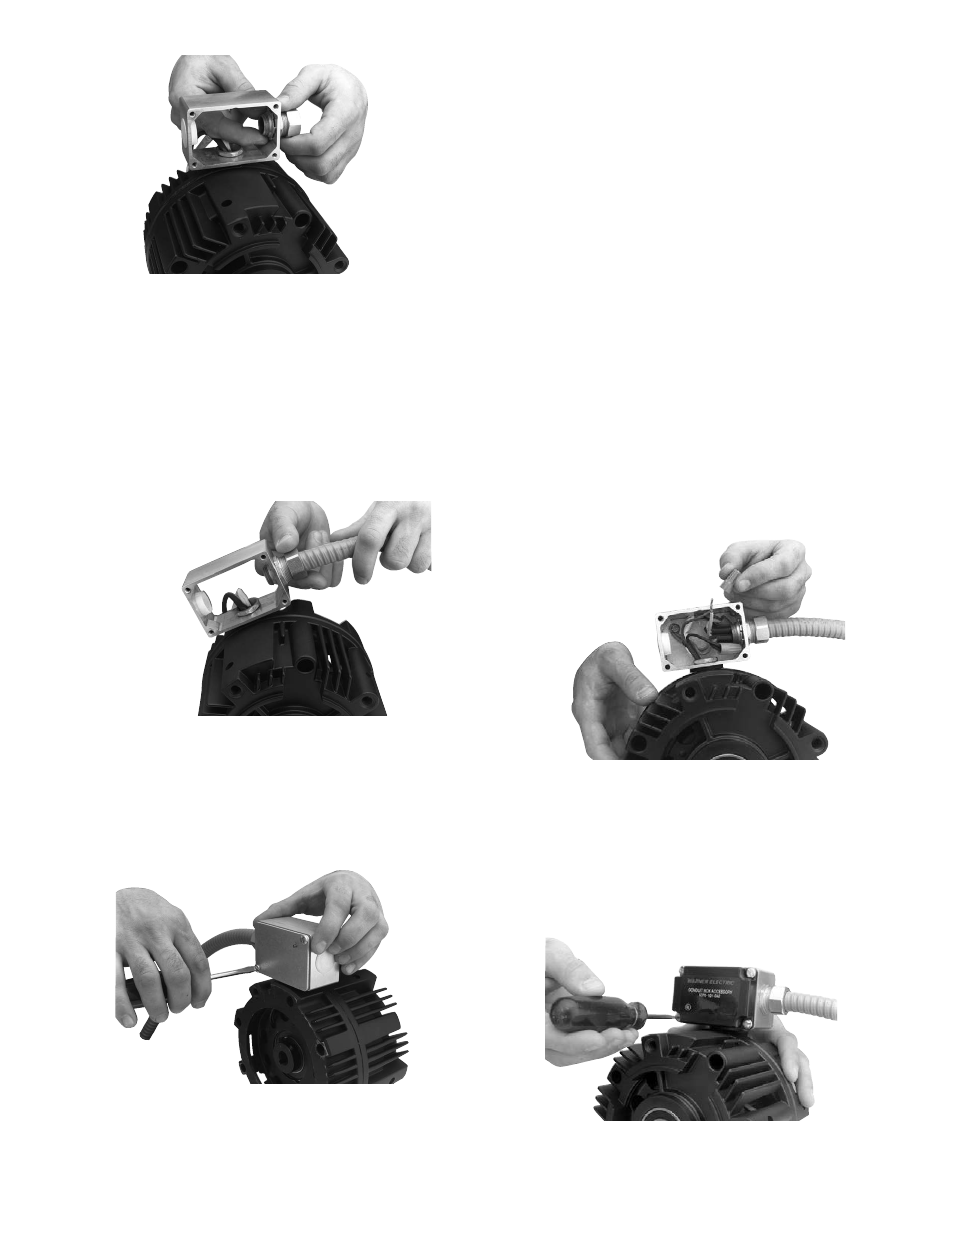
Figure 3
4. Connect electric supply cable or flexible conduit
to the fitting installed in the conduit box.
Rigid
conduit must not be connected directly to
the box as clutch/brake damage may
result. A minimum of 12 inches of flexible
cable or conduit is recommended.
(See Figure 4)
Figure 4
5. Connect back cover (3) to the conduit box with
two self tapping screws (4). (See Figure 5)
Figure 5
6. Electrical Connections
A. If external control is used, make wire
connections with wire nuts or appropriate
means in compliance with local electrical
codes. Use
green self tapping screw (5)
and wire washer (6) for grounding.
(See Figure 6)
Important – Provide only D.C. power to the
clutch/brake. A.C. voltage will not allow unit
to function properly and damage may result.
B. If CBC-150 control (not furnished) is used,
cut clutch/brake lead wires off to meet local
codes and make connections per CBC-150
installation instructions. Use green self
tapping screw (5) and wire washer (6) for
grounding. Mount control to box with four
self tapping screws (4).
Figure 6
7. If external control is used, install the black
plastic front cover (8) using the four self tapping
screws (4) furnished. (See Figure 7)
Figure 7