Vanguard Auto-Ohm 100_200 s2 User Manual
Page 26
AUTO-OHM 100/200 Series 2 Operating Procedures
26
Rev 3, 2009
b. Turn the control knob until the contrast is suitable. Press the control knob to set the contrast.
The display will return to the MAIN MENU. The contrast setting will be recalled each time the
Auto-Ohm is turned on and remain until it is changed again using this procedure.
6.8 Auto-Ohm Calibration Check
The purpose of the Calibration Check is to verify that the Auto-Ohm is operating within
acceptable specifications by running a functional check on the Auto-Ohm electronics.
To run a Calibration Check, turn the control knob to select the 100A CAL CHECK option from
the MAIN MENU (see Figure 37.0).
Figure 37.0 100A Cal Check
a. Press the control knob to begin the calibration check. The following display will appear.
Figure 38.0 Attach Short Bar Prompt
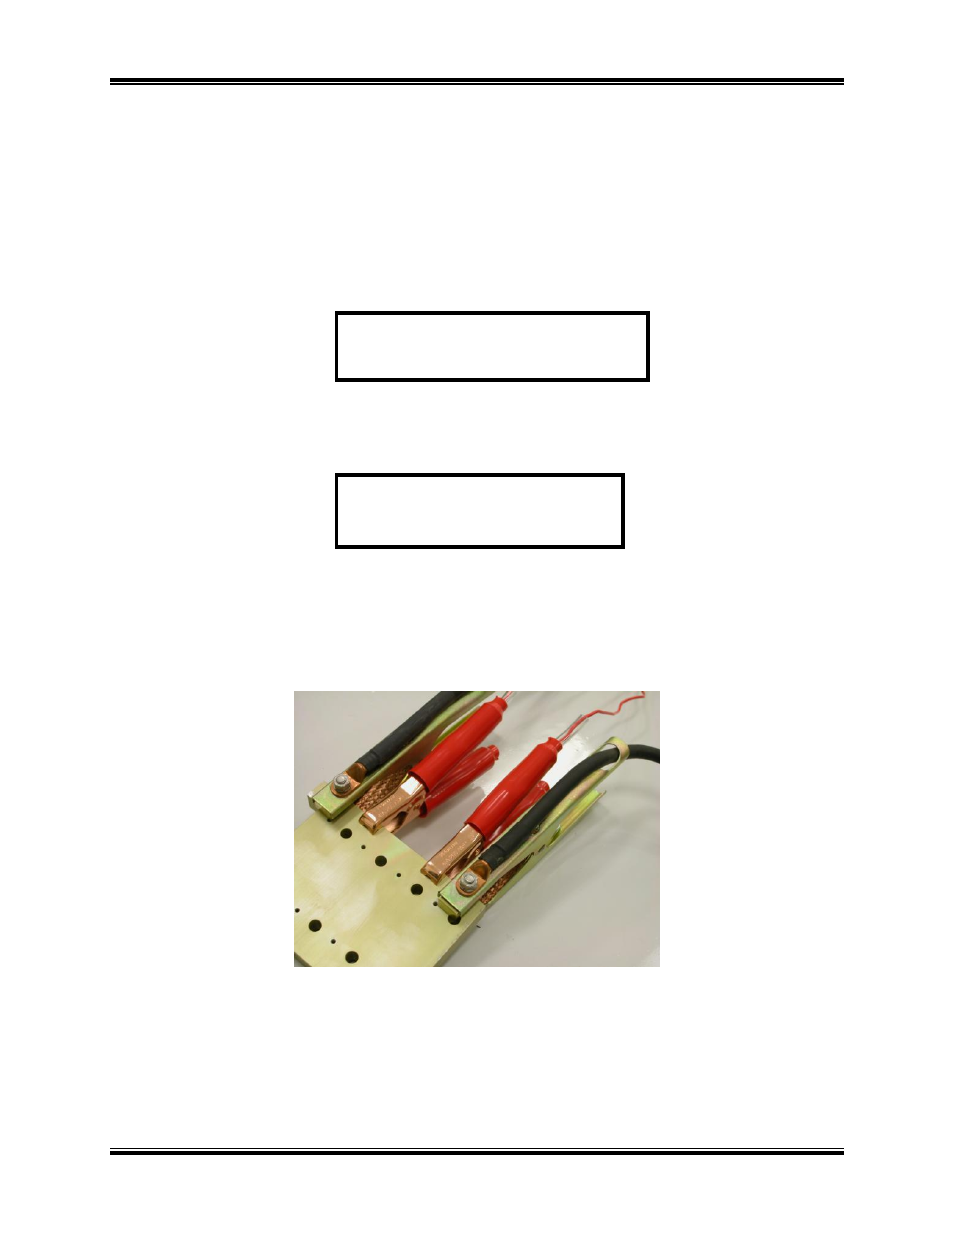
b. Attach the test leads to a piece of aluminum or copper bar (several inches apart, the spacing is
not critical, since this is a functional check). See Figure 39.0 and Figure 40.0 below for a
connection illustration. Press the control knob to start the test.
Figure 39.0 Calibration Connection (Separate Leads)
MAIN MENU
<100A CAL CHECK>
ATTACH SHORT BAR