Battery installation and charging – AT&T CL83201 User Manual
Page 13
Getting started
7
Battery installation and charging
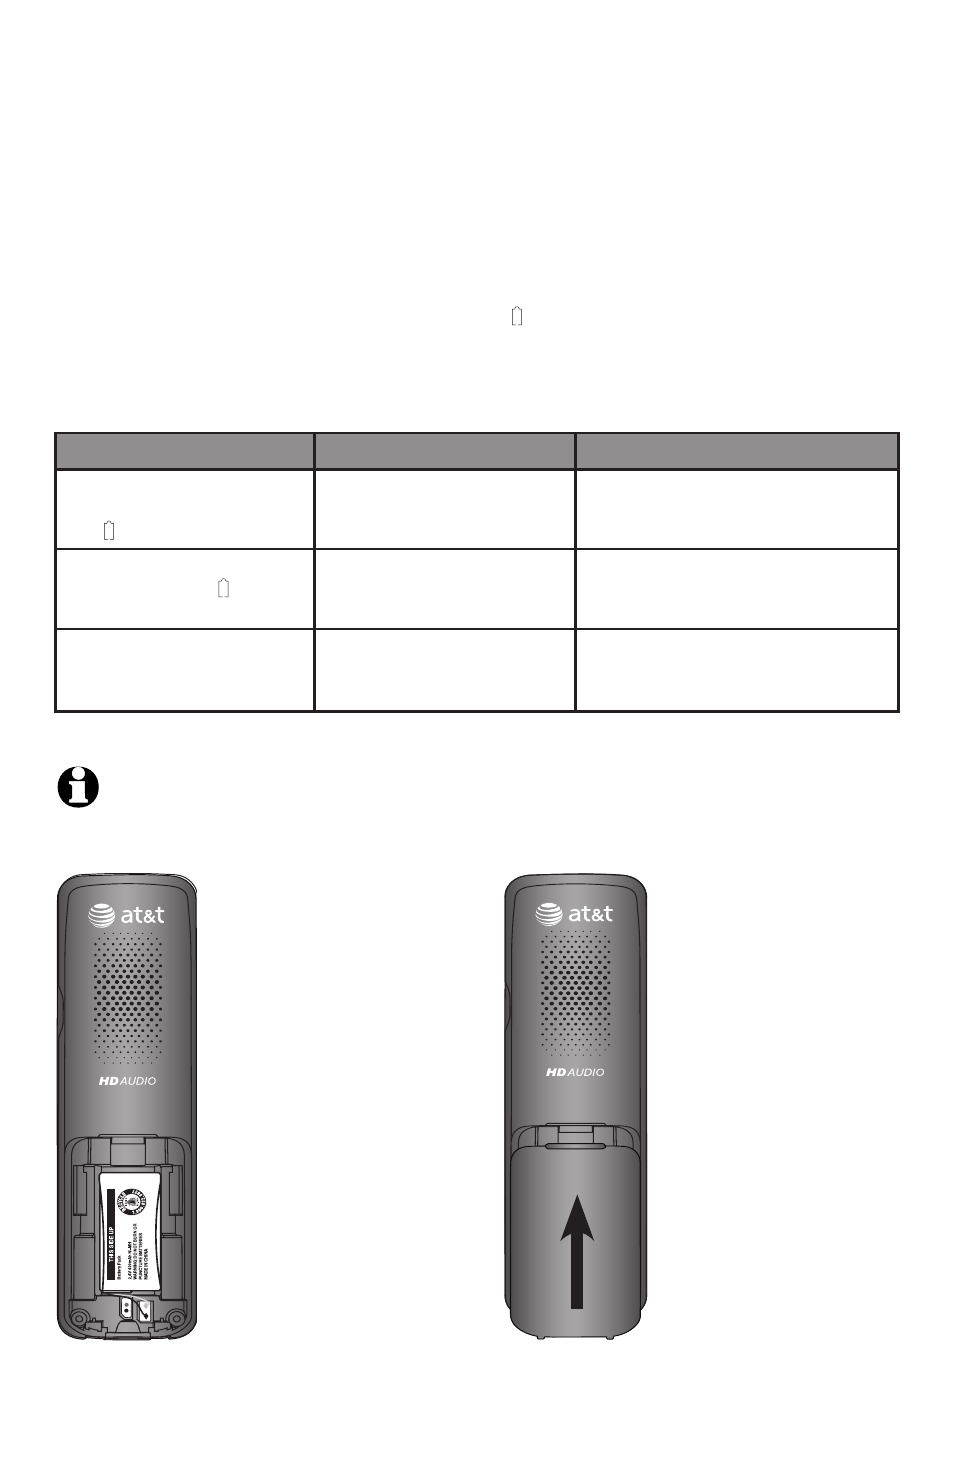
Install the battery as shown below.
Once you have installed the battery, the
screen indicates the battery status (see the table below). If necessary, place
the handset in the telephone base or charger to charge the battery. For best
performance, keep the handset in the telephone base or charger when not in
use. The battery is fully charged after 10 hours of continuous charging.
See
the table on page 110 for battery operating times.
If the screen shows
�lace in charger and flashes, you need to charge the
handset without interruption fo
r at least 30 minutes to give the handset
enough charge to use the telephone for a short time.
The following table
summarizes the battery charge indicators and actions to take.
Battery indicators
Battery status
Action
The screen is blank, or
shows
�lace in charger
and (flashing).
Battery has no or very
little charge. The handset
cannot be used.
Charge without interruption
(at least 30 minutes).
The screen shows
Low battery and
(flashing).
Battery has enough charge
to be used for a short time.
Charge without interruption
(at least 30 minutes).
The screen shows
HAND�ET X.
Battery is charged.
To keep the battery charged,
place it in the telephone base or
charger when not in use.
BY
1021
BT183342/BT283342
�tep 1
Plug the battery
connector securely
into the socket inside
the handset battery
compartment, matching
the color-coded label.
Insert the supplied
battery with the label
THI� �IDE U� facing up
as indicated.
�tep 2
Align the cover flat
against the battery
compartment, then
slide it upwards until
it clicks into place.
NOTE: If you are on a phone call in low battery mode, you hear four short beeps
every minute.