Harrington Hoists and Cranes ED-DA Hoist - (ED3) User Manual
Page 33
33
4)
Remove all chain components including the Bottom Hook Set Assembly, Stoppers, Cushion Rubbers,
Washers and Chain Pin from the chain for reuse on new chain. Inspect and replace any damaged or
worn parts.
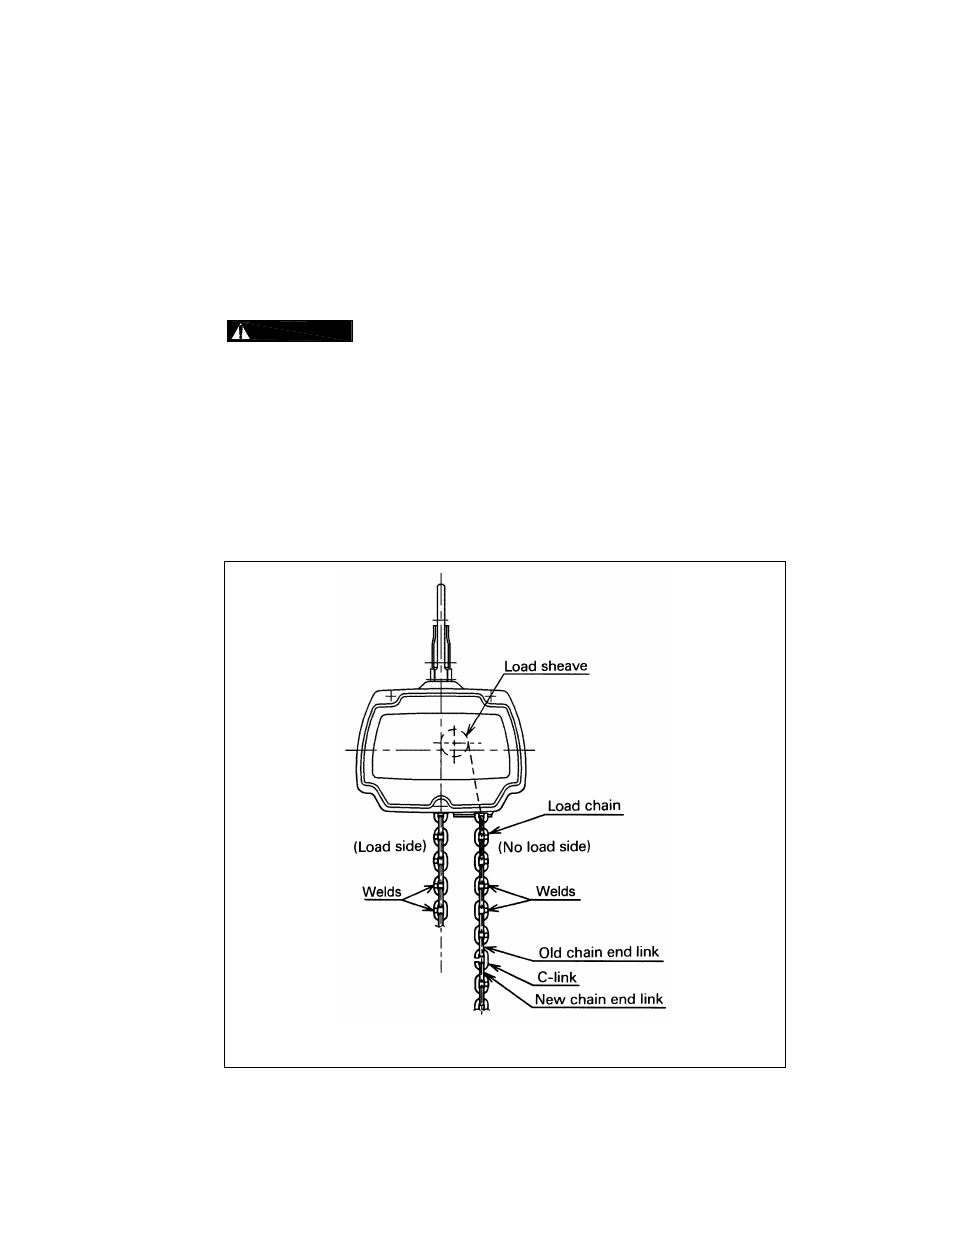
5)
Using a C-link, attach the new chain to the end link of the old chain on the no-load side. The end link of
the new Load Chain should be connected so that the welded portions of the Load Chain's standing
links are oriented to the outside as they pass over the sheave. Refer to Figure 6-1.
6)
Operate the hoist down to move the chain though the hoist body. Stop when a sufficient amount of
new chain is accumulated on the load side.
7)
Attach the chain components (step 4 above) to the chain. Refer to Section 3.2 for the proper locations.
8)
Make sure Stoppers, Cushion Rubbers, Washers and Split Pins are properly
installed.
9)
After installation has been completed, perform steps outlined in Section 3.8 "Pre-operational Checks
and Trial Operation".
6.3
Mechanical Load Brake with Friction Clutch
6.3.1
Mechanical Load Brake with Friction Clutch – If abnormal operation or slippage occurs do NOT attempt
to disassemble or adjust the Mechanical Load Brake with Friction Clutch. Replace the worn or
malfunctioning Mechanical Load Brake with Friction Clutch as an assembly with a new, factory
adjusted part.
Figure 6-1 Chain Replacement