Harrington Hoists and Cranes ED-DA Hoist - (ED3) User Manual
Page 15
15
3.4
Chain Container
3.4.1
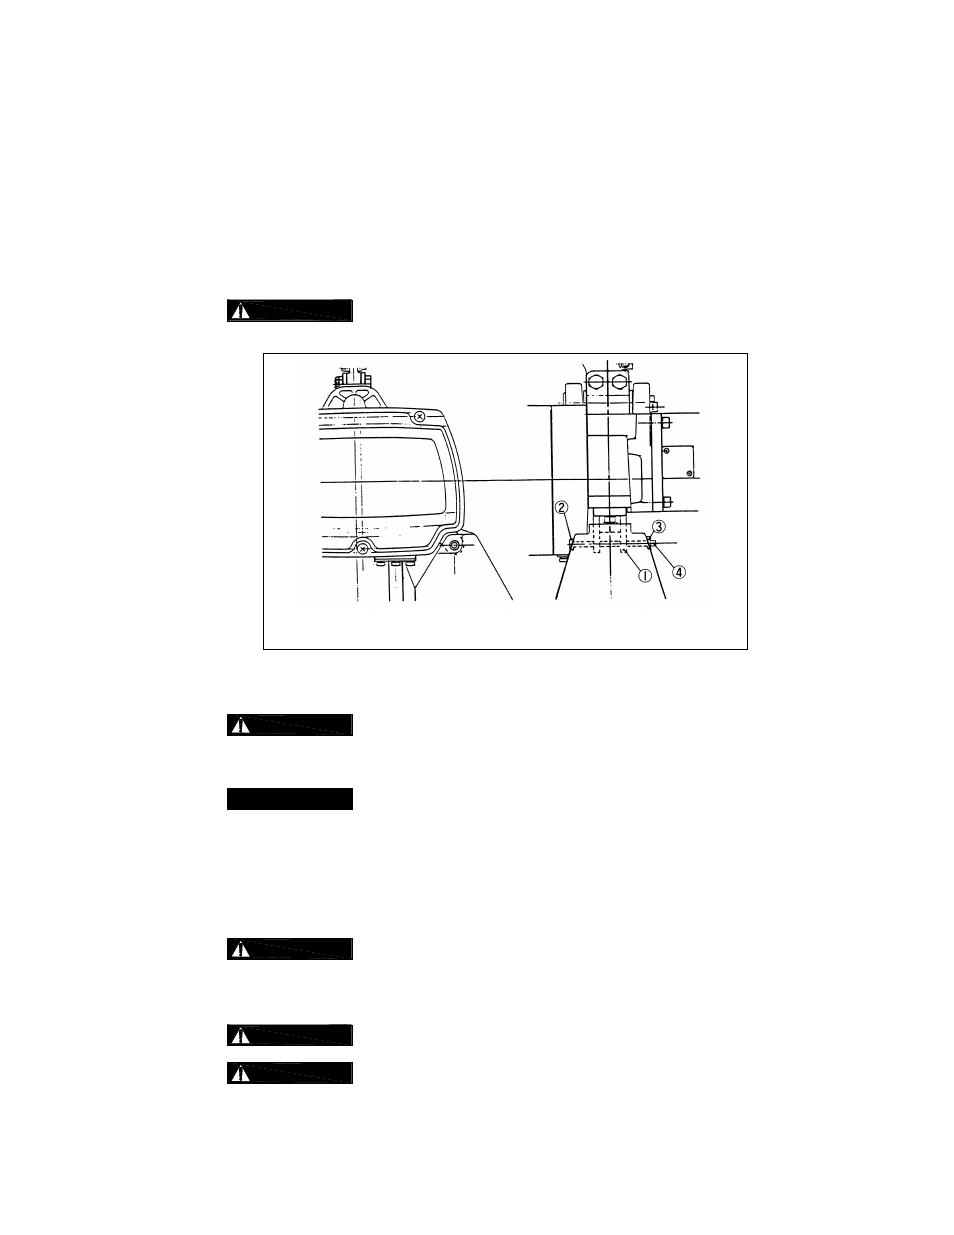
Follow the instructions below to install the Chain Container. Refer to Figure 3-3.
1) Feed the Load Chain into the Chain Container beginning with the no-load end. Take care to avoid
twisting or tangling the Load Chain.
2) Attach the Chain Container to the Chain Guide (1) with the Socket Bolt (2) and the U-Nut (3).
3) Attach the Split Pin (4) to prevent the U-Nut (3) from backing off.
4) Bend the Split Pin ends 90
o
or more.
5)
Do not use the Chain Container if any parts are damaged or if any
fasteners/hardware are missing.
Figure 3-3
Chain Container Installation
3.5
Mounting Location
3.5.1
Prior to mounting the hoist ensure that the suspension and the supporting
structure are adequate to support the hoist and its loads. If necessary consult a professional that is
qualified to evaluate the adequacy of the suspension location and its supporting structure.
3.5.2
See Section 6.6 for outdoor installation considerations
3.6
Mounting the Hoist
3.6.1
ET525 Mini Trolley – Refer to Section 3.8 for installation instructions
3.6.2
Manual Trolley - Follow instructions in Owner's Manual provided with the trolley.
3.6.3
Hook Mounted to a Fixed Location - Attach the hoist’s top hook to the fixed suspension point.
3.6.4
Ensure that the fixed suspension point rests on the center of the hook’s saddle and
the hook’s latch is engaged.
3.7
Electrical Connections
3.7.1
Ensure that the voltage of the electric power supply is proper for the hoist or trolley.
3.7.2
Before proceeding, ensure that the electrical supply for the hoist or trolley has
been de-energized (disconnected). Lock out and tag out in accordance with ANSI Z244.1 “Personnel
Protection -Lockout/Tagout of Energy Sources”.