Quick start guide for tempo trio (windows version), Drive formatting—windows xp – Sonnet Technologies Tempo Trio PCI Adapter Combo Card (Windows) User Manual
Page 14
Quick Start Guide for Tempo Trio (Windows Version)
14
Drive Formatting—Windows XP
Formatting prepares a hard drive for use by dividing the data area into tracks and
sectors, enabling your computer to store and retrieve data from the drive. This
section describes the process of formatting hard drives connected to the Tempo
Trio, using the Disk Management Administrative Tool on systems running
Windows XP. The following instructions detail the procedure to create a simple
volume (single partition); if you need to format a drive with multiple partitions,
refer to Windows Help for details. As an alternative, you may choose to format
and partition your hard drive(s) with any software that was included with the
drive, following the included instructions.
1. Turn on your computer and start Windows.
2. From the taskbar, click on Start > Control Panel.
3. In the Control Panel window, click Performance and Maintenance.
4. In the Performance and Maintenance window, click Administrative Tools.
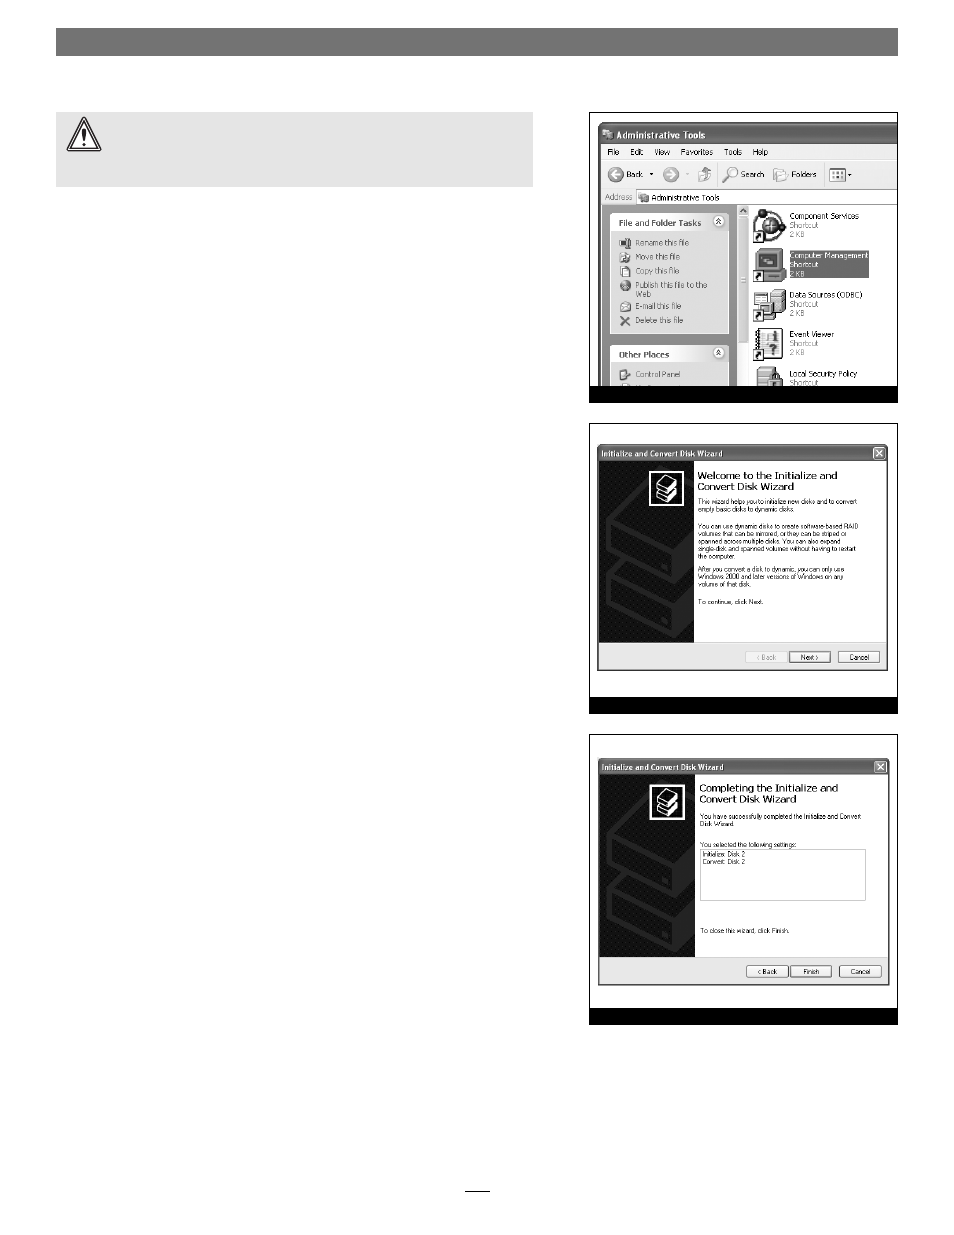
5. In the Administrative Tools window, double-click the Computer Management
shortcut (Figure 17).
6. In the left pane of the Computer Management window, double-click Disk
Management; the Initialize and Convert Disk Wizard will appear (Figure 18).
Click Next to continue.
7. In the Select Disks to Initialize window, select the new disk (which should be
your only option), and then click Next to continue.
8. In the Select Disks to Convert window, select the new disk again (which should
be your only option), and then click Next to continue.
9. When the next window appears (indicating the Initialize and Convert Disk
Wizard completed successfully), click Finish to close the window (Figure 19).
WARNING:
Until they have been formatted, hard drives attached to the
Tempo Trio will not appear under My Computer, and can’t be used; this
also applies to drives with data on them, previously used in other computers.
Please be aware that formatting a drive erases any data present.
Figure 17
Figure 18
Figure 19