Ronan X11CA Hardware Manual User Manual
Page 22
Rev 1.0 Series X11CA Hardware Manual
2. X11CA Hardware Setup
Hardware Control-© 2002 Ronan Engineering
18
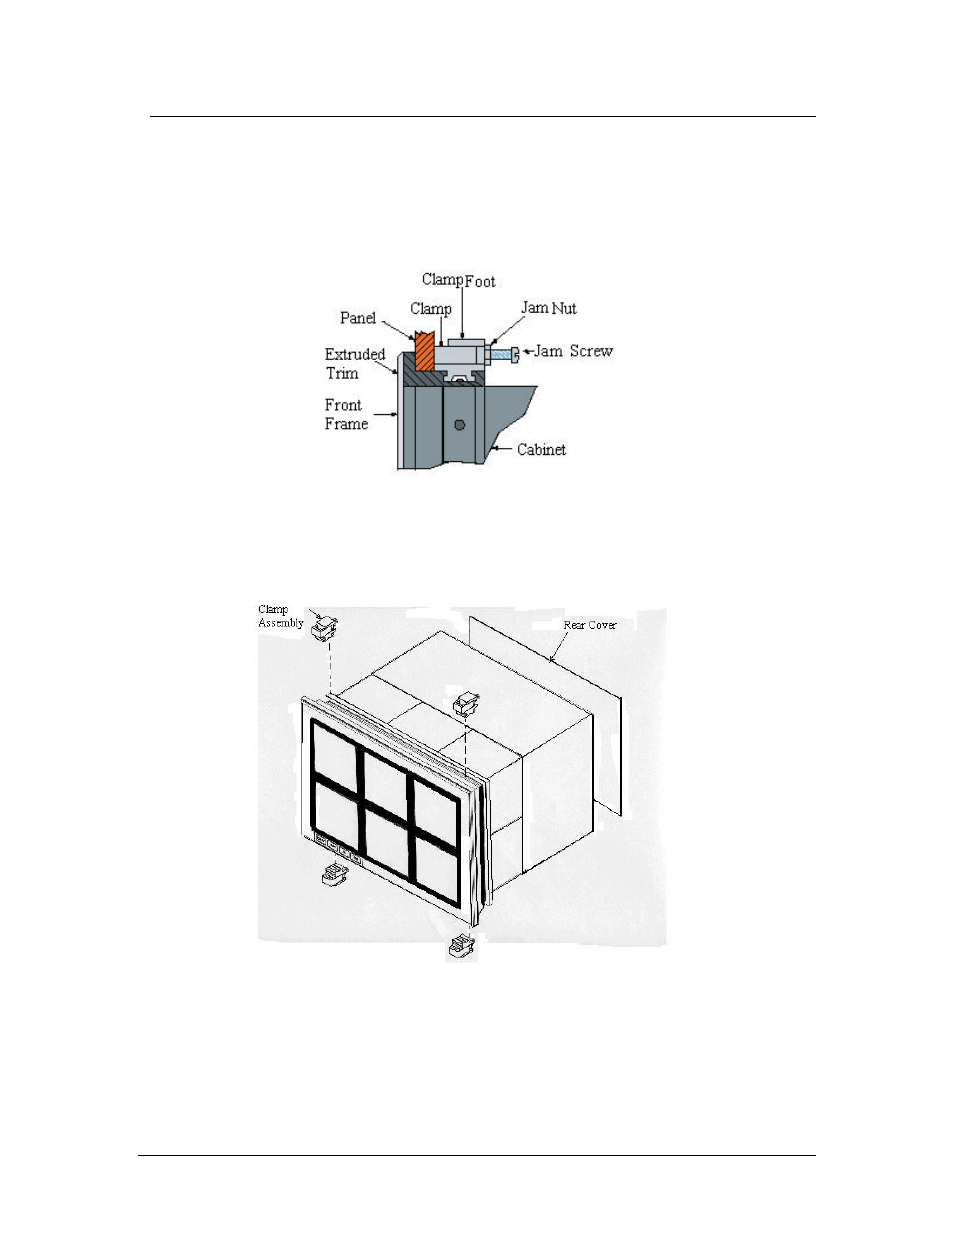
Place the second clamp into the center of the groove behind the extruded
trim of the cabinet and then slide it into about one third from the top right
corner of the cabinet. Tighten each jam screw to secure the cabinet to the
panel cutout. Tighten the lock nuts on each screw.
Figure 2-16 Detail A
4. Repeat step three for installing the bottom two clamps.
5. Refer to the wiring diagrams on the CD for wiring instructions.
See also other documents in the category Ronan Equipment:
- X16PDM (53 pages)
- X120 (35 pages)
- X11SN (23 pages)
- X11CB (2 pages)
- X11CA (20 pages)
- X11CA Software Manual (65 pages)
- X500F (60 pages)
- X71 (8 pages)
- X57 (8 pages)
- X55-600 Series (24 pages)
- X54-3412 (2 pages)
- X54-3402 (2 pages)
- X54-3302 (2 pages)
- X54-3224 (2 pages)
- X54-3212 (2 pages)
- X54-3202 (2 pages)
- X76CTM (38 pages)
- 7100M (2 pages)
- XSD-1000 (81 pages)
- X90 Series (20 pages)
- X96S WEIGH SCALE (68 pages)
- X96S MOLD LEVEL GAGE (61 pages)
- X96S LEVEL GAGE (56 pages)
- X96S MASS FLOW GAUGE (77 pages)
- X96S DENSITY GAGE (67 pages)
- Interface System (5 pages)
- Ion Chamber Detector (2 pages)
- Rigid Scintillation Detector (3 pages)
- Scintillation FlexDetector (3 pages)
- LS-S (2 pages)
- SA-4 (2 pages)
- GS-200 (2 pages)
- GS-400 (2 pages)
- SA-1 (2 pages)
- RLL-1_1A (2 pages)