Mma-303 direct/indirect charge - maintenance – Ransburg MMA-303 Direct_Ind Charge Atomizer A12870 User Manual
Page 89
MMA-303 Direct/Indirect Charge - Maintenance
LN-9269-11.3
86
Replacement
Lubricate the seat O-ring using a suitable lub-
ricant. By hand, using the seat tool (A10756-
00), carefully start the seat into the pocket for
the seat.
Carefully start the seat into the pocket. It may
be easily cross threaded.
Hand tighten the seat in place. Using a
torque wrench with a /8” (10mm) socket,
torque the valve seats to 15-20 lbs•in (1.7-2.3
Nm).
Valve Seat Torque
•
Always use a torque wrench to torque the
seats in place. Over-torqueing the seats
may cause permanent irreparable damage
to the rear manifold.
N O T E
!
C A U T I O N
Lubricate the valve O-rings with a suitable O-
ring lubricant. By hand, start the threads
clockwise of the valve into the pocket. Tight-
en using a 1/2” (13mm) socket and torque to
15-20 lbs•in (1.7-2.3 Nm) after valve is down.
Valve Torque
Valve and Seat Removal (Turbine Manifold
Assembly) (“Valve Extraction” Figures)
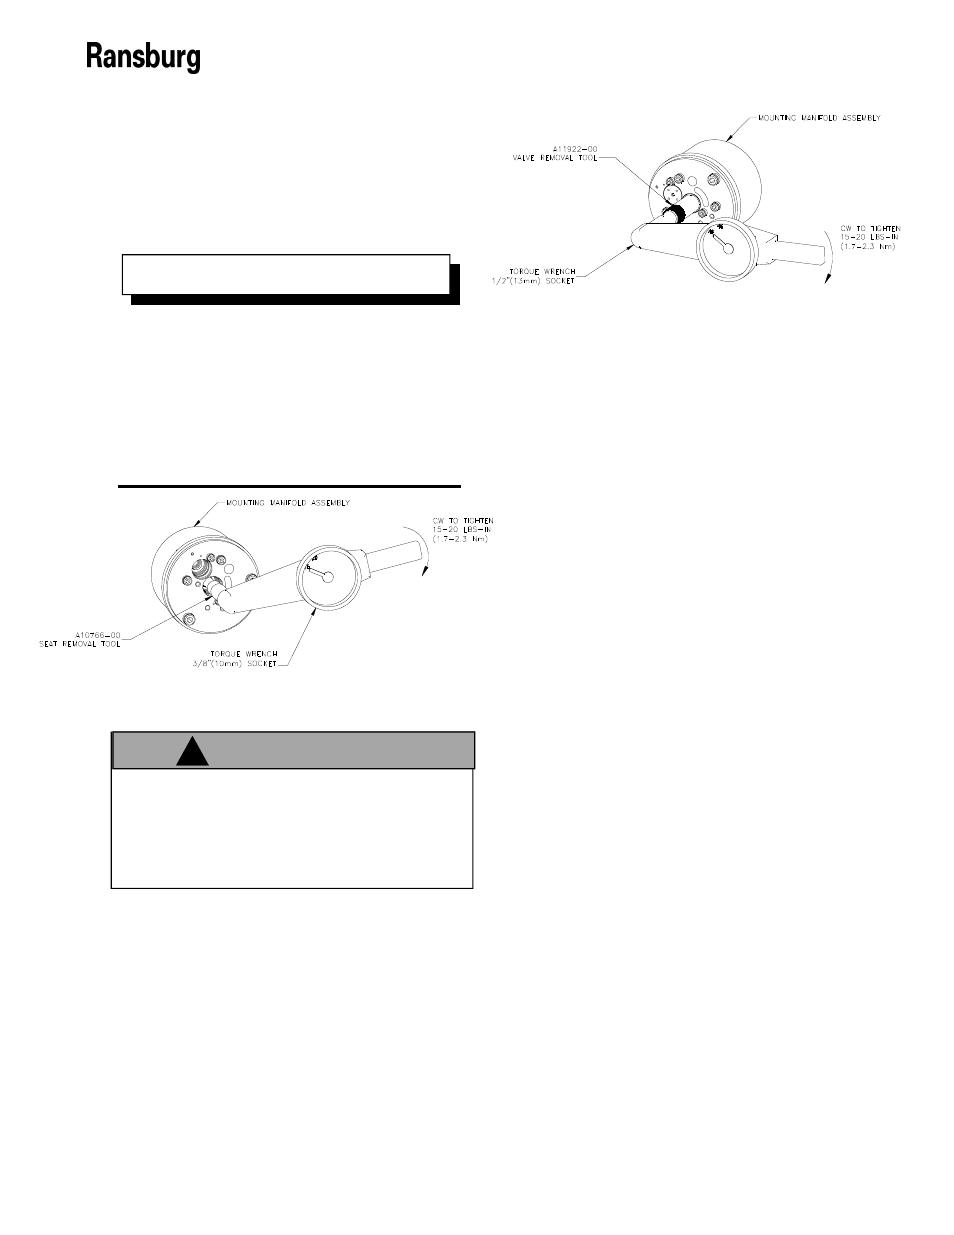
Removal
Using the valve removal tool (A11922-00), en-
gage the four (4) pins on the tool to the corre-
sponding four (4) hole pattern in the top of the
valve. Tighten knurled thumb screw and tool
to engage 1-2 threads on the valve cap. This
will aid in pulling the valve from its bore once it
is loose.
Using a 1/2” (13mm) socket, remove the valve
by turning clockwise until fully unthreaded.
Pull the valve assembly from the pocket. Pull
valve straight out.
Using seat removal tool (A10766-00), insert
the small hex end into the valve cavity to en-
gage the seat hex. Using a 3/8” (10mm) sock-
et, remove the seat by turning counter-
clockwise.
Replacement
Clean seat and valve pocket thoroughly. Lu-
bricate valve pocket, O-rings on seat, and
valve assemblies with A11545-00 lubricant.
Carefully start the seat assembly into the valve
pocket. Hand tighten in place. Using a torque
wrench with a 3/8” (10mm) socket, torque the
valve seat to 15-20 lbs•in (1.73-2.3 Nm). Next
place the valve onto the four (4) prongs of the
valve removal tool and insert into the valve
pocket. Tighten by hand as far as possible.