Kasco Marine VFX Series User Manual
Page 9
9
VFX Installation Instructions
Before installing 3 phase units (2.3, 5.3) into the pond,
please refer to 3 phase startup procedure.
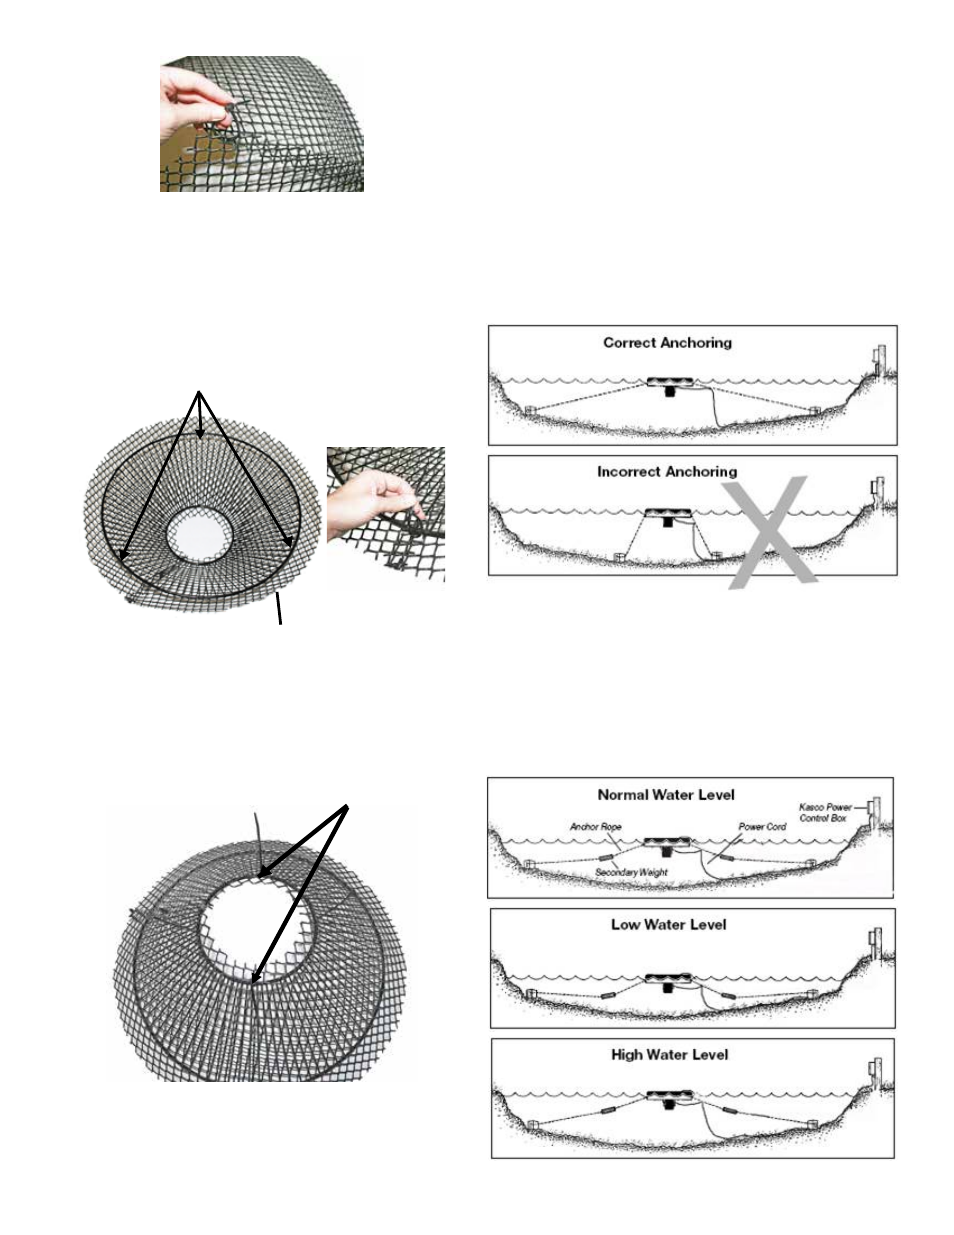
Use the ropes to position the aerator in the desired
location in the pond/lake. Anchor the ropes or secure
them to the shoreline so the ropes are free of slack, but
not tight. To prevent twisting of the unit due to torque,
you should place the anchor at least 3 feet from the
float for each foot of depth (Ex. A 6 foot deep pond
would require an anchor 18 feet horizontally from the
float.)
ALTERNATE INSTALLATION
In ponds where the water level fluctuates significantly,
you may need to suspend a small weight (12” of 1”
galvanize pipe works well) at the mid-point of the
rope to take up any slack as the water level drops. The
weight should be light enough so the aerator can rise
as the water level rises. This can also help hide ropes
by sinking them further below the surface.
2. Insert existing stainless steel screen centered inside
mesh cone with approximately 2 inches of mesh
overlap to the top ring of the screen. Attach mesh
to the top ring of the screen in (3) equally spaced
locations using cable ties.
Attach 3 cable ties
to top ring equally spaced
2 inch overlap
3. Flip mesh and screen assembly over and use
remaining cable ties to secure mesh to small bottom
diameter of the stainless steel ring.
Attach 2 cable ties
to bottom ring equally spaced
4. Clip off excess cable tie material once mesh is
secured into place. Go back to assembly instructions
to continue with connecting the bottom screen to the
float.