Hauler Racks V11SGV-1 User Manual
Page 8
HAULER RACKS, INC.
Toll Free: 1-800-843-5445
7109 31
st
Avenue North Phone: 763-546-5620
Minneapolis, MN 55427-2848 Fax: 763-546-0933
Page 8 of 9 WWW.HAULERRACKS.COM
7. Mounting to Van
Place the rack on the van (an assistant is highly recommended) and position to the desired location.
Adjust the G-mounts to the desired width and tighten the G-mount assembly to the crossbar hardware.
Recheck rack position and adjust if needed.
Note: Measure the side to side distances to make sure the rack is centered along the roof and not skewed.)
Using the G-mounts holes for a pattern; mark the holes onto the van roof. Move the rack aside.
Drill 5/16” holes through the van roof.
Reposition rack over the mounting holes.
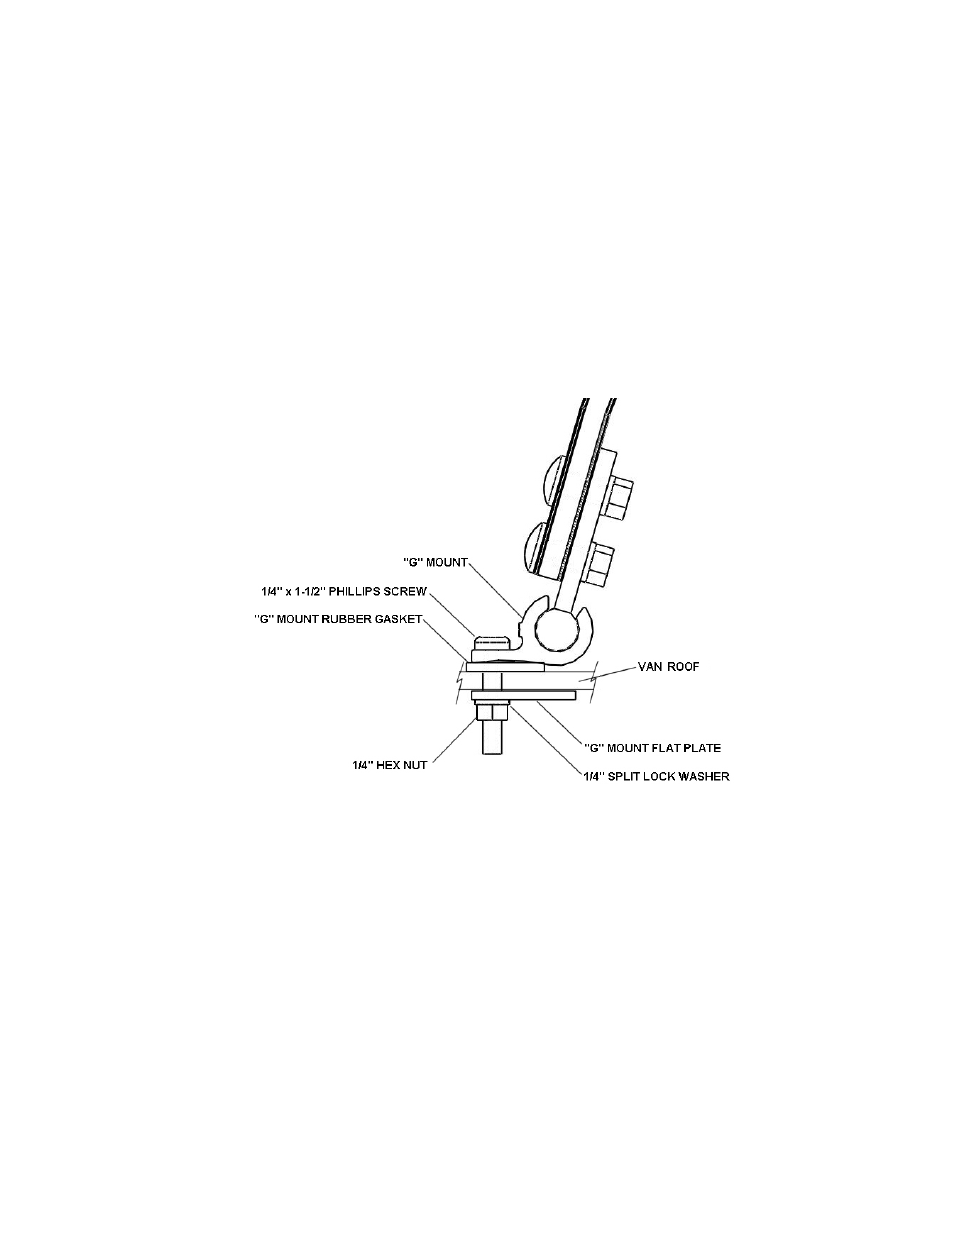
The rubber gasket goes between the G-mount and van roof and G-mount flat plate is used in the interior.
To prevent any leaks, seal with water proof silicone (optional, not included).
Secure the G-mount assembly to the roof with (3) ¼”-1-1/2” Phillips screws, (3) ¼” split lock washers and (3)¼” nuts. Tighten all
screws. Repeat for remaining G-mount assemblies.
8. Tighten all nuts, screws and bolts after installation.