Hauler Racks V11SGV-1 User Manual
Page 3
HAULER RACKS, INC.
Toll Free: 1-800-843-5445
7109 31
st
Avenue North Phone: 763-546-5620
Minneapolis, MN 55427-2848 Fax: 763-546-0933
Page 3 of 9 WWW.HAULERRACKS.COM
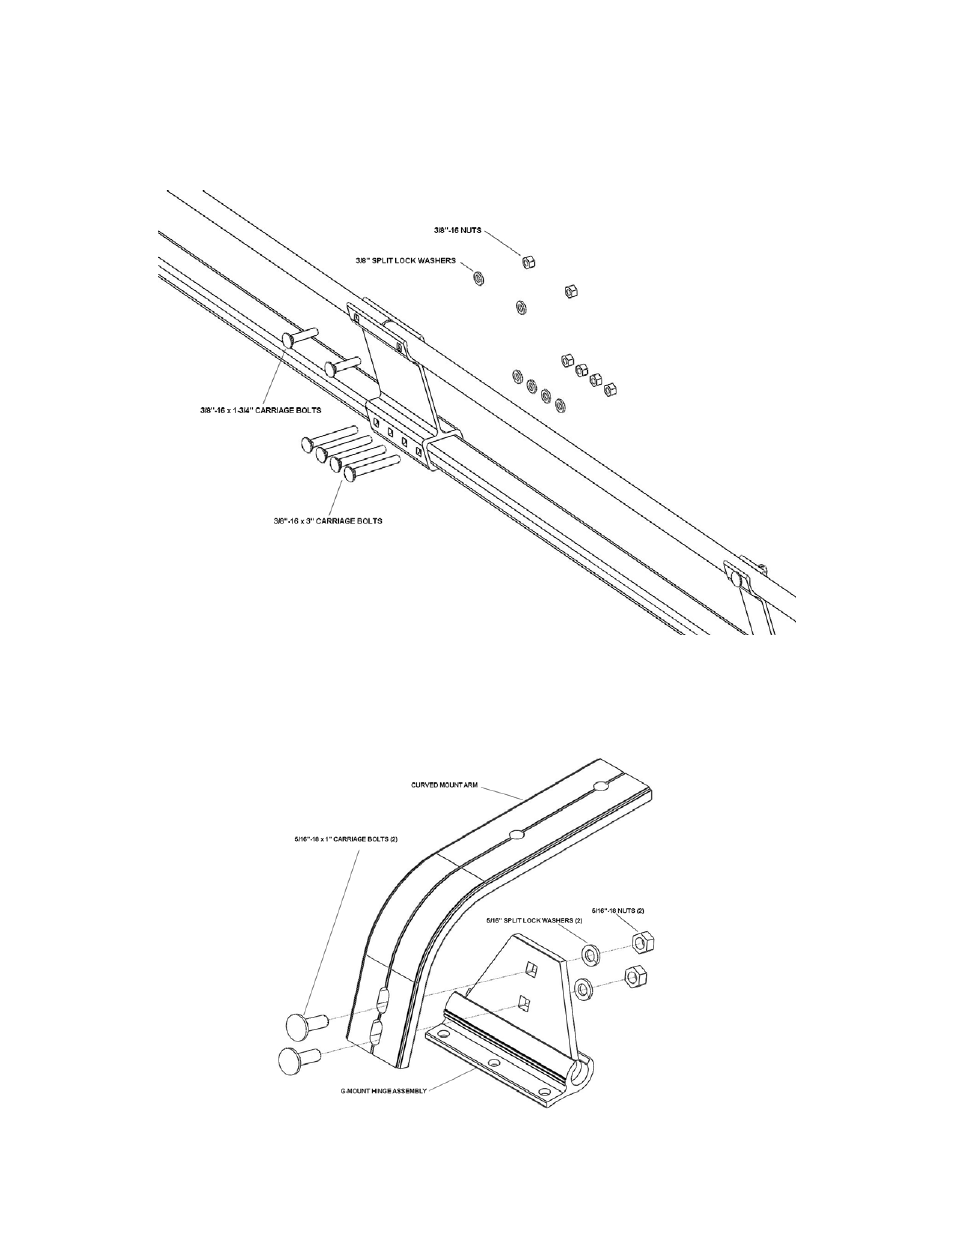
1. (Continued) Connect front and rear sections
Note the orientation of the other carriage bolts on rail assemblies.
For the top round tube, use (2) 3/8”-16 x 1-3/4” carriage bolts, (2) 3/8” split lock washers and (2) 3/8”-16 nuts, install hardware
finger tight. Repeat for other side rail.
For the lower rectangle tube, use (4) 3/8”-16 x 3” carriage bolts, (4) 3/8” split lock washers and (4) 3/8”-16 nuts, install hardware
finger tight. Repeat for other side rail.
2. G-Mount assembly
Assemble G-mount hinge to curved mount arm by placing the (2) 5/16”-18 x 1” carriage bolts as shown through the curved
mounting arm and G-mount hinge.
Secure and tighten the curved mount arm to the G-mount hinge with (2) 5/16” split lock washer and (2) 5/16”-18 nut.
Repeat for remaining G-mounts hinges.