Hauler Racks HKRS5-1 User Manual
Page 6
Page 6 of 8
HAULER RACKS, INC.
7109 31
st
Avenue North
Minneapolis, MN 55427-2848
WWW.HAULERRACKS.COM
Toll Free: 1-800-843-5445
Phone: 763-546-5620
Fax: 763-546-0933
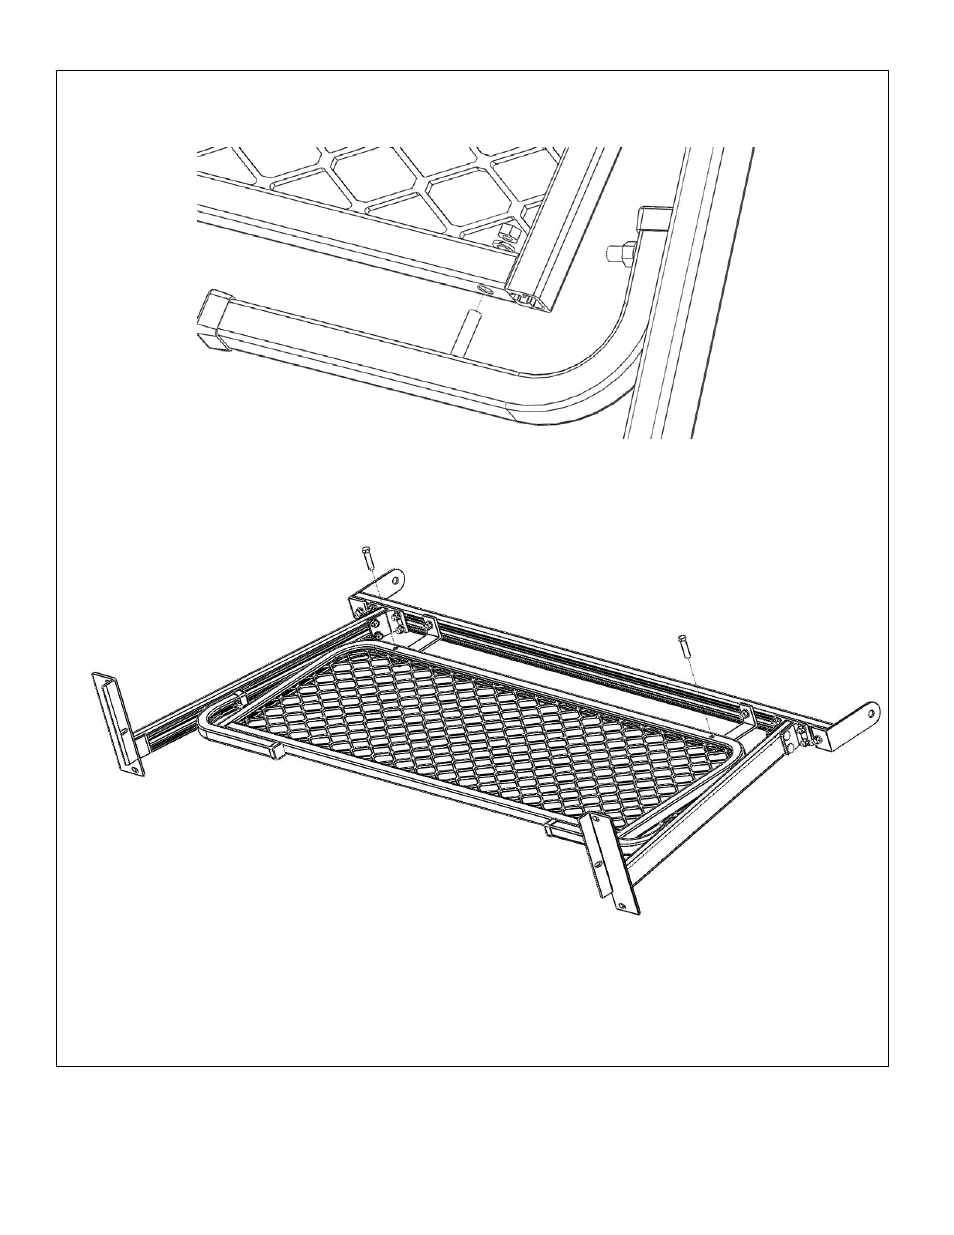
6. Rack assembly (continued)
Slide the screen assembly down so the 5/16”-18 x 1-1/2” bolts go through the lower portion of the screen assembly. Loosely secure screen
assembly to the lower screen braces using 5/16” split lock washers and 5/16”-18 nuts.
Adjust the screen assembly, lower screen braces and screen ‘L’ brackets so that the upper holes of the screen assembly align with the holes on
the screen ‘L’ brackets.
Secure the screen assembly to the screen ‘L’ brackets with (2) 3/8”-16 x 1-3/4” hex head bolts, 3/8” split lock washers and 3/8”-16 nuts.
Center the screen assembly on the load bar by measuring the distance from each end to the end of the load bar. Adjust as needed until equal.
Tighten the screen ‘L’ bracket to the load bar and screen assembly.
Tighten the upper screen assembly to the screen ‘L’ brackets