Instructions for t-butt joints – General Tools and Instruments 840 Pro Doweling Kit User Manual
Page 8
INSTRUCTIONS FOR T-BUTT JOINTS
NOTE: When using this jig to make T-Butt joints, the width of
either surface to be drilled cannot exceed 4 inches.
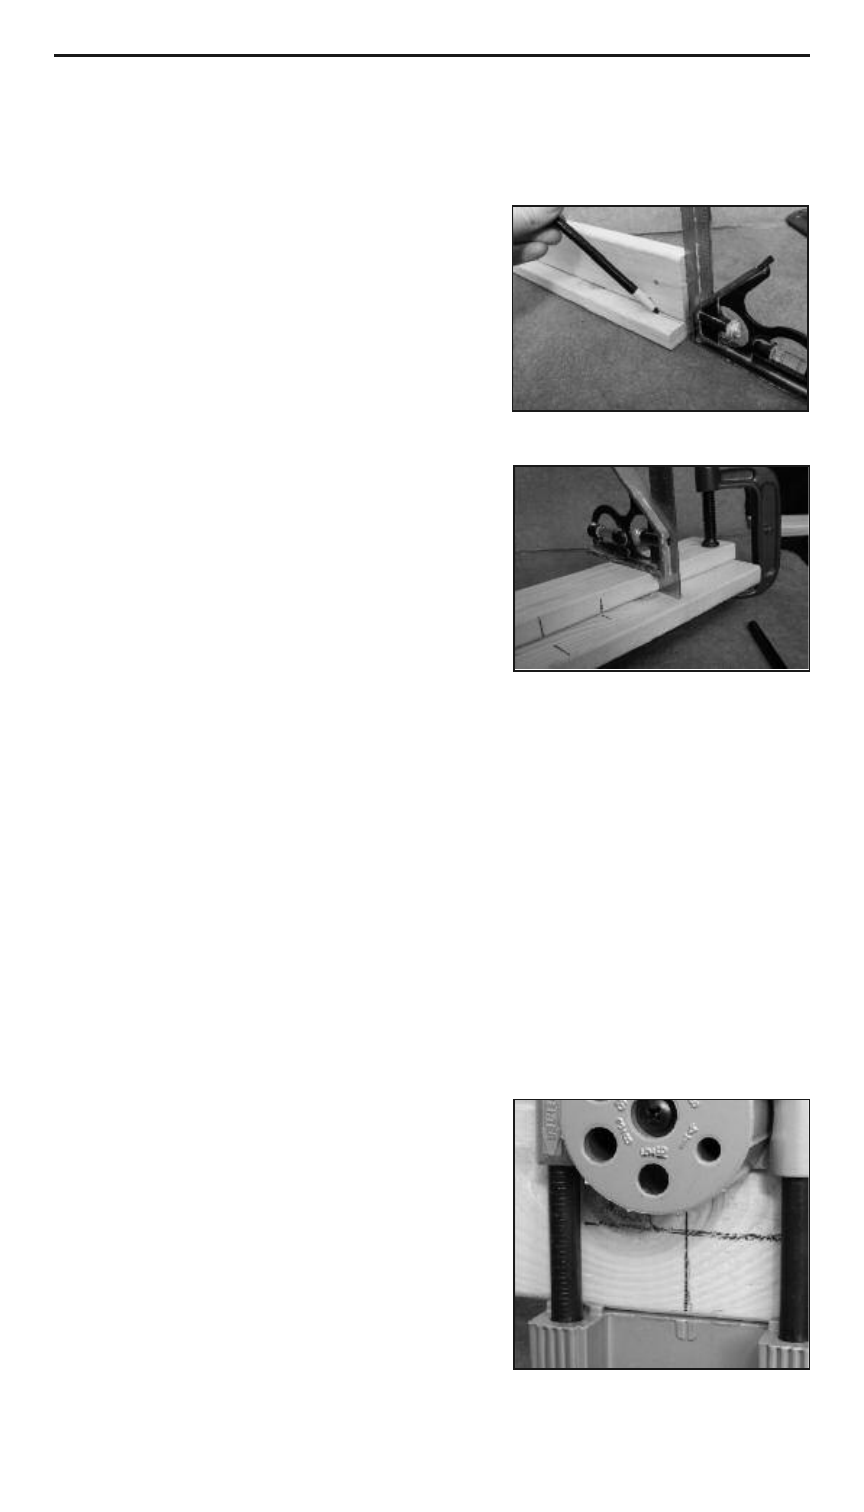
1. Place boards you want to join in
the final position and mark them
“A” and “B”. Use a square to align
the two boards and mark a line
along the edge of board “A” on
the short side of board “B” (See
Figure 8).
2. Flip board “A” flat so it lies on
board “B”. Use a square to ensure
the edges are still aligned (See
Figure 9). Clamp the boards
together.
3. Use the square to mark the edge
of board “A” and the surface of
board “B” to be drilled at all
desired dowel pin locations
(See Figure 9).
4. Remove the clamp and place board “A” in the jig as detailed
in “HOW TO MAKE EDGE-TO-EDGE JOINTS”, steps 5-7.
5. Drill holes in board “A” at all desired locations. Follow steps
8-15 in “HOW TO MAKE EDGE-TO-EDGE JOINTS.”
6. Remove board “A” from the jig once all holes are drilled.
7. Open the CLAMP SCREW (B) on the jig wide enough to fit over
the board “B” with surface to be drilled facing up.
8. Place the FIXED JAW (C) of the jig
against the side of board “B” that
is closer to the marked line from
step 1. Align the center of the
INDEX MARK (D) with one of the
lines marked, from step 3, on the
board. (See Figure 10)
Figure 8
Figure 9
Figure 10
8