PASCO ME-6664 Photogate Tape Set User Manual
Page 10
Model No. ME-6664
Photogate Tape Set
9
®
Note: Keep the Photogate
and rod stand in a shaded
area, away from direct
sunlight. Direct sunlight
may interfere with the
photogate beam and cause
inaccurate measurements.
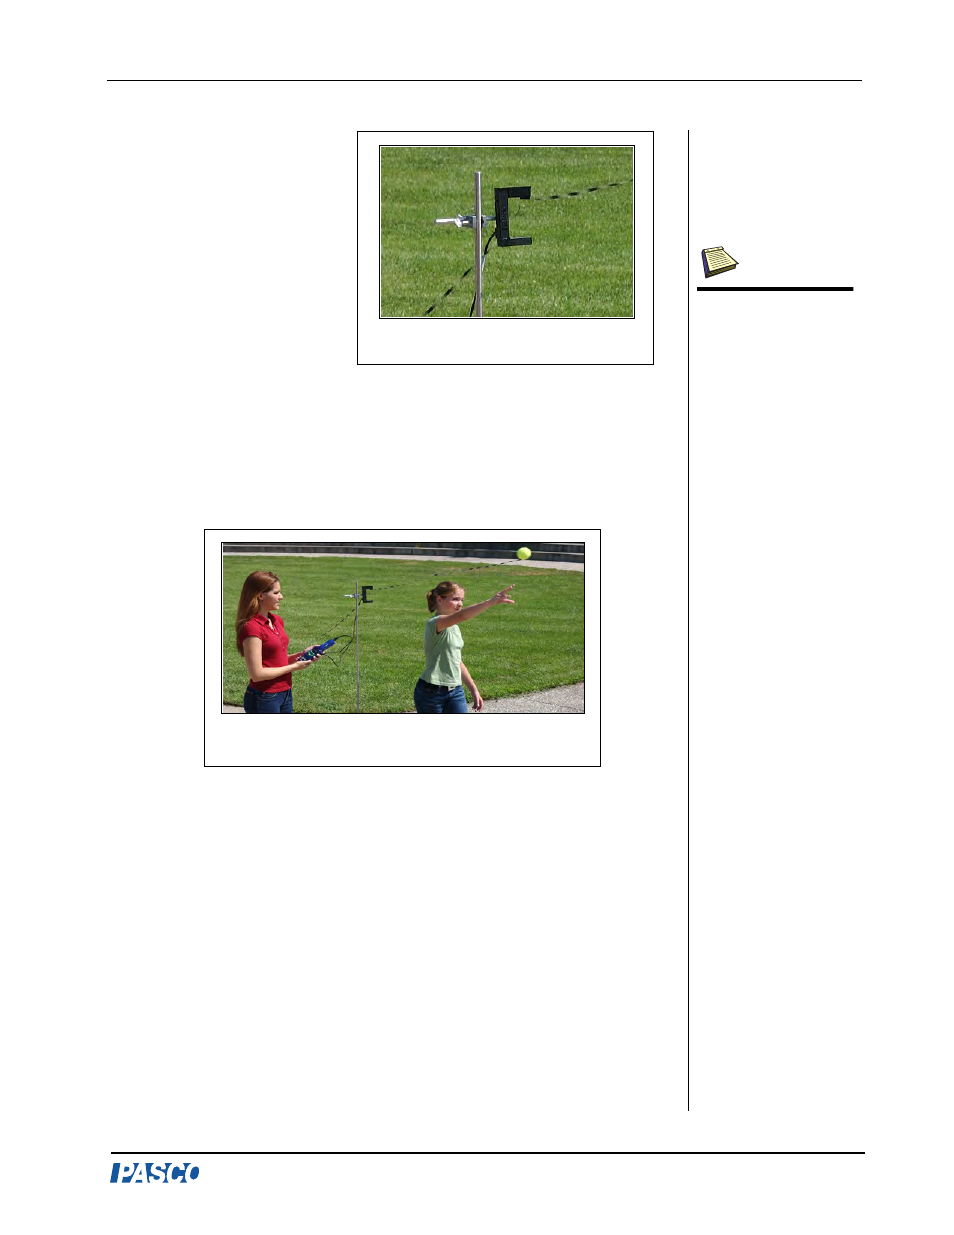
3. Slide the Photogate Tape
Bracket over a side arm
on the Photogate Head.
4. Cut a five foot piece of Photogate Tape. Use tape to attach one end
of the Photogate Tape to the tennis ball.
5. Thread the other end of the Photogate Tape through the bracket on
the Photogate Head (Figure 5). Do not tape or fasten the opposite
end of the Photogate Tape. This end should be free to travel
completely through the bracket.
6. Move the tape until the leading edge of a black section of the tape
aligns with the hole on the Photogate Tape Bracket. (Note: As the
tape moves through the photogate, a velocity reading will be
recorded each time a 5 cm band moves through the beam.)
7. Plug a Photogate Port into a PASPORT Xplorer. Attach the black
cable from the Photogate Port to the Photogate Head. (To keep the
photogate cable out of the way of the tape, use a piece of string or
rope to fasten the cable to the rod.)
8. Ask one student to be the timer and another student to be the ball
thrower. (The timer will hold the Xplorer and watch the tape.)
9. Position the thrower beside the rod stand, standing parallel to the
direction of the Photogate Tape Bracket and tape travel (Figure 6).
Figure 5: Setup of Photogate
Head on a Rod Stand
Figure 6: Recording the Velocity of a Thrown
Tennis Ball with Photogate Tape
Note: For this experi-
ment, you should have
enough tape to record the
velocity of the ball from
the start of the throw to
the release. The point of
this study is not to plot the
velocity of the entire
travel duration of the ball,
as this would probably
require several rolls of
tape!!!