PASCO OS-8515C Basic Optics System User Manual
Page 42
®
B a s i c O p t i c s S y s t e m
E x p e r i m e n t 1 4 : V i r t u a l I m a g e s
42
4.
Look through the lens toward the light source (see Figure 14.1). Describe the
image. Is it upright or inverted? Does it appear to be larger or smaller than the
object?
________________________________________________________________
________________________________________________________________
________________________________________________________________
5.
Which do you think is closer to the lens: the image or the object? Why do you
think so?
________________________________________________________________
________________________________________________________________
________________________________________________________________
6.
Place the +200 mm lens on the bench anywhere between the 50 cm and 80 cm
marks. Record the position here. _____________
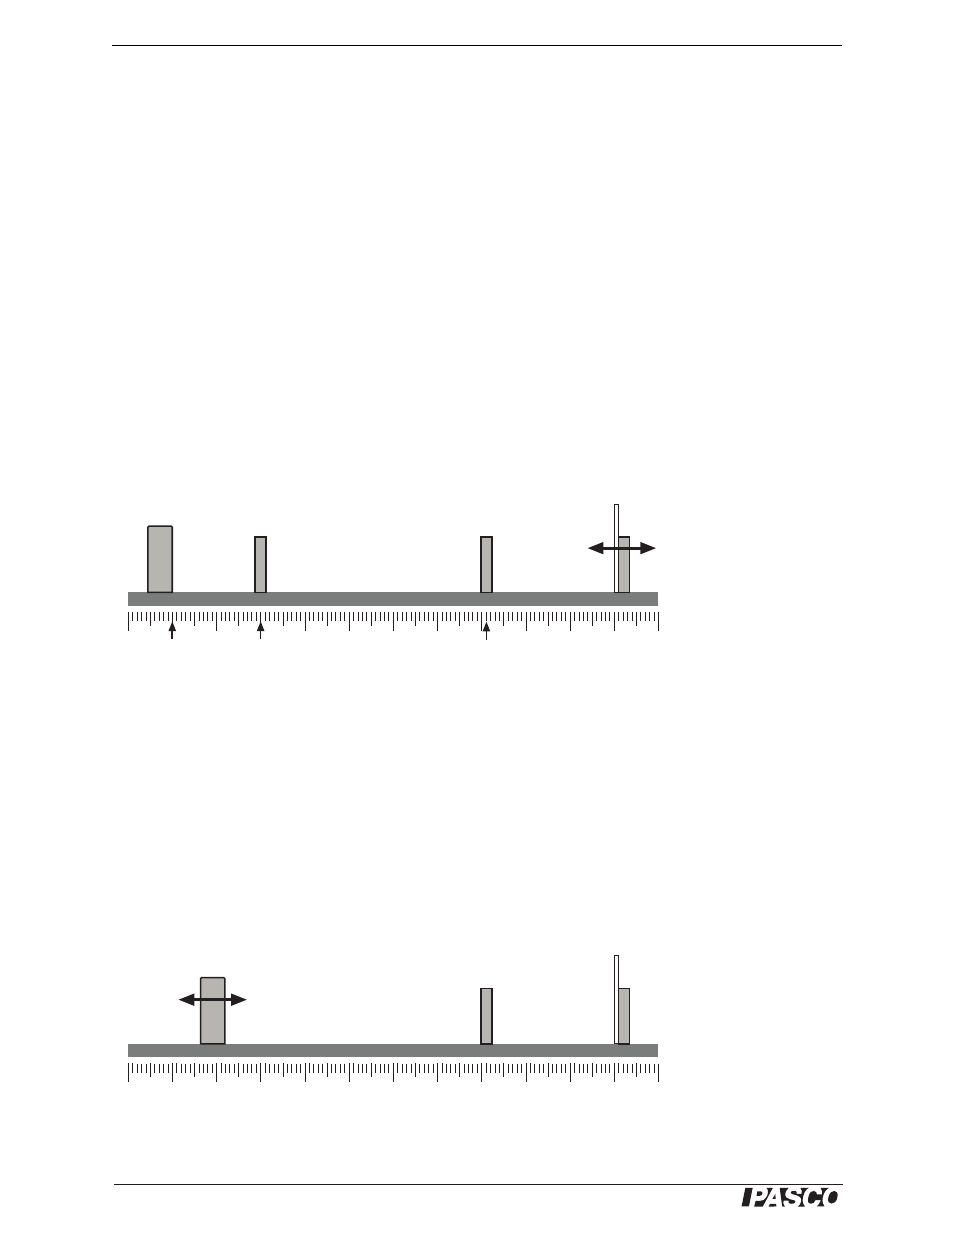
7.
Place the viewing screen behind the positive lens (see Figure 14.2). Slide the
screen to a position where a clear image is formed on it. Record the position
here. _____________
Figure 14.2
The real image that you see on the screen is formed by the positive lens with the vir-
tual image (formed by the negative lens) acting as the object. In the following steps,
you will discover the location of the virtual image by replacing it with the light
source.
8.
Remove the negative lens from the bench. What happens to the image on the
screen?__________________________________________________________
9.
Slide the light source to a new position so that a clear image is formed on the
screen. (Do not move the positive lens or the screen.) Write the bench position of
the light source here. _____________
Figure 14.3
Light
source
Screen
+200 mm
Lens
Adjust to
focus image
-150 mm
Lens
10 cm
30 cm
50 cm to 80 cm
Light
source
Screen
+200 mm
Lens
Adjust to
focus image