PASCO ET-8770 Energy-Transfer Friction User Manual
Page 7
Energy Transfer - Friction
Model No. ET-8770
6
®
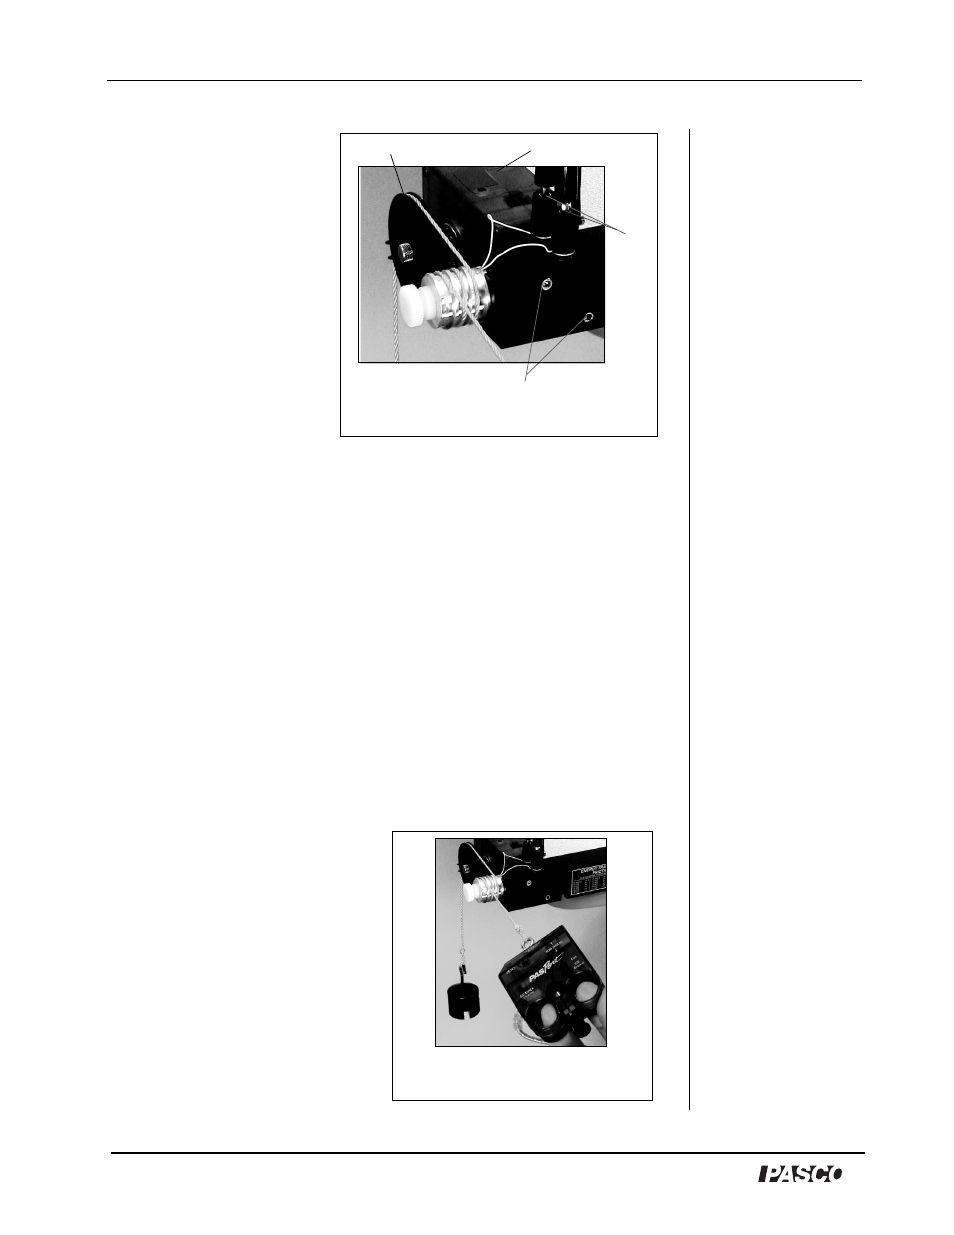
6. Loosen the knobs on
the banana jacks and
insert the stripped
portion of the wire
in the holes under
the jacks. (Note: Do
not kink the wires.
(Figure 1).) Screw
the knobs on the
banana jacks to hold
the wires in place.
Do not overtighten.
7. With the cable
assembly, connect a
Temperature Sensor
(or Thermistor Sensor or ohmmeter) to the thermistor jacks.
(Figure 2).
8. Attach the Rotary Motion Sensor (RMS) to the inside of the base
(using the allen wrench on the cap screw of the RMS). Attach the
RMS, such that the large pulley faces toward the cylinder, but the
away from the table’s edge (Figure 2).
Note: If a Rotary Motion Sensor is not available, an introductory lab
can still be done using a simple average of the work performed, where
the work = average force times distance. Without a Rotary Motion
Sensor, you can measure the distance and manually calculate the work
performed. If a Force Sensor is not available, use a spring scale.
9. Hook a 24” piece of yellow cord to a hanging mass (about 200 g)
and a Force Sensor.
10. With one hand, hold the
hanging mass while you use
the other hand to wrap the
cord over the top groove in
the large pulley and over
each groove in the cylinder
(Figures 2 and 3).
11. Connect the Temperature,
Force and Rotary Motion
Sensors to a computer
interface (ScienceWorkshop
or PASPORT interface).
Rotary Motion Sensor
Pulley
Attachment Screws
Figure 2: Setup with Rotary
Motion Sensor
jacks
Figure 3: Wrapping the cord
around the pulley and cylinder