PASCO PS-2190 1 MHz 2-channel Voltage Sensor User Manual
Page 2
®
1 M H z 2 - c h a n n e l V o l t a g e S e n s o r
PS-2190
2
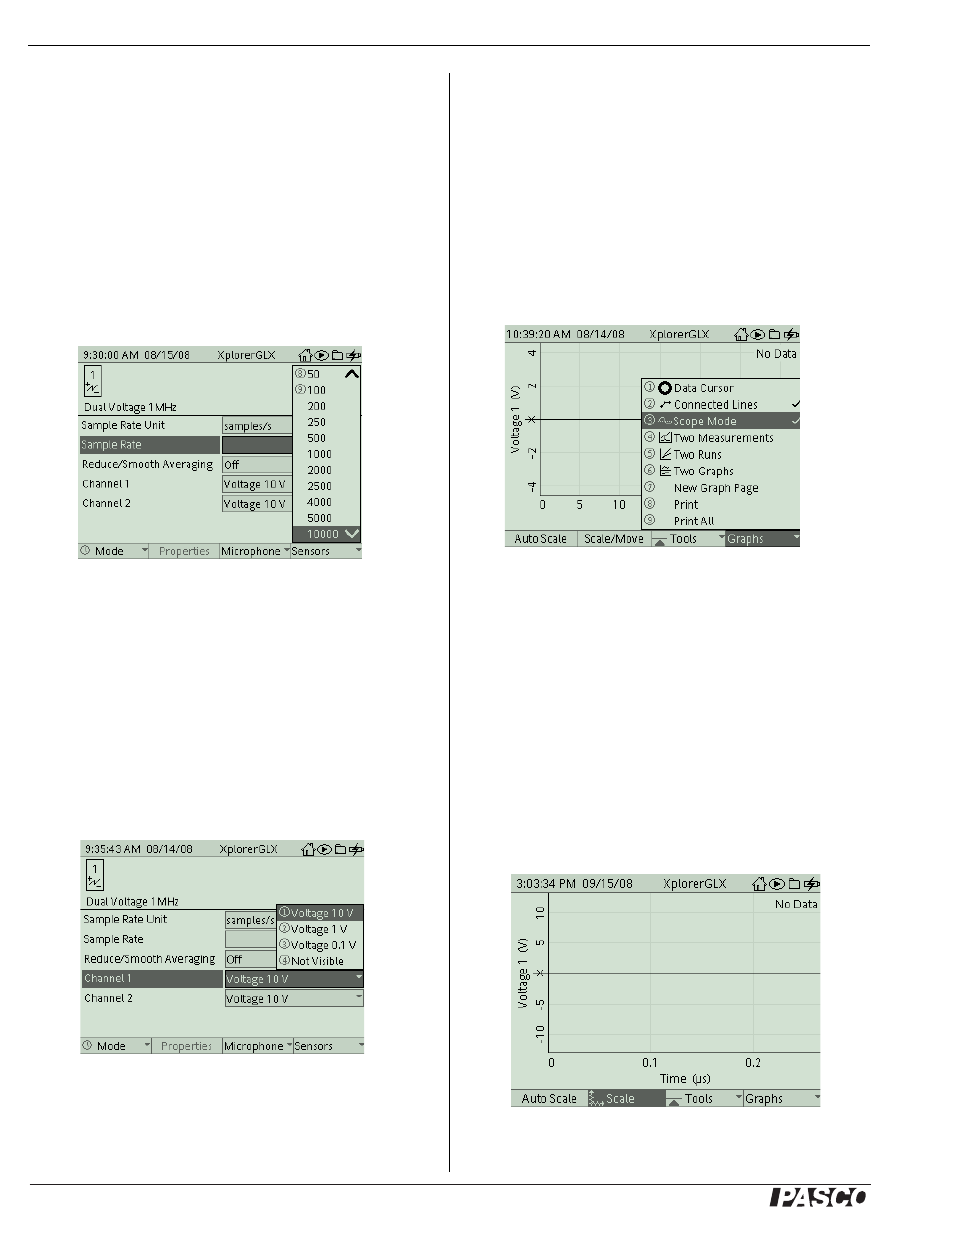
The Sensors screen shows the icon and name of the sensor in the
upper left corner, and menus for Sample Rate Unit, Sample Rate,
Reduce/Smooth Averaging, Channel 1, and Channel 2.
Sample Rate in the Sensors Screen
By default, the sensor collects data at 10,000 samples per second.
To change the Sample Rate, for example, use the down cursor
button (d) to select the menu. Use the ‘plus’ or ‘minus’ but-
tons (-+) to increase or decrease the sample rate, or press the
check button (c) to open the menu. Use the up or down cursor
buttons to highlight the sample rate and press the check button
again to select the choice and exit the menu. The maximum sam-
ple rate that can be selected in the Sensors screen is 20,000 Hz
For faster sampling, see “Scope Mode Sample Rate Selection”..
Selecting Voltage Range
By default, the input voltage range for both channels is ±10 V. To
change the input voltage range for either Channel 1or Channel 2
or to make the channel ‘not visible’, use the up or down cursor
buttons to highlight the menu and press the check button (c) to
open the menu. The menu choices are numbered.
Press the number button for the number of your choice to select
the choice and close the menu, or use the up or down cursor but-
tons to highlight your choice and then press the check button to
select the choice and close the menu.
The input voltage range for each channel can be set indepen-
dently.
Selecting Scope Mode
The 1 MHz 2-channel Voltage Sensor is designed to be used with
the Xplorer GLX in Scope Mode where the maximum sample
rate of 1,000,000 Hz can be selected.
Press the Home button to open the Home screen. Press the F1
button (F) under ‘Graph’ to open the Graph screen.
Press the F4 button (I) under ‘Graphs’ to open the menu. The
menu choices are numbered. Press the number button of the num-
ber of your choice (for example, ‘Scope Mode’), or use the up
and down arrow buttons to highlight your choice and then press
the check button (c) to select the choice and close the menu.
The Graph screen changes slightly -- the ‘zero’ on the vertical
axis becomes an ‘x’-- to indicate that the Graph is in the Scope
Mode. The ‘Trigger’ choice in the Tools menu is also automati-
cally selected.
Scope Mode Sample Rate Selection
To change the sample rate in Scope Mode, press the F2 (G)
button under ‘Scale/Move’ in the Graph screen. To increase the
sample rate, press the right cursor button (r). To decrease the
sample rate, press the left cursor button (l).
As you increase the sample rate by rescaling the Time (s) axis
with the ‘Scale/Move’ tool, the units will change from seconds
(s) to milliseconds (ms) and -- ultimately -- microseconds (
µs).
Figure 2: Select sample rate
Figure 3: Select input voltage range
Figure 4: Select Scope Mode
Figure 5: Sample rate in Scope Mode