Theory of operation, Sensor set-up, Orientation and positioning – PASCO PS-2175 GPS Position Sensor User Manual
Page 4: Interface set-up
®
G P S P o s i ti o n S e n s o r
T h e o r y o f O p e r a t i o n
4
Theory of Operation
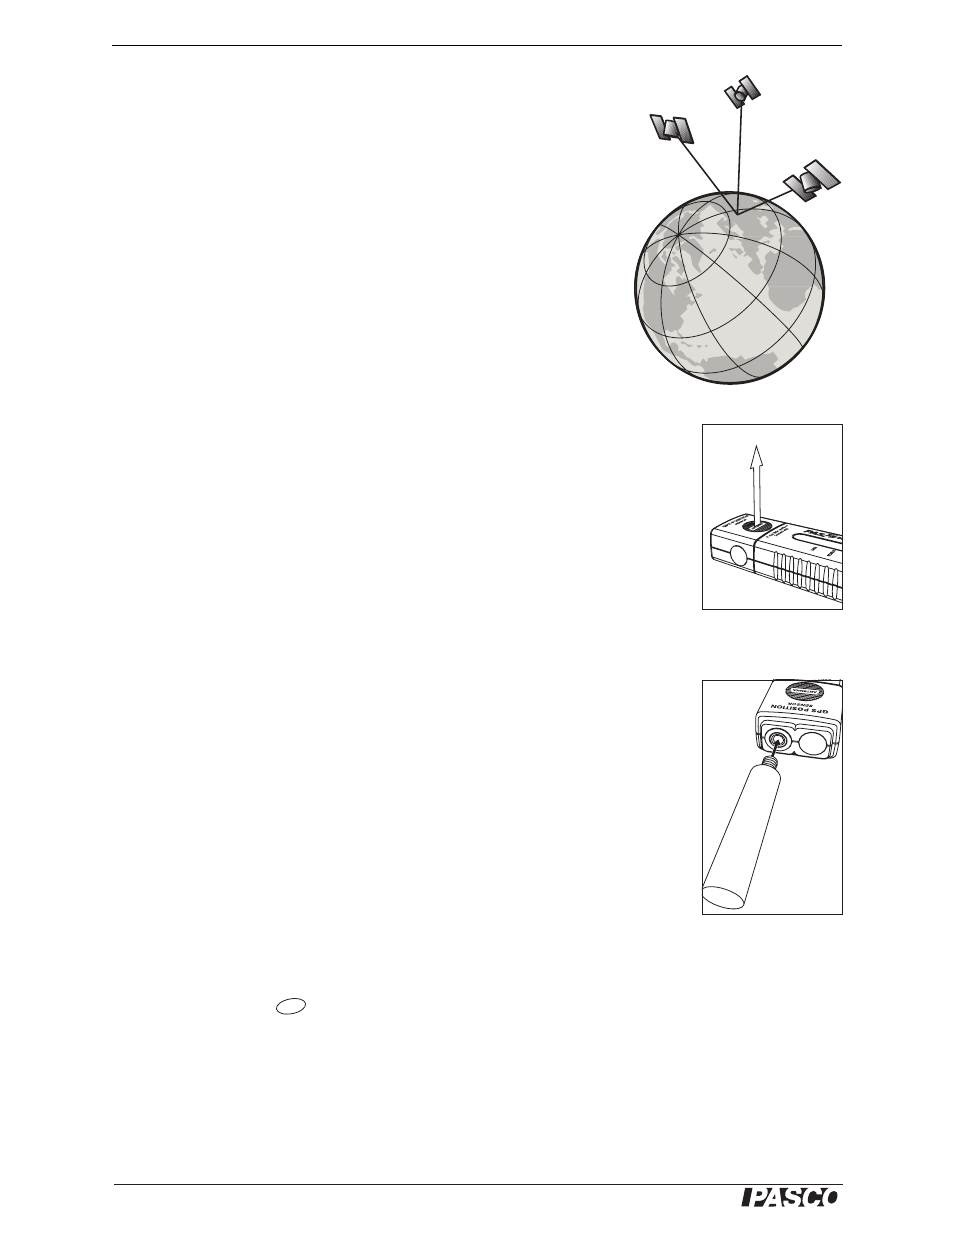
GPS stands for Global Positioning System. This system is maintained by the
U.S. government for use by people anywhere on earth. The system consists of
more than 24 satellites orbiting at an altitude of about 20000 km. The satel-
lites broadcast ranging signals and necessary data for the Position Sensor to
determine its own position and velocity. The Position Sensor only receives
data from the satellites; it does not transmit any signal.
To determine its position, the sensor must receive data from at least three sat-
ellites. When the sensor is first powered on, it searches the sky for available
satellites. This process typically takes between 30 seconds and 2 minutes.
Once satellites have been identified, the sensor actively tracks them and
acquires new satellites as they come into view.
The Position Sensor performs best outdoors with a clear view of the sky.
Sensor Set-up
Orientation and Positioning
It is important to orient the sensor properly to receive signals from satellites overhead,
especially during initial search mode (when the red
SEARCH
indicator is blinking).
The antenna detects signals through the labeled side of the sensor. Hold the sensor
with the labeled side approximately horizontal and facing the sky. Do no cover the
marked antenna area.
If the sensor is connected directly to the Xplorer GLX (without a cable), connect it to
channel 1 or 2 (not 3 or 4) and hold the GLX horizontally.
A 1/4-20 threaded insert is provided for attachment of a mounting rod or thumbscrew
as illustrated.
Interface set-up
The Position Sensor works best with GLX firmware version 1.40 or later. Visit www.pasco.com/glx
to download the newest firmware.
Before taking the GLX outdoors, leave it connected to AC power for several hours to ensure that
the battery is fully charged.
1.
Plug the Position Sensor directly into channel 1 or 2 of the Xplorer GLX, or use
the included cable to connect it to any channel.
2.
Press and hold the power button to turn on the GLX. The GLX automatically
detects the sensor and opens the Digits display showing Latitude and Longitude
measurements.
3.
(Optional) Press
to see all eight of the sensor’s primary measurements.
If you plan to use other sensors to collect data alongside GPS data, connect them to
other ports of the GLX.
up
Orientation for
initial
search mode
Optional mounting rod
attachment
F4