Setup – PASCO ME-6569 RMS_IDS KIT User Manual
Page 6
RMS/IDS Kit
012–06408A
2
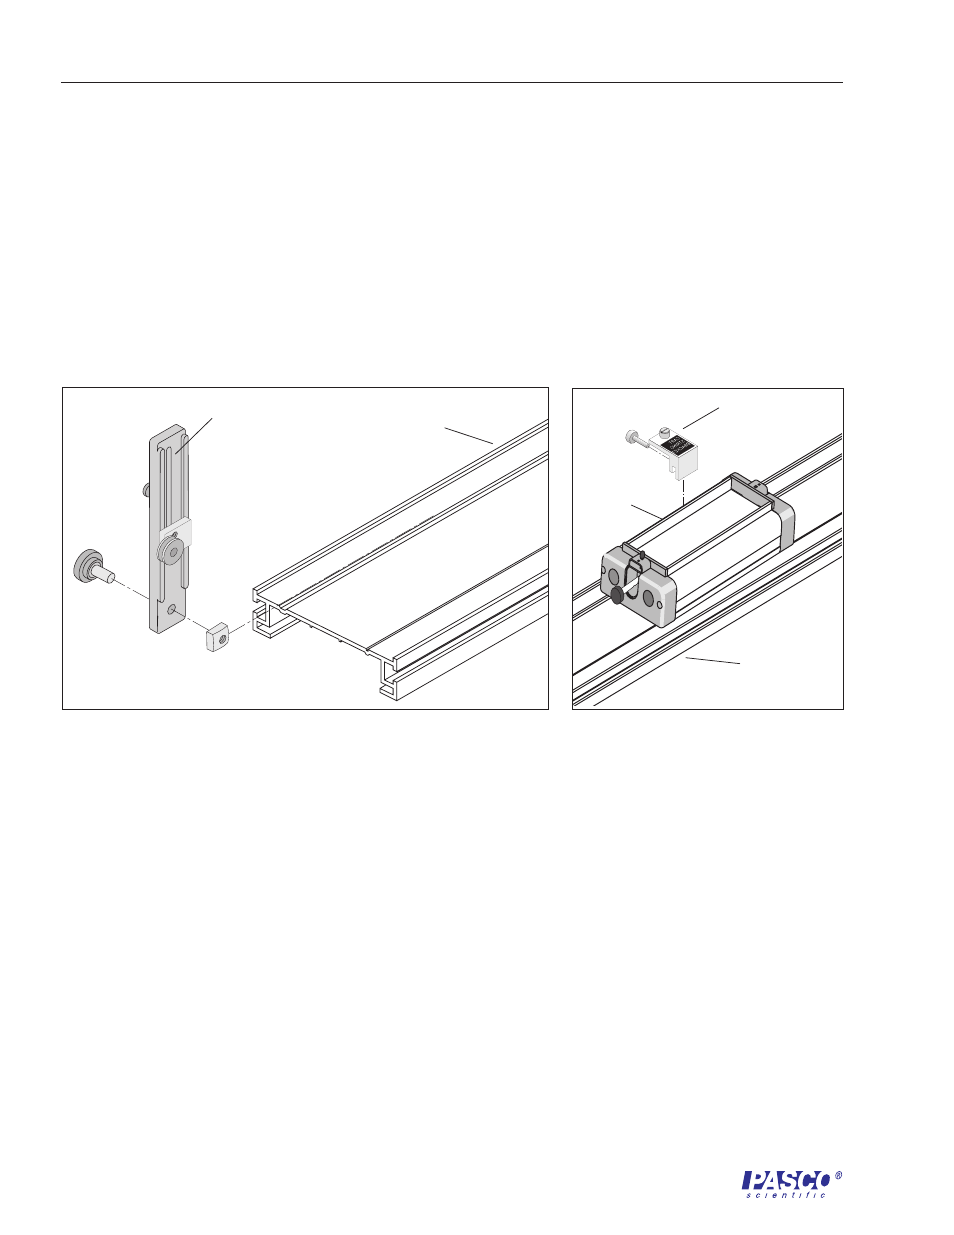
IDS track
IDS track pulley
bracket
IDS track
IDS cart
cart—string bracket
Setup
Equipment
1.
Mount the Rotary Motion Sensor (RMS) on the IDS track with the
IDS Mount Accessory so the RMS can be used like a Smart Pulley
(see IDS Mount Instruction Sheet and Figure 3).
2.
Mount the IDS track pulley bracket on the same side of the track
at the other end (Figure 1).
3.
Mount the cartstring bracket on the cart (Figure 2).
4..
Cut a length of thread about 2.5 m long (for the 1.2 m track).
Anchor one end of the thread under the screw of the cartstring
bracket on the cart. Thread the string over and under the large
pulley of the RMS (Figure 3).
5.
Pull the thread under and over the top of the small pulley on the
bracket.
6.
Pull the thread taunt and secure the end under the thumbscrew of
the cartstring bracket.
7.
Adjust the height of the large and small pulleys so the top half of
the string is horizontal and so the bottom half moves without being
obstructed by the track or brackets (Figure 3).
Figure 2
Attaching the cartstring bracket to the
Dynamics Cart
Figure 1
Mounting the IDS track pulley bracket on the IDS track