5 setting up the dvr unit, 1 installing the hard disk – AVerMedia Technologies AVERDIGI EB3004 MD User Manual
Page 7
3
Name
Function
(5) Audio Out
Output the audio signal to a audio out device such as speaker
i
The audio output device has its own power supply is necessary.
(6) Sensor In
Support 4 sensor devices
(7) Alarm Out
Support 1 relay device (Relay: 1A @ 125V AC/30V DC)
(8) RS-232
For PTZ camera connection and firmware update
(9) FAN speed Switch
Adjust fan speed(High/Low) according to the actual environment situation
We do strong recommend that adjust the fan speed to High when the
operating environment is over 30 ℃.
(10) 12V DC
Power cable connection
1.5
Setting Up the DVR Unit
1.5.1 Installing the Hard Disk
i
For hard disk spec, please referring to
http://www.avermedia.com/AVerDiGi/Product/
→
AverDiGi EB3004 MD → Hardware Recommendations
The “compatible hard disks” indicated in the above recommendation list only means that these
commercially available hard disks were tested with AVerMedia products and functioned well
under normal operation conditions. AVerMedia does not guarantee or provide warranties,
explicitly, implied or statutory with respect to the reliability of the hard disk function or its
compatibility. In no event AVerMedia shall be liable for damages, with respect to any business
interruption of clients, lost profits, loss of programs or other data on your information handling
system or otherwise. This includes direct, indirect, incidental, special, or consequential
damages, resulting from the incompatibility caused by the usage of these hard disks, even if
AVerMedia has expressly advised about the risk of such damages. The entire risk arising out of
the use of any information attached here with is borne by the recipient.
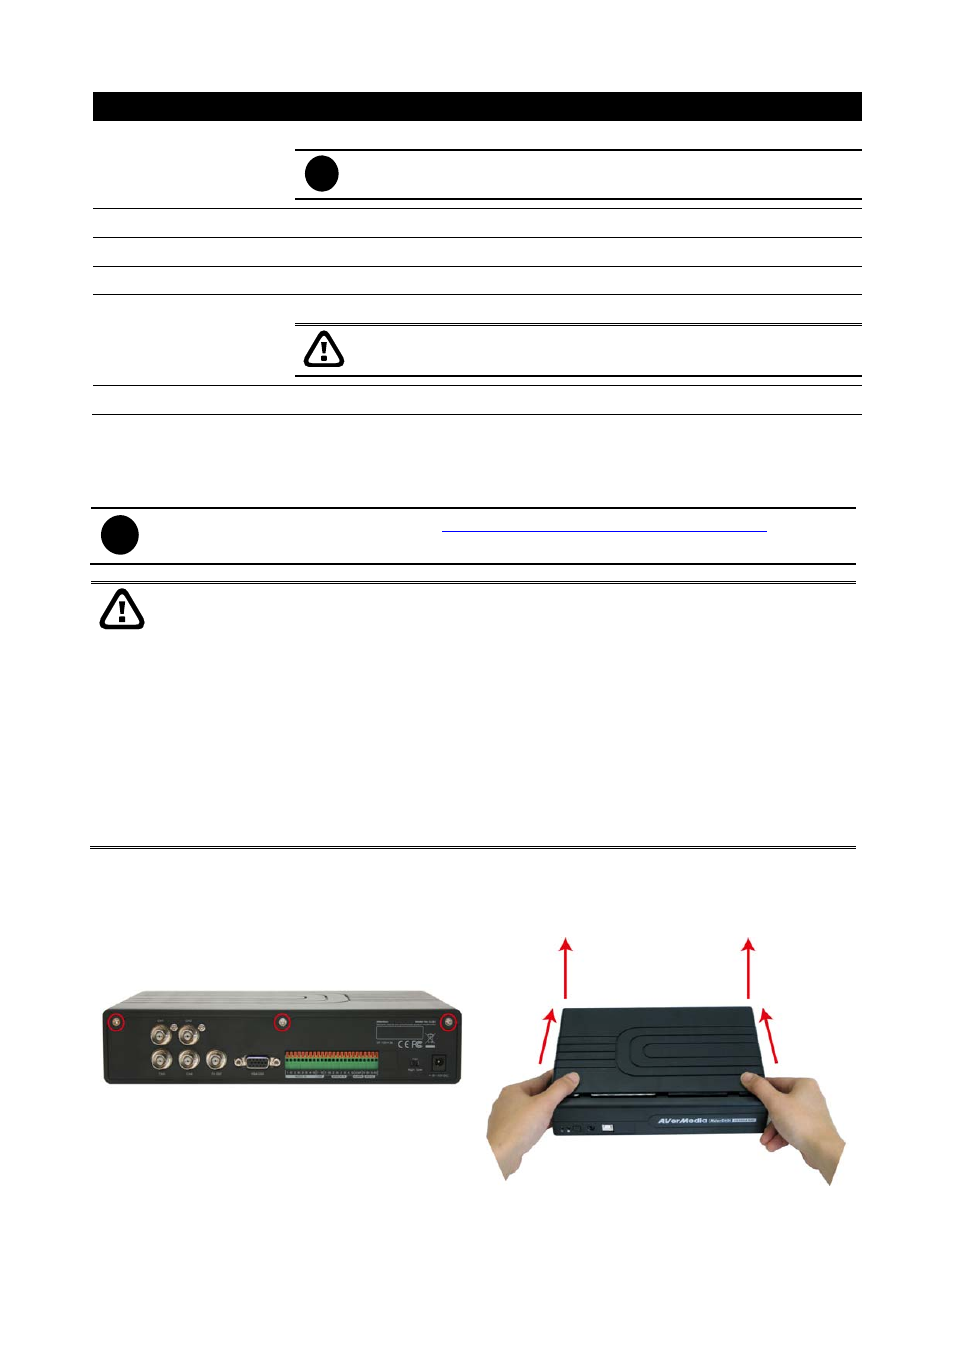
The DVR unit allows user to install one hard disk. Follow the illustrated instructions below to
install the hard disk:
1. Loosen
all
screws
2. Push the cover backward and lift