Wiring the lcr – Liquid Controls LCR Install User Manual
Page 11
11
Wiring the LCR
General
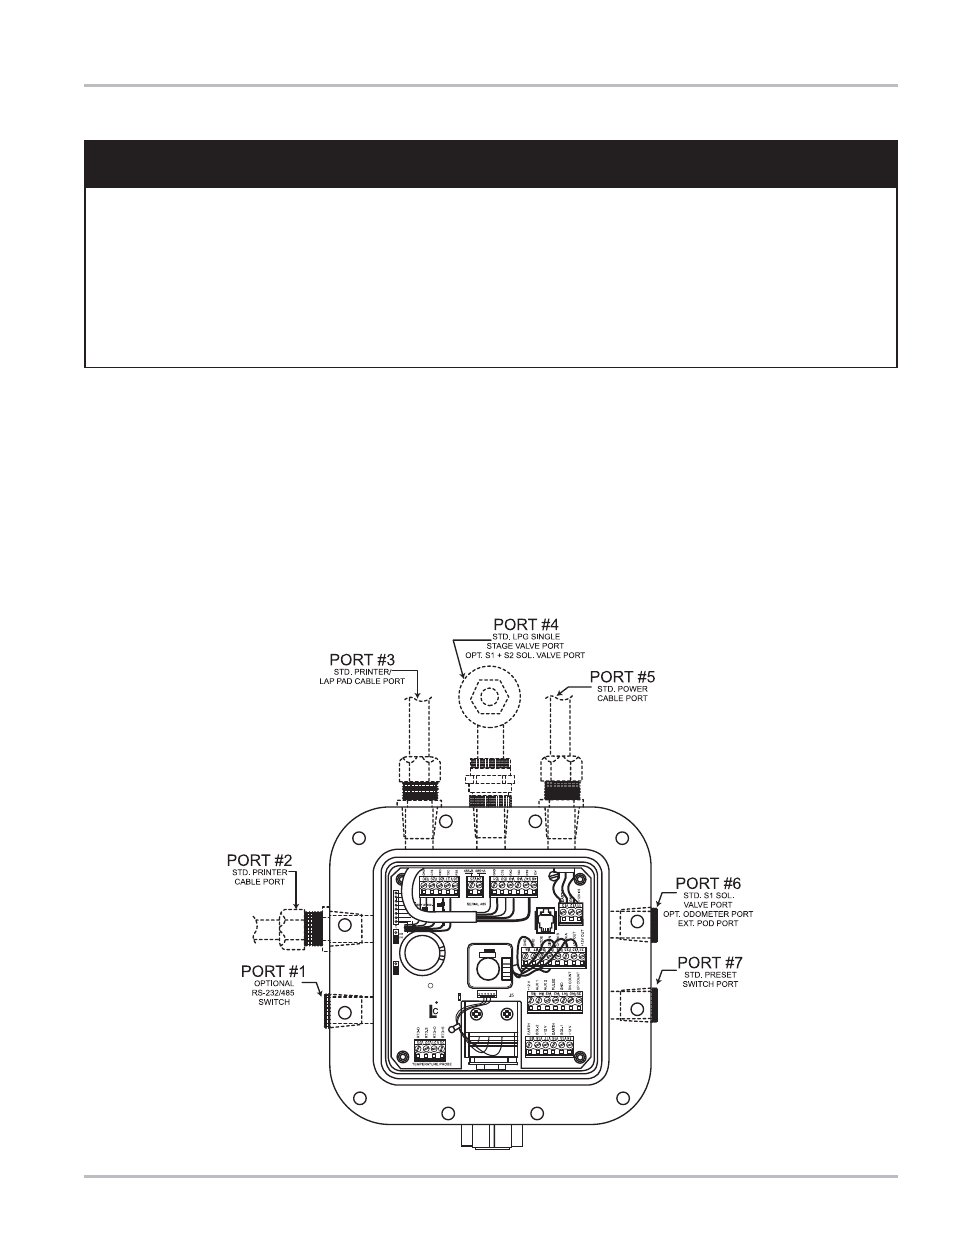
Once the LCR, and optional equipment such as control valve and ETVC kit have been installed in accordance with
instructions supplied with the units, wiring connections need to be made from those components to the LCR. The user
supplied wiring for all connected equipment must be routed through suitable conduit to the LCR. Threaded pipe
conduit, Liquid Tight, and Synflex are among some choices. If plastic Synflex fittings are used, make sure that they are
rated for outdoor use, temperature and gas/oil service. The conduit hubs on the LCR are all 1/2” - 14 NPT. Recommended
conduit routings are shown to the right. For your convenience in wiring, all terminal blocks on the LCR are removable
by pulling straight up. CAUTION: The conduit/cable entrances must be sealed inside and out using appropriate cable
glands to prevent moisture from entering in the LCR.
!
!
!
!
!
WARNING
WARNING
WARNING
WARNING
WARNING
Power, input and output (I/O) wiring must be in
accordance with the area classification for which it is
used (Class I, Div 2). For North America, installations
must be per the U. S. National Electrical Code, NFPA
70, or the Canadian Electrical Code in order to maintain
Class I, Division 2 ratings. This may require using
connections or other adaptations in accordance with
the requirements of the authority having jurisdiction.
WARNING
: Explosion Hazard - Substitution of
components may impair suitability for Class I, Division
2 applications.
WARNING
: Explosion Hazard - When in hazardous
locations, turn power OFF before replacing or wiring
modules.
WARNING
: Explosion Hazard - Do NOT disconnect
equipment unless power has been switched OFF or
the area is known to be Non-Hazardous.