Installing 240v load controller, Using 240v load controller – INSTEON Load Controller 220V / 240V 30 Amp, N/O and N/C (2477SA1, 2477SA2) Manual User Manual
Page 6
240V Load Controller Owner’s Manual
Page 6 of 14
Installing 240V Load Controller
1) At the circuit breaker or fuse panel, disable the circuit supplying power to the electrical junction box that is
wired to the appliance you wish to control with 240V Load Controller.
2) Remove the cover of the junction box and disconnect the two supply lines coming from the circuit breaker,
ensuring that you have ½” of bare wire on the ends.
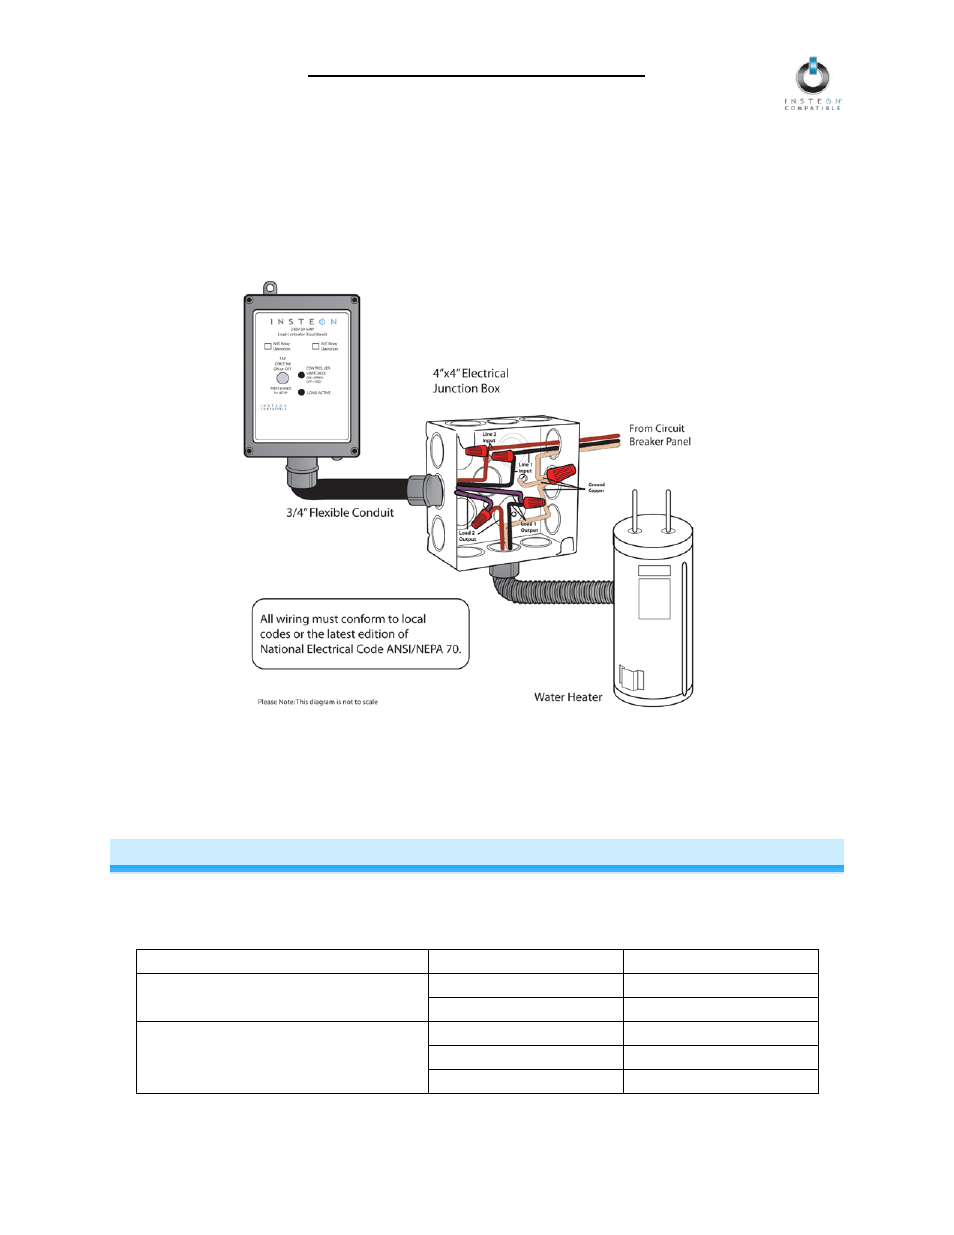
3) Refer to the diagram below to properly connect 240V Load Controller to the load and junction box. The
Ground wire will not be connected to 240V Load Controller, so cap the Ground wire with a wire nut.
4) Ensure that all wire connectors are firmly attached and that there is no exposed copper except for the
Ground wire.
5) Enable power to the junction box from the circuit breaker or fuse panel.
6) Test that 240V Load Controller is working properly by pressing the Set button to toggle the load on and
then off.
USING 240V LOAD CONTROLLER
You can use the Set button on 240V Load Controller to toggle the load on and off
The 240V Load Controller Status LED will be solid green when the load is on and solid red when it is
off. See the following table for the Load Active LED status:
240V Load Controller Model (SKU #)
Relay Status
Active Status LED
Normally Open Relay (#2477SA1)
Open
Off
Closed
Solid green
Normally Closed Relay (#2477SA2)
Open
Off
Closed with load on
Solid green
Closed with load off
Off