Fluid Components International MT86_MT86HT Manual Operation User Manual
Page 6
FLUID COMPONENTS INTL
CHAPTER 3 - OPERATION
Models MT86, MT86HT
3 - 6
Doc. No. 003162 Rev. F
Table 3-1. Jumper Configuration For Output Adjustment
* J3 and J4 will always be in this position unless the factory has authorized option changes.
1.
Repeat steps 1 through 5 from above. Record the Delta "R" that was required to generate the milliamp output
for both the low and high flow rates.
2.
Remove jumpers J1, J5 and J7. Add jumpers J2, J6 and J8, to make the span and zero circuitry active.
3.
Adjust the FC81 Field Calibrator, or precision decade boxes, to the Delta "R" resistance that represents the low
flow milliamp output of Step 1.
4.
Adjust the zero potentiometer, R17, on the control board to give the milliamp output that represents the
calculated low flow.
5.
Adjust the FC81 Field Calibrator, or precision decade boxes, to the Delta "R" resistance value that represents
the high flow milliamp output from Step 1.
6.
Repeat Steps 3 through 5 until the correct milliamp output matches the Delta "R" for the high and low flows.
7.
Disconnect the FC81 Field Calibrator or precision decade boxes and reconnect the sensing point to its original
input board.
8.
Return switch SW1-3 to the open position.
9.
Set the head-selector, SW2, to the number of sensing points in the system. The flowmeter can be reset to the
factory set calibration with the use of the original jumper setup. The originally installed jumpers are J1, J3, J5
and J7. The above span and zero adjustments are not in effect when the flowmeter is in the original
configuration. The factory set calibrations are in control of the flowmeter. Table 3-1 shows the jumper settings
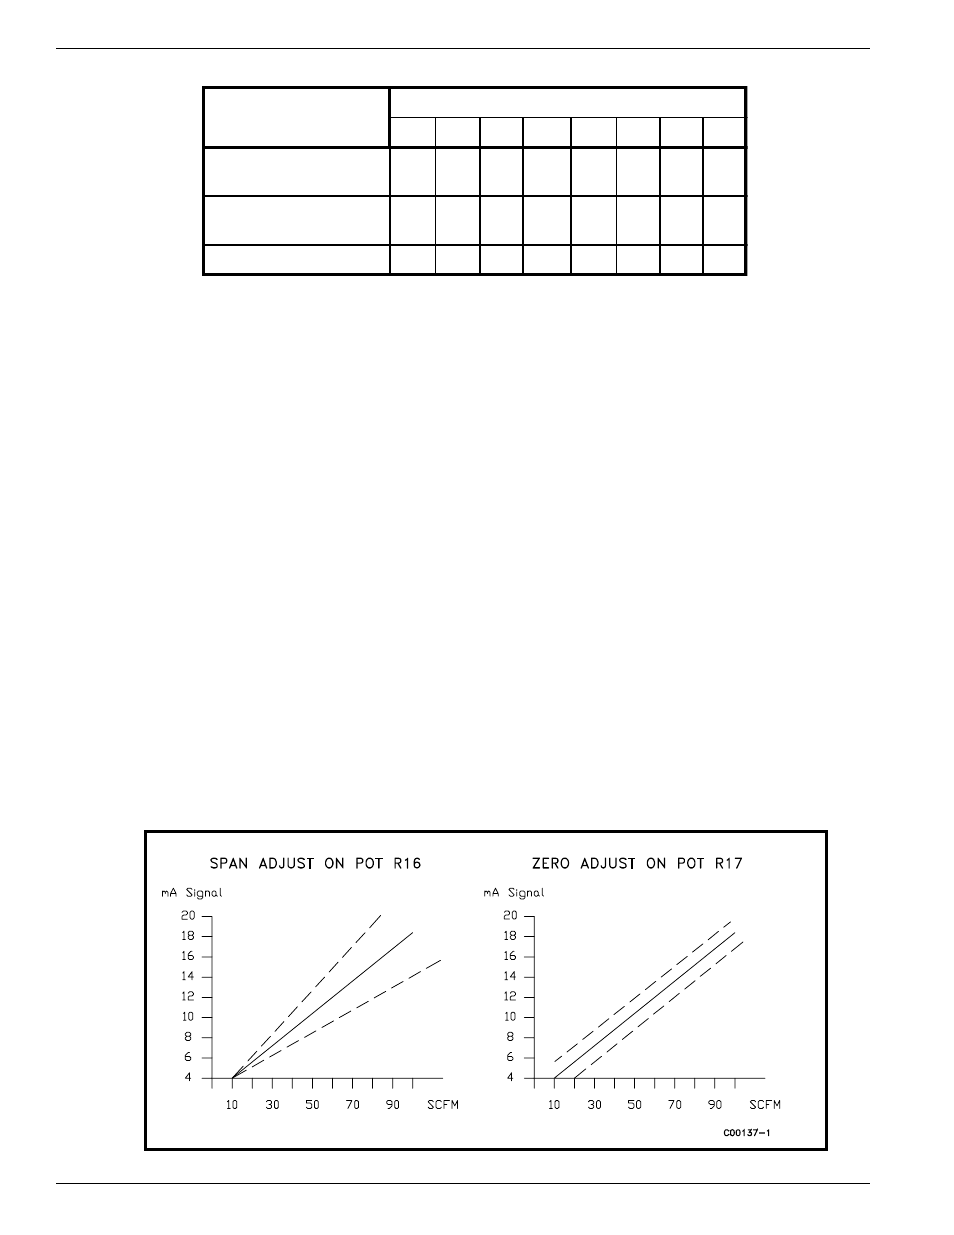
that are needed to make the zero and span adjustments active. Figure 3-3 shows the zero and span effects on the
flowmeter.
If only the zero adjust needs to be done, the span and zero jumpers will need to be set. Then proceed with the zero
adjustment.
MODE
INSTALL JUMPER
J1
J2
J3*
J4*
J5
J6
J7
J8
Factory Set Span and
Zero
YES
NO
YES
NO
YES
NO
YES
NO
Span Only Adjust
Activated
NO
YES YES
NO
YES
NO
NO
YES
Span and Zero Activation
NO
YES YES
NO
NO
YES
NO
YES
Figure 3-3. Zero and Span Adjustment