Burkert Type 8696 User Manual
Page 17
17
Start-up
NOTE!
Avoid maladjustment of the controller due to an incorrect
pilot pressure or applied operating medium pressure!
• Run
X.TUNE whenever the pilot pressure (= pneumatic auxil-
iary energy) is available during subsequent operation.
• Run the
X.TUNE function preferably without operating medium
pressure to exclude interference caused by flow forces.
To run
X.TUNE, the positioner must be in the AUTOMATIC
operating status (DIP switch 4 = OFF).
→
Screw off the transparent cap of the positioner to operate the
keys and DIP switches.
→
Start the
X.TUNE by pressing key 1
4)
for 5 s.
While the
X.TUNE is running, LED 1 flashes quickly (green).
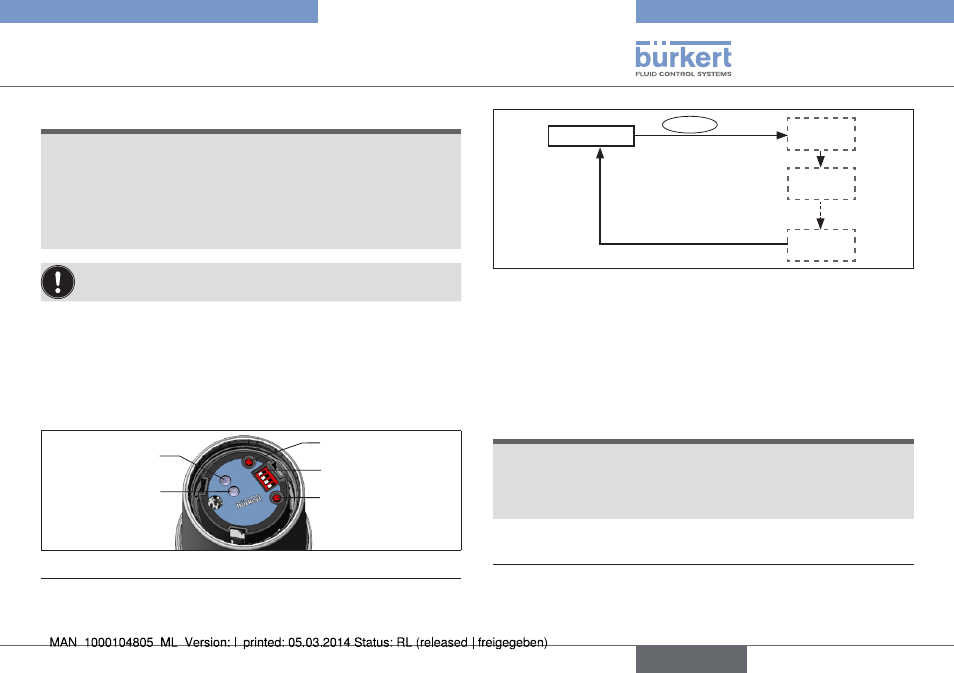
DIP Switches
Key 2
Key 1
LED 1
LED 2
Fig. 9:
Starting X.TUNE
4)
The X.TUNE can also be started via communications software.
X.TUNE
Key 1
5 s
X.TUNE
STARTED
TUNE #0
INIT
X.TUNE
READY
Fig. 10: Automatic adjustment X.TUNE
When the automatic adjustment is complete, LED 1 flashes slowly
(green)
5)
.
The changes are automatically transferred to the memory (EEPROM)
provided the
X.TUNE function is successful.
NOTE!
Damage or malfunction due to penetration of dirt and
humidity!
• To observe protection class IP65 / IP67, screw the transparent
cap in all the way.
→
Close the device (assembly tool: 674078
6)
).
5)
if a fault occurs, LED 1 is lit red.
6)
The assembly tool (674078) is available from your Bürkert sales
office.
english
Type 8696