Burkert Type 3239 User Manual
Page 21
21
Repairs
replacement of the diaphragm
Procedure:
→
Clamp valve body in a holding device (applies only to valves not
yet installed).
→
Cross-loosen fastening screws and remove actuator with dia-
phragm from the body.
→
Detach or unscrew old diaphragm. If attachment is with a
bayonet catch, loosen the diaphragm by turning it 90° (see table
„Tab. 10: Fastening types for diaphragm“).
→
Turn handwheel all the way clockwise (CLOSED position).
→
Install new diaphragm in the actuator (see „Tab. 10: Fastening
types for diaphragm“).
→
Turn handwheel all the way counter-clockwise (OPEN position).
→
Align diaphragm.
note marker for direction of flow!
→
Place actuator back on the body.
→
Lightly cross-tighten the fastening screws until the diaphragm is
between the body and actuator.
do not tighten screws yet.
→
Activate the diaphragm valve once to position the diaphragm
correctly.
→
Tighten the fastening screws with the valve in the open position up
to the permitted tightening torque (see tables in chapter „10.2.1
Tightening torques for diaphragms“).
→
Check the tightening torque of the screws again.
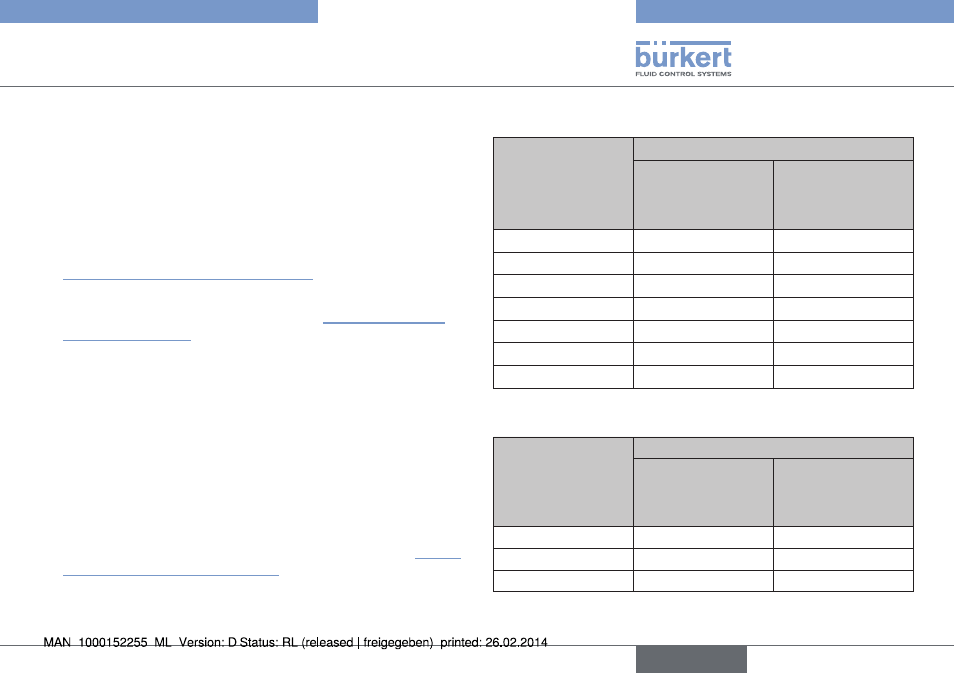
10.2.1 Tightening torques for diaphragms
Orifice
(diaphragm size)
dn [mm]
actuator pps or stainless steel
diaphragm
epdm / fkm
diaphragm
ptfe/advanced
ptfe/laminated
advanced ptfe
8
2
2,5
15
3,5
4
20
4
4,5
25
5
6
32
6
8
40
8
10
50
12
15
Tab. 11: Tightening torques for diaphragms, actuator PPS or
stainless steel
Orifice
(diaphragm size)
dn [mm]
actuator stainless steel
diaphragm
epdm / fkm
diaphragm
ptfe/advanced
ptfe/laminated
advanced ptfe
65
20
30
80
30
40
100
40
50
Tab. 12: Tightening torques for diaphragms, actuator stainless steel
english
Type 3232, 3233, 3233 K, 3234,
3235, 3239