Burkert Type 2101 User Manual
Page 10
10
Installation
Type 2101
7.2. before installation
• The globe valve can be installed in any installation position, pref-
erably with the actuator face up.
• Before connecting the valve, ensure the lines are flush.
• Observe direction of flow (see type label).
7.2.1. Preparatory work
→
Clean pipelines (sealing material, swarf, etc.).
devices with welded body
Remove the actuator from the valve body:
→
Clamp the valve body in a holding device.
note!
damage to the seat seal or the seat contour!
• When removing the actuator, ensure that the valve is in open
position.
→
Control function A pressurize the pilot air port 1 with com-
pressed air (5 bar): valve opens.
→
Using a suitable open-end wrench, place the wrench flat on the
tube.
→
Unscrew the actuator from the valve body.
other device versions
→
Do not remove actuator unless this is a customer-specific
requirement.
→
Procedure see “Devices with welded body”.
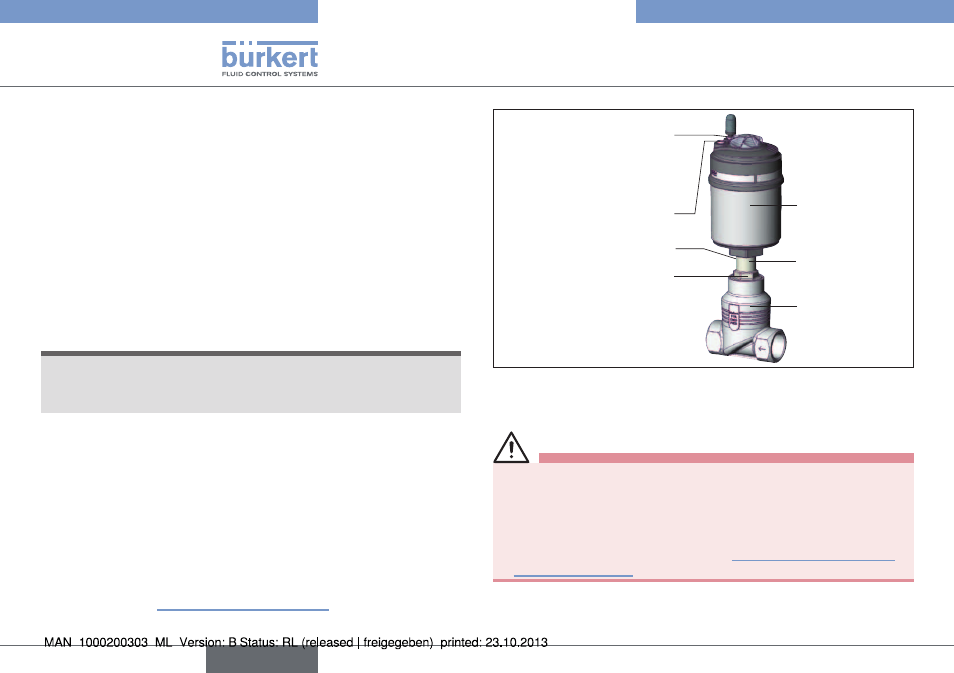
Actuator
Nipple
Valve body
Air discharge connection
CFA, CFB
Pilot air port
CFI
Pilot air port
CFA, CFB, CFI
Flats for open-end
wrench
Release bore
2
1
Fig. 2:
Installation
7.3. installation
Warning!
risk of injury from improper assembly!
Assembly with unsuitable tools or non-observance of the tight-
ening torque is dangerous as the device may be damaged.
• For installation use an open-end wrench, never a pipe wrench.
• Observe the tightening torque (see “Tab. 4: Tightening torque
english