7 installing an optical drive – Asus Barebone System Vintage-PE2 User Manual
Page 37
A S U S V i n t a g e - P E 2
A S U S V i n t a g e - P E 2
A S U S V i n t a g e - P E 2
A S U S V i n t a g e - P E 2
A S U S V i n t a g e - P E 2
2 - 2 1
2 - 2 1
2 - 2 1
2 - 2 1
2 - 2 1
2.7
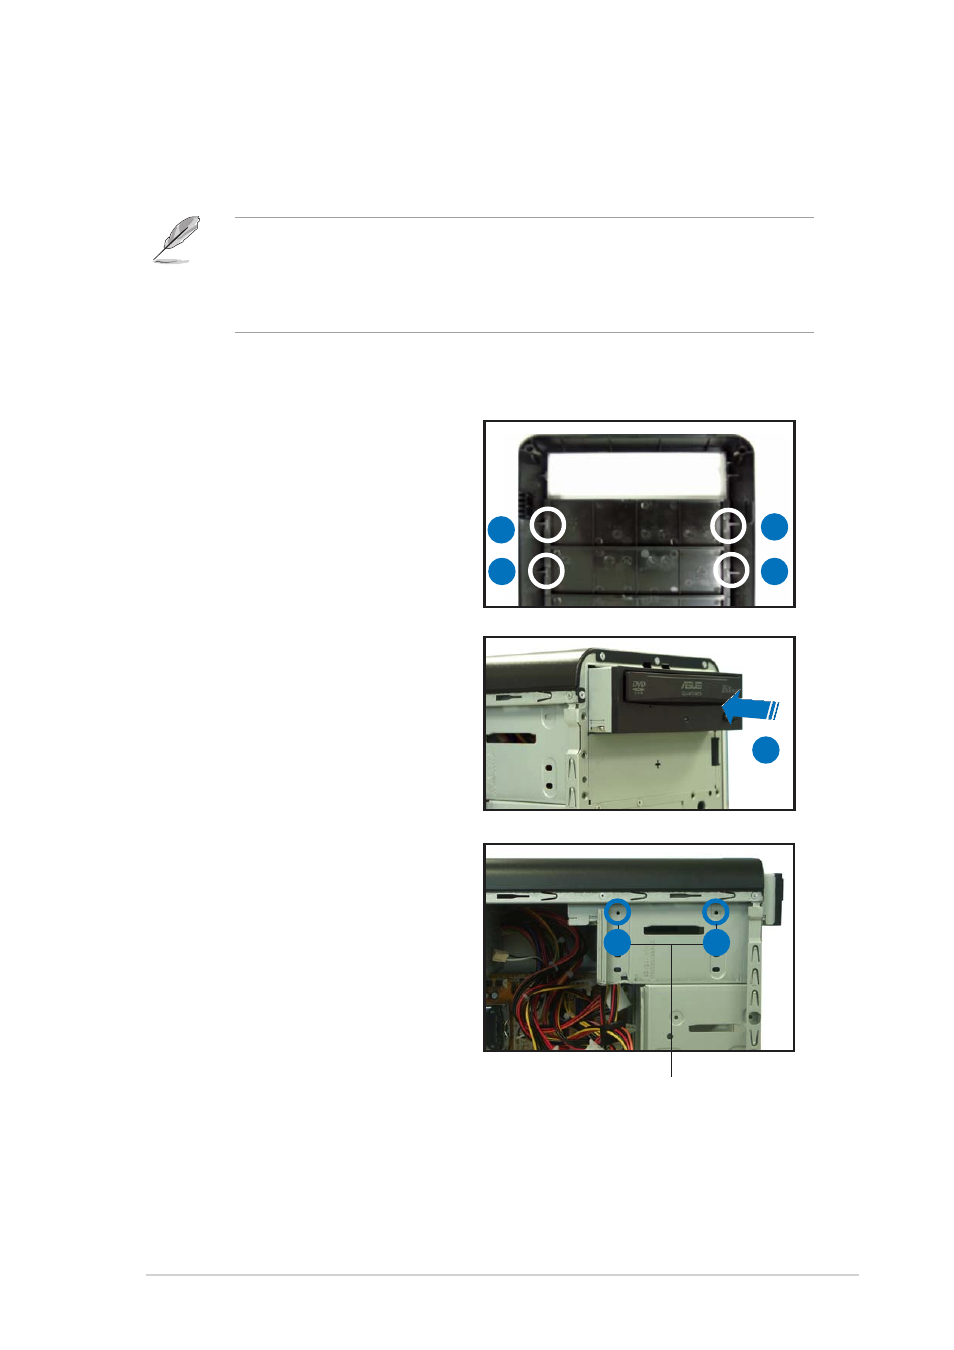
Installing an optical drive
Refer to the instructions in this section to install an optical drive(s) or
5.25-inch storage devices.
4.
Insert the optical drive into the
upper 5.25-inch drive bay.
3
3
3
3
4
To install an optical drive:
1.
Place the chassis upright.
2.
Remove the side plate and
front cover. Refer to section
2.3 for details.
3.
Remove the drive bay plate
covers by releasing the lock
tabs.
•
You can install an additional optical drive only if you use Serial ATA
hard disk drives.
•
You cannot use the optical drive if you install two IDE hard disk
drives.
O p t i c a l d r i v e s c r e w h o l e s
O p t i c a l d r i v e s c r e w h o l e s
O p t i c a l d r i v e s c r e w h o l e s
O p t i c a l d r i v e s c r e w h o l e s
O p t i c a l d r i v e s c r e w h o l e s
5.
Carefully push the optical drive
into the bay until its screw
holes align with the holes on
the bay as shown.
5
5