Wall track installation, Vertical installation using wood studs, Vertical installation on drywall – CHIEF KSA1022 User Manual
Page 5
Installation Instructions
KSA-1022
5
WALL TRACK INSTALLATION
1.
Determine mounting location on wall.
2.
Determine whether wall track accessory will be mounted
horizontally or vertically.
WARNING:
There is a limit on how many components may
be mounted on each bracket depending on the mounting
method. Refer to the table below for details.
WARNING:
The KSA-1022 wall track accessory CANNOT
be installed horizontally on drywall without wood or steel
studs.
NOTE:
It may be necessary to remove cable management
flaps from wall track accessory in order to expose holes
to be used for installation.
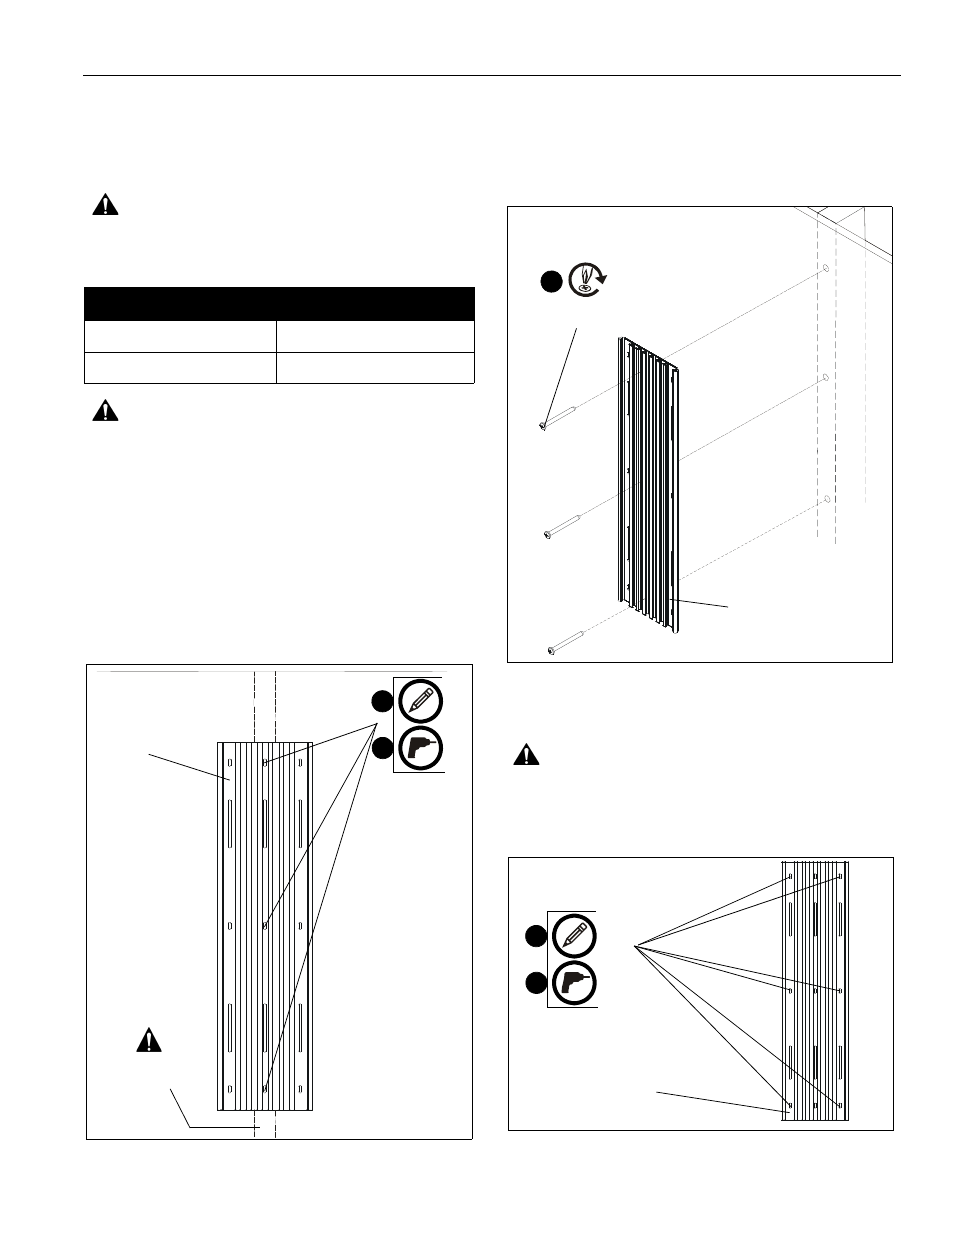
Vertical Installation using Wood Studs
1.
Using a stud finder or similar method locate stud.
2.
Align the middle mounting holes on mount with stud making
sure mounting holes are centered on stud. (See Figure 1)
Figure 1
3.
Using wall track accessory (A) as a template, mark location
of three mounting holes on wall. (See Figure 1)
4.
Drill three 7/64" holes. (See Figure 1)
5.
Install three #12 x 2 1/2" round pan wood screws (F) through
small center bracket holes and into drilled holes. (See
Figure 2)
Figure 2
Vertical Installation on Drywall
WARNING:
Drywall must be at least 1/2" thick in order to
install wall track accessory.
1.
Using wall track accessory (A) as a template, mark location
of six mounting holes on wall making sure it will be level.
(See Figure 3)
Figure 3
Two Mount Maximum
Three Mount Maximum
Horizontal, dual stud mounting
Horizontal, triple stud mounting
Vertical, drywall mounting
Vertical, single stud mounting
3
4
X 3
X 3
Mounting holes
centered on stud
(A)
(F) x 3
5
(A)
1
2
X 6
X 6
(A)