CHIEF KSA1022 User Manual
Page 12
KSA-1022
Installation Instructions
12
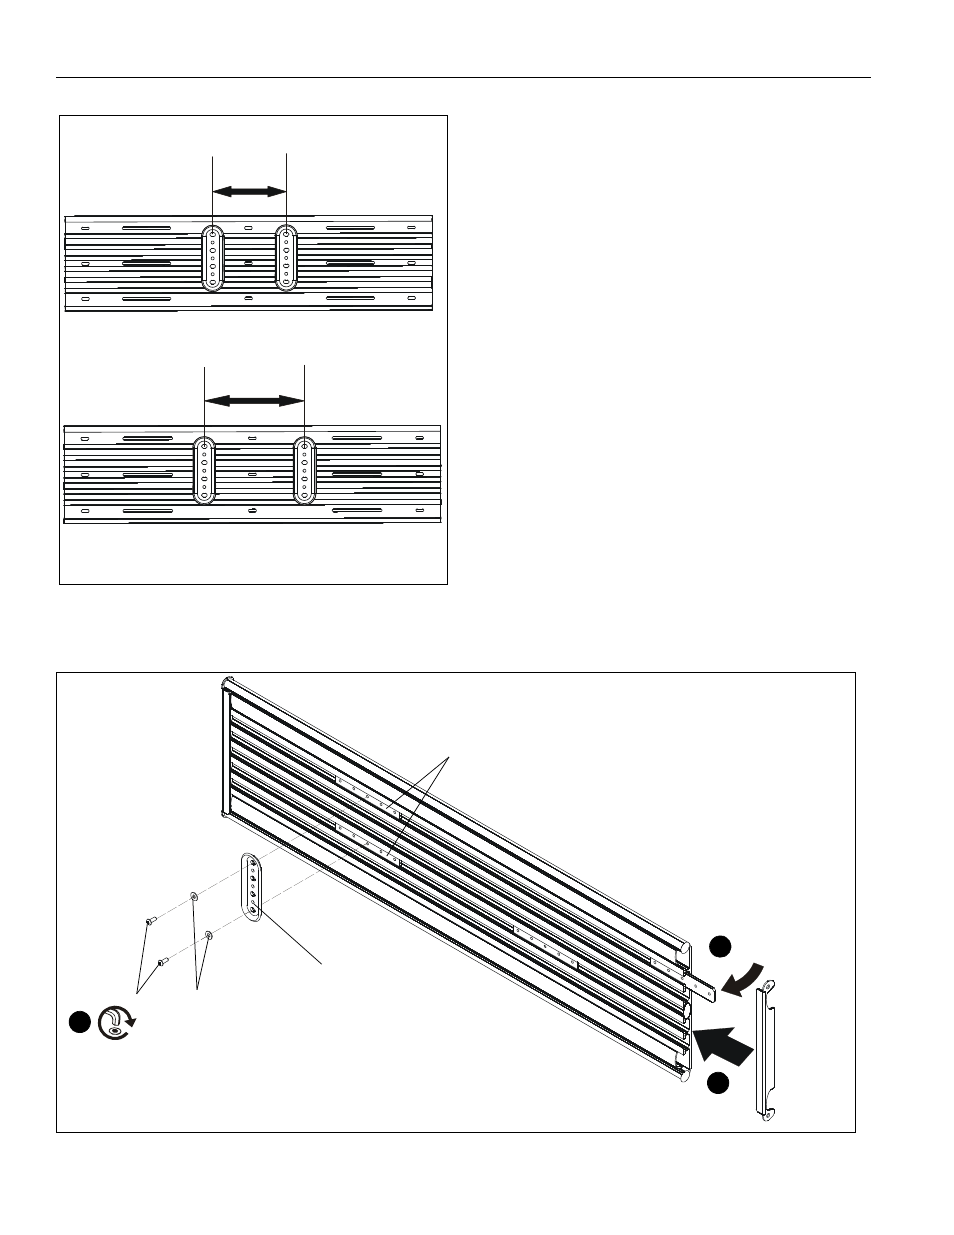
Figure 20
1.
Remove side cover to slide locking plate brackets (B) into
wall track accessory (A) at the desired mounting location.
(See Figure 21)
NOTE:
Locking plate brackets must be inserted into the top
channel and second channel from the bottom.
2.
Reinstall side cover to wall track accessory after all locking
plate brackets have been inserted. (See Figure 21)
3.
Use hex key (J) to install #10 button head cap screws (E)
through #10 washers (H) and wall plate (not included) into
center holes of locking plate brackets (B). (See Figure 21)
4.
Refer to corresponding installation manual to complete
installation of specific computer hardware.
8" minimum
Dual Stud Mounting
Triple Stud Mounting
14" minimum
Figure 21
2
(B) x 2
(E) x 2
(H) x 2
wall bracket
1
3
- PACPC1 (8 pages)
- CMS Series Columns (8 pages)
- CPA Series Columns (4 pages)
- PAC390 (2 pages)
- KTA1005 Series (8 pages)
- KFA225 Series (12 pages)
- PAC391B (8 pages)
- KTA1007 Series (4 pages)
- KSA1024B (8 pages)
- PAC392B (8 pages)
- KTP Series (8 pages)
- KSA1011 (8 pages)
- FSA1015 (8 pages)
- OFB214 (4 pages)
- KTA220_225 (8 pages)
- KSA1021 (8 pages)
- KSA1250 (16 pages)
- KSA1250 (8 pages)
- KRA500 (4 pages)
- PAC261 Series (12 pages)
- KSA1023 (12 pages)
- KSA1020 (12 pages)
- FSA1001 (1 page)
- FSA1002 (2 pages)
- FSA1003 (1 page)
- FSA1005 (1 page)
- PAC200 (6 pages)
- MAC722 (8 pages)
- FSA1009 (8 pages)
- FSA1008 (1 page)
- PAC720 (6 pages)
- KSA1018 (8 pages)
- KSA1012 (1 page)
- MAC720 (6 pages)
- KTA1000 (4 pages)
- FSA1013 (8 pages)
- KTA1001 (8 pages)
- KSA1014 (6 pages)
- KSA1017 (8 pages)
- KTA1003 (6 pages)
- KSA1019 (8 pages)
- KTA1004 (8 pages)
- PAC775 (4 pages)
- PAC790 (8 pages)