3 calibration, 2 diameter gauge – CEMB USA C72_2SE EVO (B) User Manual
Page 18
18
Use and maintenance manual Rev. 12-2009
ENGLISH
6.1.3 Calibration
To calibrate the machine, proceed as follows:
Fit an average size wheel with a metal rim on the shaft.
▪
Example: 6” x 15” (± 1”).
Set the wheel measurements as described in paragraph
▪
USE OF THE WHEEL BALANCER.
CAUTION
S
ETTING
INCORRECT
DIMENSIONS
WOULD
MEAN
THAT
THE
MACHINE
IS
NOT
CORRECTLY
CALIBRATED
, T
HEREFORE
,
ALL
SUBSEQUENT
MEASUREMENTS
WILL
BE
INCORRECT
UNTIL
CALIBRATION
IS
PER
-
FORMED
ONCE
AGAIN
WITH
THE
CORRECT
DIMENSIONS
.
Display the SETUP menu:
P
1. ress
to view the CALIBRATION
function.
A
2. dd a standard weight of 60 g (2.00 oz) to the outer
side, in any position.
.
Sh
3.
ift the standard weight from the outside to the
inside keeping the same position.
Tu
4.
rn the wheel until the standard weight is at the top
(12
o’clock).
End of calibration.
5.
To cancel calibration at any time, press
.
6.2
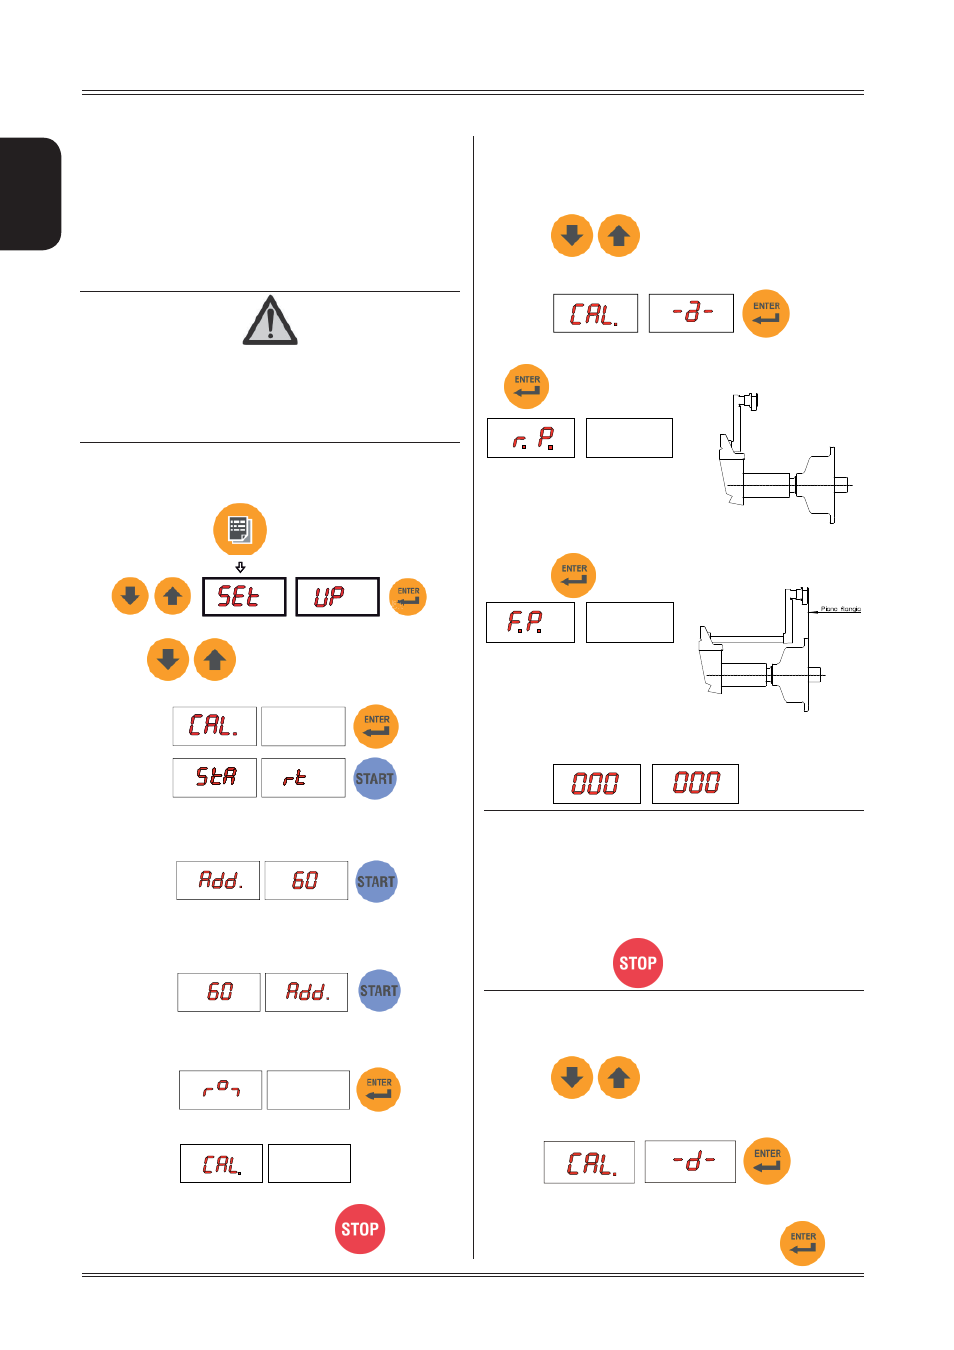
AUTOMATIC GAUGES CALIBRATION
6.2.1 Rim distance gauge
Display the SETUP menu
P
1. ress
to view the rim distance
gauge CALIBRATION function.
Leave the distance gauge in rest position and press
2.
Br
3.
ing the gauge in line with the adapter flange and
press
CORRECT CALIBRATION
Return the gauge to rest position.
The wheel balancer is ready for operation.
INDICATION
In the event of errors or faulty operation, the writing
“r.P.”:
ap
pears on the display : shift the gauge to the
rest position and repeat the calibration operation exactly
as described above. If the error persists, contact the
Technical Service Department. In the event of incorrect
input in the rim distance gauge calibration function, press
to cancel it.
6.2.2 Diameter gauge
E
Display the SETUP menu
P
1. ress
to view the diameter
gauge CALIBRATION function.
m
Plac
2.
e the round part of the gauge terminal on the
flange as shown in the figure and press
Menu