C.E. Niehoff & Co. N3134 Regulator Changeout Instructions User Manual
N3134 regulator, C. e. niehoff & co, Regulator changeout instructions
II0035A
Page 1 of 1
N3134 Regulator
Regulator Changeout Instructions
C. E. Niehoff & Co.
BRUSHLESS ALTERNATORS
on N1231-1 and N1235-1 Alternators
C. E. Niehoff & Co. • 2021 Lee Street • Evanston, IL 60202 Tech Services Hotline 800-643-4633
Removing regulator from N1231-1 alternator
1. Turn off ignition switch. Turn off master
battery disconnect switch (if equipped) or
disconnect batteries (if necessary) to ensure
battery potential is removed from charging
system.
2. Remove wires attached to E and F– terminals
on existing regulator.
3. Unplug alternator-to-regulator harness at
alternator.
4. Remove and discard mounting hardware
attaching regulator to alternator. Remove
regulator/harness.
Re-installing regulator on N1235-1 alternator
1. Set N3134 regulator on N1235-1 alternator.
Use mounting holes shown in Figure 1.
2. Install new mounting hardware (in bag sup-
plied with alternator) as shown in Figure 1.
Coat screw threads with Loctite®* 222 thread
adhesive. Follow instructions on bottle.
Tighten mounting hardware to 10.1 Nm/90
lb. in.
3. Plug alternator-to-regulator harness into
alternator and re-install wires at E and F–
terminals. Torque terminal mounting nuts to
3.4-3.9 Nm/30-35 lb. in.
4. Start engine and verify alternator output/
operation.
* Loctite is a registered trademark of the Loctite Corporation.
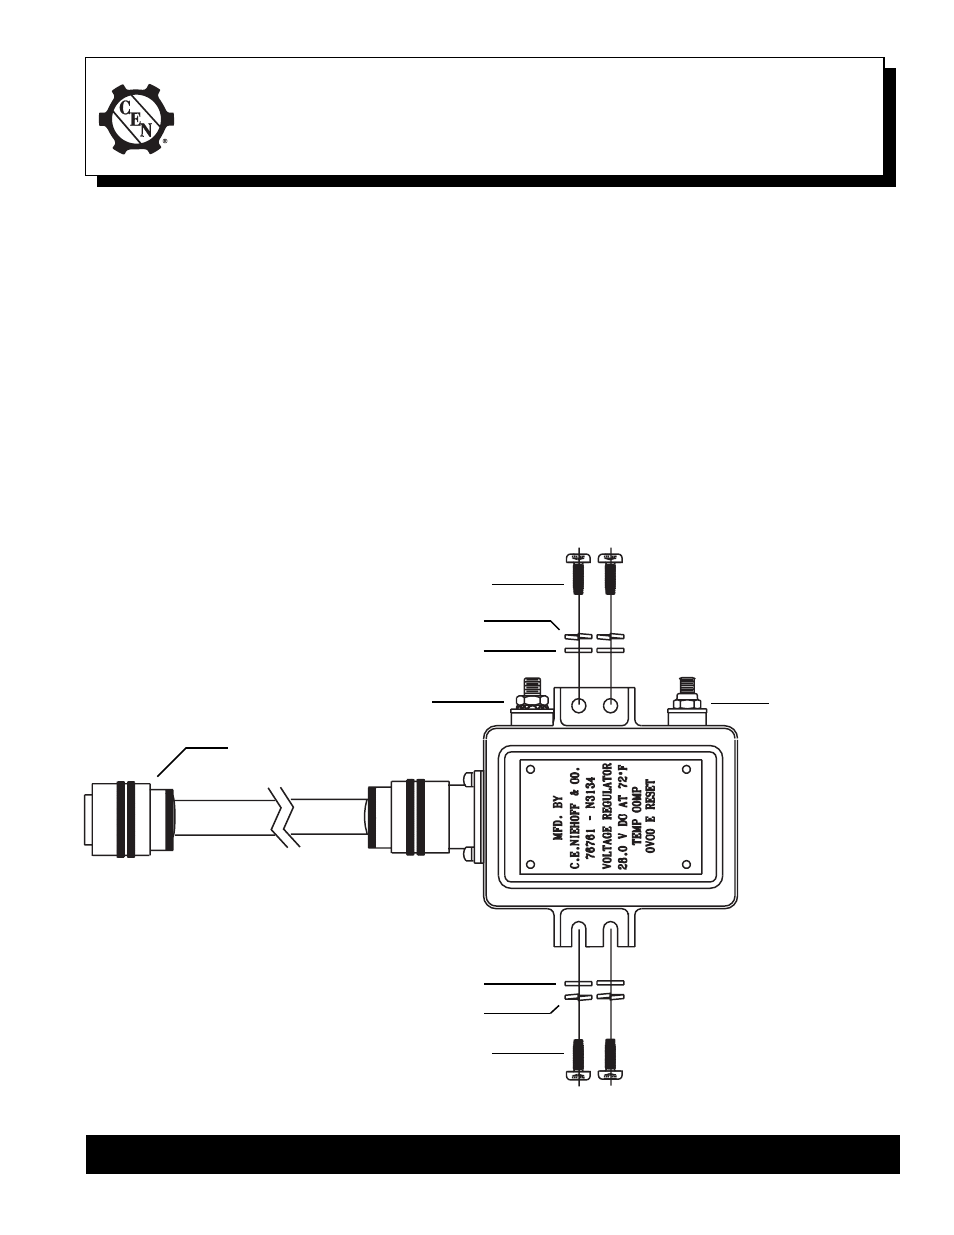
Figure 1 - Regulator/Harness Attachment
Lockwasher
Washer
Screw TXM-25 PAN 10-32 x .50 –
Torque to 10.1 Nm/90 lb.in.
Lockwasher
Washer
Screw TXM-25 PAN 10-32 x .50 –
Torque to 10.1 Nm/90 lb.in.
E Terminal:
Torque locknut to
3.4-3.9 Nm/30-35 lb.in.
F– Terminal:
Torque locknut to
3.4-3.9 Nm/30-35 lb.in.
N7066 harness —
connect this end to alternator