C.E. Niehoff & Co. C600: A4-106 Tension Link Adjuster Instructions User Manual
A4-106 tension link drive belt tension adjuster, C. e. niehoff & co
II0008A
Page 1 of 2
A4-106 Tension Link
Drive Belt Tension Adjuster
Installation Instructions
C. E. Niehoff & Co.
BRUSHLESS ALTERNATORS
for 600 Series Alternator on
Detroit Diesel Series 60 Engines
This symbol is used to indicate
presence of hazards that can cause
minor property damage.
CAUTION
These instructions will cover installation of
A4-106 tension link (drive belt tension adjuster)
for use with 600 series alternators installed on
Detroit Diesel Series 60 engines used in select
fire service applications.
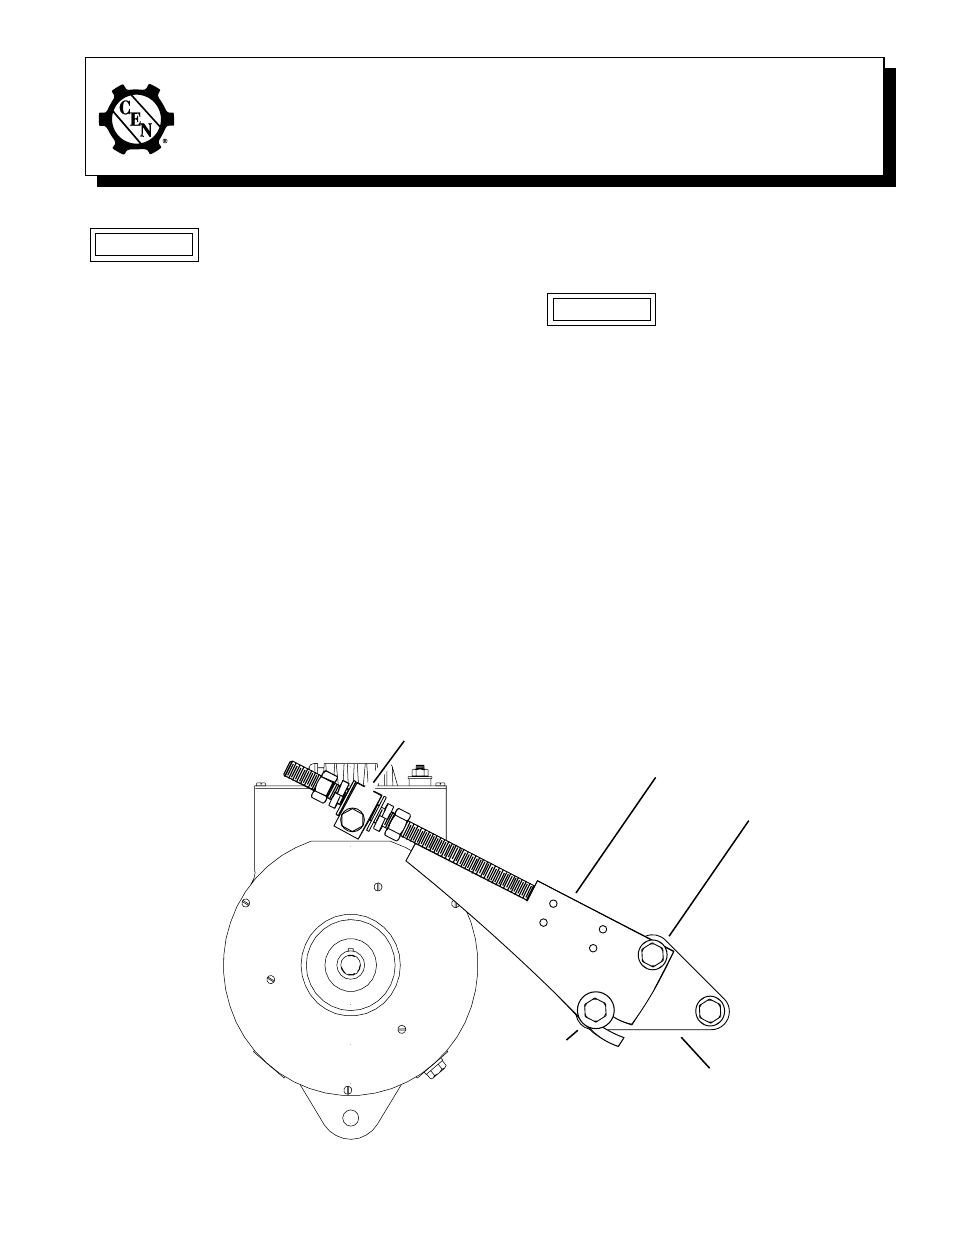
Review Figure 1 to familiarize yourself with
arrangement of tension link and basic layout of
assembly. Tension plate mounting holes are
identified by number on drawing and in steps
that follow.
Installation steps are as follows:
1. Release tension on alternator drive belt by
loosening alternator attaching hardware on
present tension link and alternator mount-
ing lugs (feet).
2. Remove drive belt from alternator pulley.
3. Remove mounting hardware from both ends
of present tension link and remove tension
link.
Do not allow unsupported
alternator to swing down on
mounting lugs and impact mounting bracket or
engine. Damage to mounting lugs or alternator
may occur.
4. Using holes #1 and #2, mount tension plate
(triangular bracket) on gear case cover of
engine using 7/16” Grade 8 or M10, Class
10.9, bolts long enough to pass through
tension plate and engine gear case cover.
Note: Bolt used in hole #1 will be 3/8” longer
than original engine bolt to allow for thick-
ness of tension plate or approximately 4-1/2”
long. Bolt used in hole #2 will be ¾” longer
than original engine bolt to allow for thick-
ness of tension plate and thickness of the
slotted end of the tension link or approxi-
mately 5-1/4” long.
Remove slack in #1 bolt but do not torque
bolt at this time.
CAUTION
Figure 1 - A4-106 Tension Link Assembly Installed on Alternator
Û
Hardened washer
from kit
Û
Trunnion
(hardware provided
in kit)
Û
Tension plate
(bracket)
Ы
1
2
3
Ы
Bolt, washer
and locknut
provided in kit
Tension link