Real sampling, Narrow space measuring typical applications – Atec Mitutoyo-SJ-410 User Manual
Page 5

5
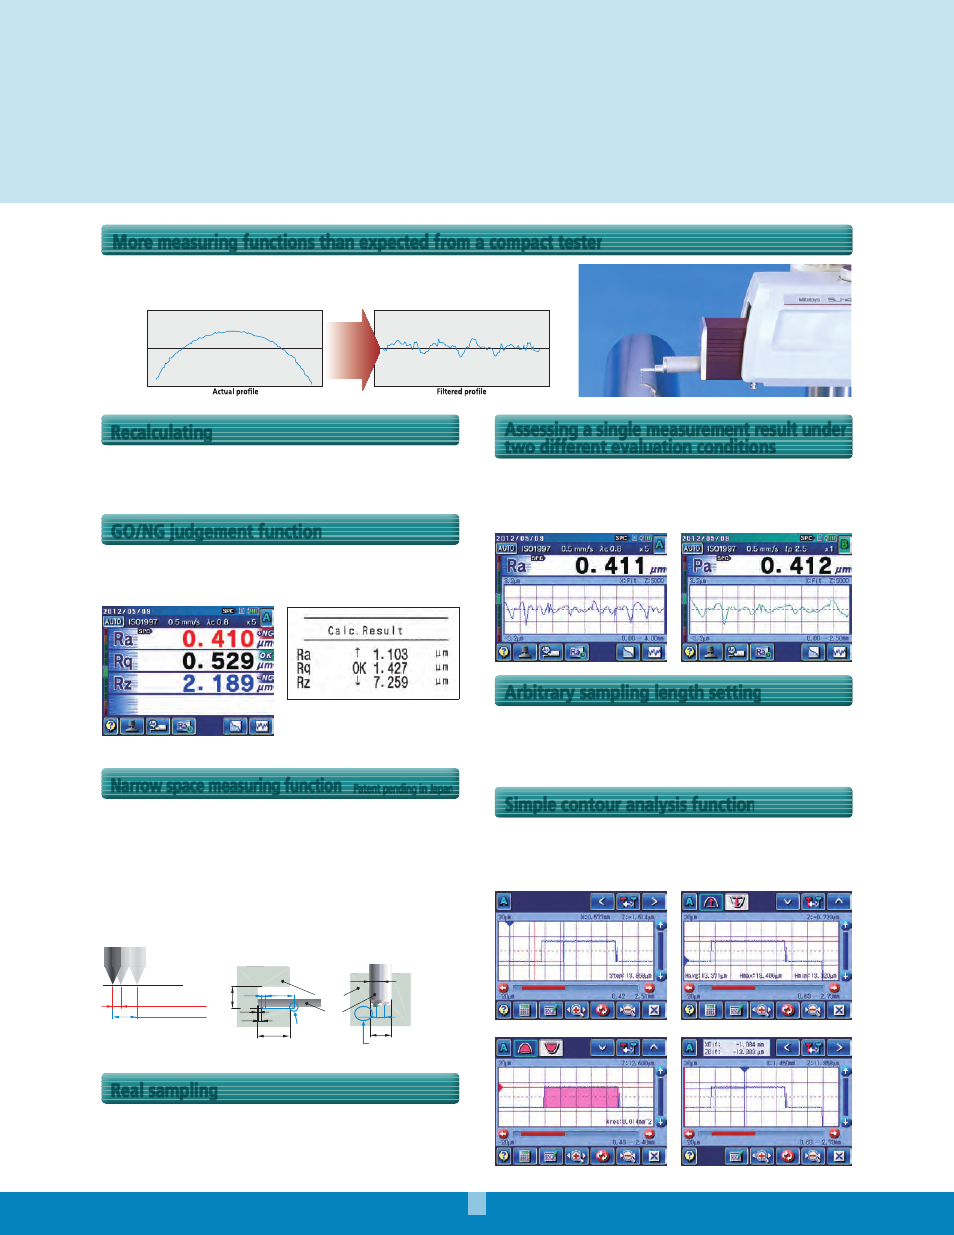
Usually, a spherical or cylindrical surface (R-surface) cannot be evaluated, but, by removing
the radius with a filter, R-surface data is processed as if taken from a flat surface.
Step
Dimensions
Step volume
Coordinate difference
More measuring functions than expected from a compact tester
R-Surface
compensation
R-Surface
compensation
Previously measured data can be recalculated for use in other
evaluations by changing the current standard, assessed profile and
roughness parameters.
A single measurement enables simultaneous analysis under two
different evaluation conditions. A single measurement allows calculation
of parameters and analysis of assessed profiles without the need for
recalculation after saving data, contributing to higher work efficiency.
Point group data collected for surface roughness evaluation is used
to perform simplified contour analysis (step, step height, area and
coordinate variation). It assesses minute forms that cannot be assessed
by a contour measurer.
This function allows a sampling length to be arbitrarily set in 0.01mm
increments (SJ-411: 0.1mm to 25mm, SJ-412: 0.1mm to 50mm).
It also allows the SJ-410 series to make both narrow and wide range
measurements.
The “OK” symbol means the measurement
is within the limits set; “NG” means it is not,
in which case an arrow points to either the
upper or lower limit in the printout.
An “OK/NG” judgment symbol is displayed when limits are set for
the roughness parameter. In case of “NG,” the calculated result
is highlighted. The calculated result can also be printed out.
Surface roughness measurement requires a run-up distance before
starting the measurement (or retrieving data). When the SJ-410
Series measures, its run-up distance is normally set to 0.5mm. This
distance, however, can be shortened to 0.15mm using the narrow
part measurement function (starting from the origin point of the drive
unit). The function extends the possibility of measurement of narrow
locations such as grooves in piston ring / O-ring mounts.
This function samples stylus displacement for a specified time
without engaging detector traverse, which enables use as a
simplified vibration meter or displacement gage incorporated in
another system.
Recalculating
Assessing a single measurement result under
two different evaluation conditions
Simple contour analysis function
Arbitrary sampling length setting
GO/NG judgement function
Narrow space measuring function
Patent pending in Japan
Real sampling
3.5
0.5
0.5
2.5
0.1
Example: surface roughness measuring
of piston-ring groove
Example: surface roughness measuring
of mounting groove for O-ring
Overruns surface
using 0.5mm run-up
Run-up of 0.5mm is not
enough for performing
the measurement
Evaluation length
λ
c=2.5mm
1 sampling length
Evaluation length
λ
c=0.8mm
1 sampling length
2.5
ø1.2
1.3
Stylus
Workpiece
Normal run up: 0.5mm
Run up for narrow parts
: 0.15mm
1.
8
The run-up distance can
be shortened to 0.15mm
by measuring from the
origin point.
•
Narrow space measuring
Typical applications
