Alpha Technologies CFR Intelligent Interface Device User Manual
Page 23
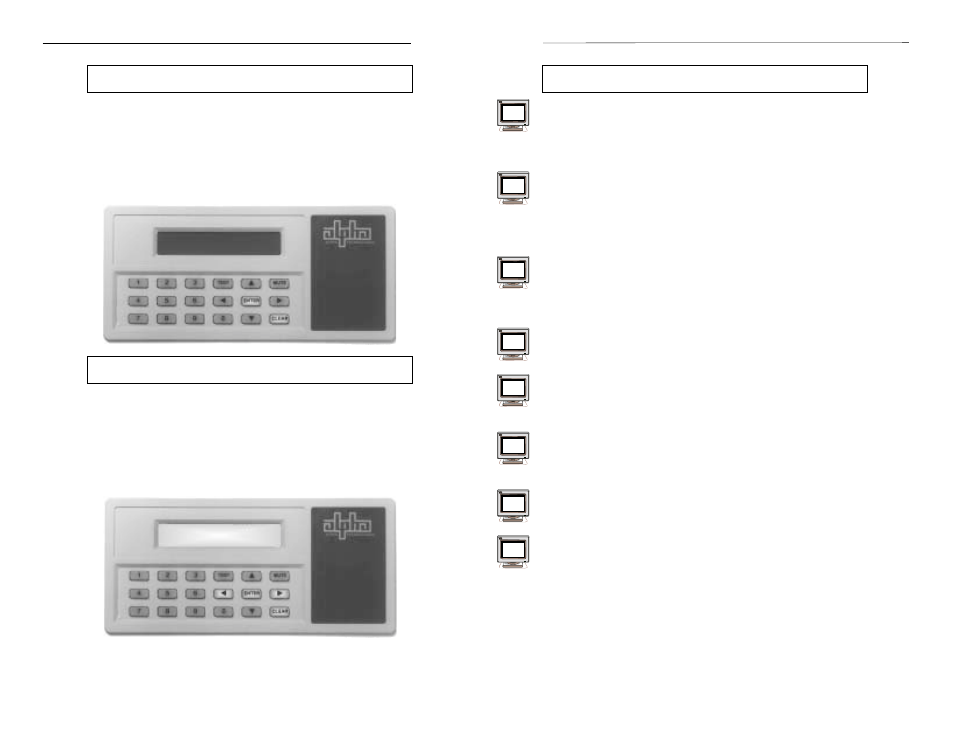
Alpha Technologies (DEFAULT) Screen
The "ALPHA TECHNOLOGIES" default screen displays date and time
information. The default screen is continually displayed until another screen
is selected from the front panel keypad. Whenever a screen is left idle for 2
minutes, the unit will return to the default screen. Note: The display will also
go into a "sleep" mode (extinguishing the backlighting on the LCD and keypad
to conserve energy) whenever it is left idle for 2 minutes or more. When a
front panel key is pressed, the display will light, as will the keypad to guide
you through the menu.
Opening Menu
Whenever a front panel key is pressed with the default screen displayed,
the OPENING MENU appears and prompts you to make a selection. At the
same time, the keys on the keypad that relate to the menu prompts are
lighted. Press the > arrow to advance to the various main menus (SYSTEM
PARAMETERS, INPUT PARAMETERS, OUTPUT PARAMETERS, etc.).
Press the < to step back through the main menus. Press ENTER when the
correct menu appears.
LINE PRESENT
LINE PRESENT
LINE PRESENT
LINE PRESENT
LINE PRESENT
LINE FAILURE
LOW BATTERY
WARNING
SHUTDOWN
SERVICE
ALPHA TECHNOLOGIES
ALPHA TECHNOLOGIES
ALPHA TECHNOLOGIES
ALPHA TECHNOLOGIES
ALPHA TECHNOLOGIES
05-07-92 08:02:10
05-07-92 08:02:10
05-07-92 08:02:10
05-07-92 08:02:10
05-07-92 08:02:10
OPENING MENU
OPENING MENU
OPENING MENU
OPENING MENU
OPENING MENU
SYSTEM PARAMETERS
LINE PRESENT
LINE PRESENT
LINE PRESENT
LINE PRESENT
LINE PRESENT
LINE FAILURE
LOW BATTERY
WARNING
SHUTDOWN
SERVICE
Press CLEAR to return to the DEFAULT screen.
3. OPERATION
3. OPERATION
25
25
25
25
25
16
User Parameters,
continued
Set Phone Number
This menu selection allows you enter the phone number that the modem
will dial when an alarm condition occurs. The Intelligent Interface Device
assumes that the phone number starts with "ATD". For numeric pagers, use
commas (,) for time delay.
Set Alarm Triggers
This menu selection allows you to set from none to the maximum
number of alarms available. You can scroll through the available alarms
using the illuminated arrow keys and select either Y for Yes (notify), or N for
No (do not notify). The selection is accomplished by toggling the display and
pressing ENTER.
Set RS-485 Port
This menu allows you to setup the RS-485 port including setting the
baud rate and parity of the communications device, and address of the
Intelligent Interface Device. Note: If a modem is installed, this function is not
available.
Set RS-485 Baud Rate
Select the proper baud rate for your communications device. The baud
rates available for RS-485 are: 300, 600, 1200, 2400, 4800, and 9600.
Set RS-485 Parity
Select the proper parity for your communications device. The available
choices are 8N1 (8 data bits, no parity, 1 stop bit); 7E1 (7 data bits, even parity,
and 1 stop bit); and 7O1 (7 data bits, odd parity, and 1 stop bit).
Set Address
This menu allows you to set the address of the Intelligent Interface Device.
The address can be from 1 to 99, but cannot duplicate the address of any other
devices connected to the line.
Set Alphanumeric Pager ID String
This can only be done through the RS-232 or modem interface. The 7-digit
pager ID string identifies which particular pager will be paged.
Set Modem Message String
This can only be done through the RS-232 or modem interface. The string
(up to 80 characters) can be used to identify the location of the unit paging. The
message is a header to the alarm information sent to the alphanumeric pager.
X
X
X
X
X
X
502
503