Vi. teaching the detectors, Dip switch – ABUS FU8403 Wireless Display Module User Manual
Page 11
11
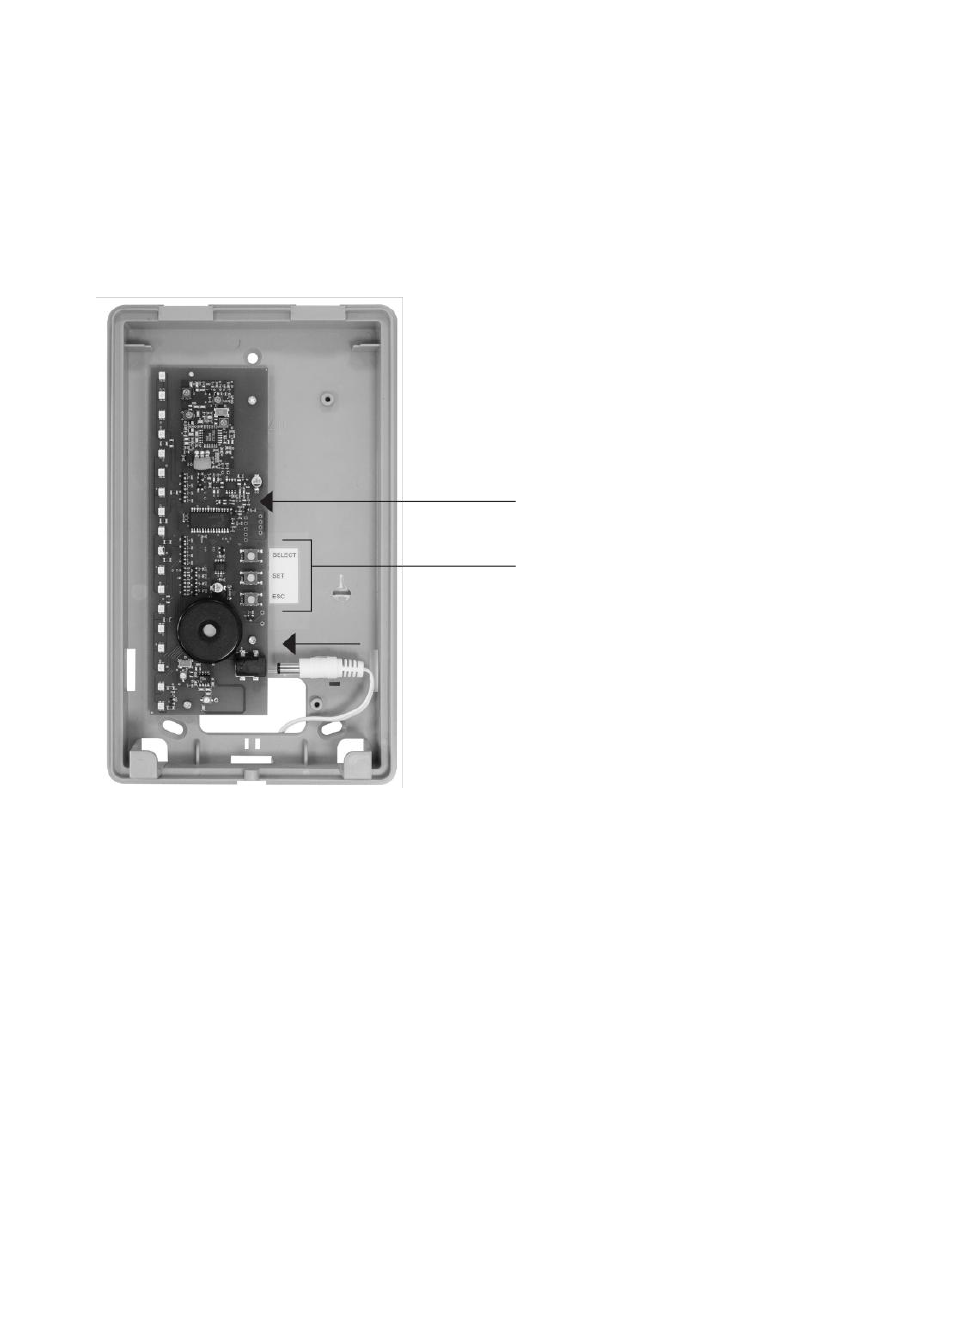
• SELECT key
(Ta1):
Selects menus / values / zones
• SET key
(Ta2):
Confirms the selection, partially with a delay of 4 seconds (keep pressed)
• ESC key
(Ta3):
Abort, go back one step
VI. Teaching the detectors
Remove the bottom from the top of the housing of the radio controlled display module before starting teaching.
To do that, unscrew the screws on the bottom and pull off the housing section.
Connect the power supply and plug in the jack on the radio controlled display module.
1. General key functions:
2. DIP switch functions:
DIP switch
Key
• DIP 1
Supervision
– Monitoring on/off (see Point VI. Remarks)
• DIP 2
Malfunction
– Monitoring on/off
Both are factory activated (recommended setting).
3. Main menu structure in the radio controlled display module:
• Submenu LED 01:
Teach detector
• Submenu LED 02:
Delete detector
• Submenu LED 03:
Wireless level indicator, detector
• Submenu LED 16:
Delete all (factory reset)
Navigation through the menus:
• Select the main menu from the display mode: Press SELECT key 1 once
• The submenu LED 01 (teach detector) can be opened with SET key 2
• Selecting the other submenus: With SELECT key 1, jump to the desired submenu;
corresponding LED is shining green
• Open the desired submenu with SET key 2
Hint: If you have opened an incorrect submenu by mistake, you can exit it using the ESC key.
You can always return to the display mode by pressing the ESC key several times.