Installation instructions evo-sq – Gotham EVO-SQ User Manual
Page 3
CJ5201108 REV. A
7/12 1 OF 2
@2012 Acuity Brands Lighting, Inc.
All Rights Reserved
INSTALLATION INSTRUCTIONS
EVO-SQ
xLay-in panel T-bar ceiling:
1. Cut ceiling opening slightly larger than the outside opening of the mounting frame.
2. Position mounting frame through opening in ceiling.
3. Once mounting frame has been secured in structure, adjust the mounting frame vertically to align the bottom edge
to either flush or slightly above (1/8" max) the ceiling line (see Figure 3). The notch located in the draw-down flange of
the housing can be used to assist with alignment of multiple fixtures (see Figure 4).
4. If additional security is required, a No. 8 sheet metal screw, wire tie or wire (not supplied) may be used to tie the
latch arm to the mounting frame.
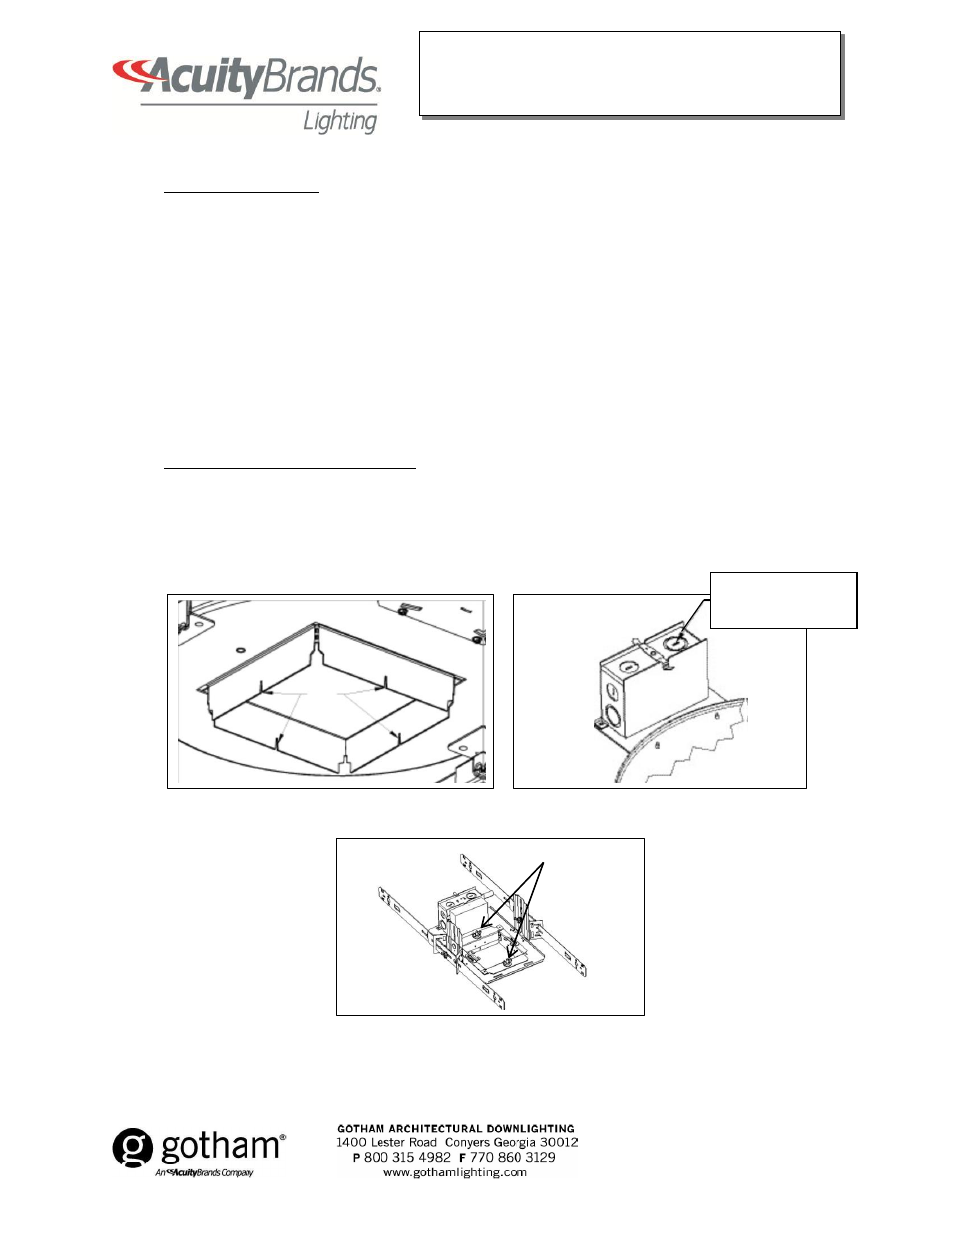
5. Remove knockouts on junction box to feed power supply to fixture (see Figure 5). Supply wire must meet applicable
electrical codes and be rated for a minimum of 90°C. Junction box is thru-wire rated for 8-No. 12 AWG conductors (4
in-4 out).
6. Complete necessary wire connections. Snap the door onto the junction box.
7. To adjust housing alignment after installation, see “Post Installation Adjustment.”
POST INSTALLATION HOUSING ALIGNMENT
In the event that the trim is in need of alignment after installation, adjustments can be made to the housing.
1. Remove trim by gripping edge of flange and pulling it out of housing.
2. To adjust housing for trim alignment, reach through aperture and loosen two speed nuts (see Figure 6). Adjust
housing as required and retighten nuts.
3. Reinstall trim. If needed, refer to trim installation instructions.
Figure 4
Figure 5
Figure 6
Sight
Notches
Remove knockouts
as needed
Speed Nuts