Installation instructions evo-sq – Gotham EVO-SQ User Manual
Page 2
CJ5201108 REV. A
7/12 1 OF 2
@2012 Acuity Brands Lighting, Inc.
All Rights Reserved
INSTALLATION INSTRUCTIONS
EVO-SQ
Installation:
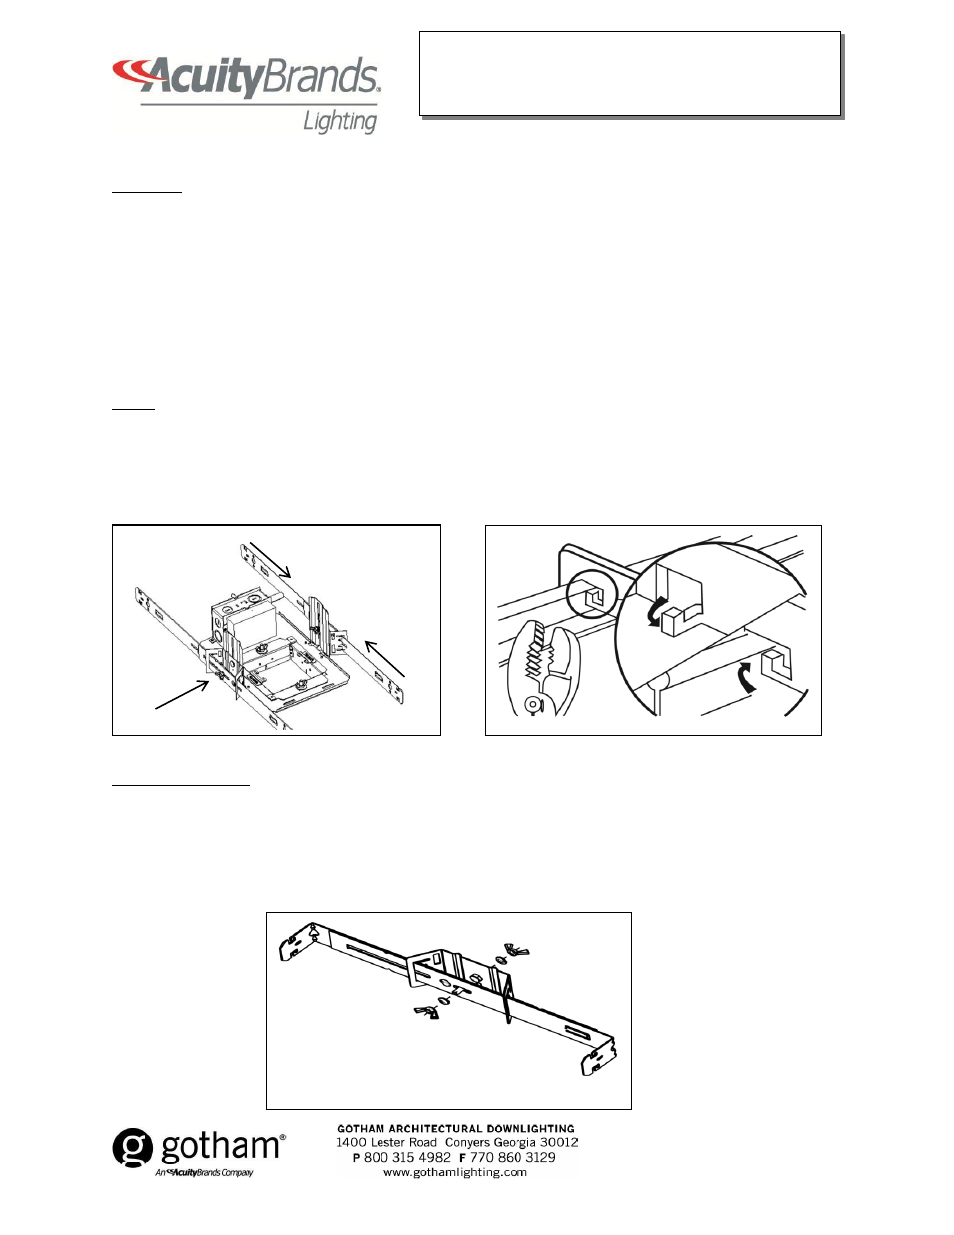
1) Place (2) short hanger bars together so that the formed tabs slip into the slots to form one long rigid hanger bar. Aligning
the ”V” cutouts in the hanger bar will set the spacing for a 24” ceiling. (See Figure 1.)
2.) Assemble the hanger bars into the adjustable mounting brackets by sliding the mated long rigid hanger bar through the tall
vertical leg of the C-shaped cutout in the bracket and secure with the supplied hardware, the wing nut facing away from the
fixture for adjustment. (See figure 3)
3.) Adjust the hanger bars as needed and tighten the wing nuts to secure the spacing. (See Figure 1.)
4.) Locate the T-bar slots near the ends of the bar hangers, bend the tabs out at 45 degree angle from the bar hanger at each
end. Snap the bar hangers over the ceiling T-bars for a secure fit. (See Figure 2.)
5.) Repeat this assembly for the opposite side of the fixture.
Wiring:
1.) Remove the snap-on junction box captive door.
2.) Pry out the desired knockout with a flat blade screwdriver for hard wire access. (Figure 5)
3.) Driver Black wire connects to Line Voltage. Driver White wire connects to the Neutral wire. The Ground wire connects to the
Bare Copper wire connected to the junction box. Bundle all wire into junction box.
4.) Close the snap-on junction box captive door.
Wood Joist Installation:
1) Bend (4) bar hangers per fixture at right angles at the row of (3) holes 2 inches from one end of the bar hangers.
(See Figure 3.)
2) Insert bar hangers into adjustable mounting brackets as shown. (See Figure 3)
3) Adjust the hanger bars as needed and tighten the wing nuts to secure for 16” to 24” center-to-center joist spacing.
4) Use fasteners, supplied by others, to secure the fixture to the wood joists in at least (4) places.
Figure 1
Figure 2
Figure 3