Using the ir 102 remote control, Remote control buttons, Locking ir remote access – Extron Electronics SW DVI A Series User Guide User Manual
Page 16: Enabling front panel lockout (executive mode), Using the ir 102 remote control -4, Remote control buttons -5, Operation, cont’d
SW DVI A Series • Operation
Operation, cont’d
3-4
SW DVI A Series • Operation
3-5
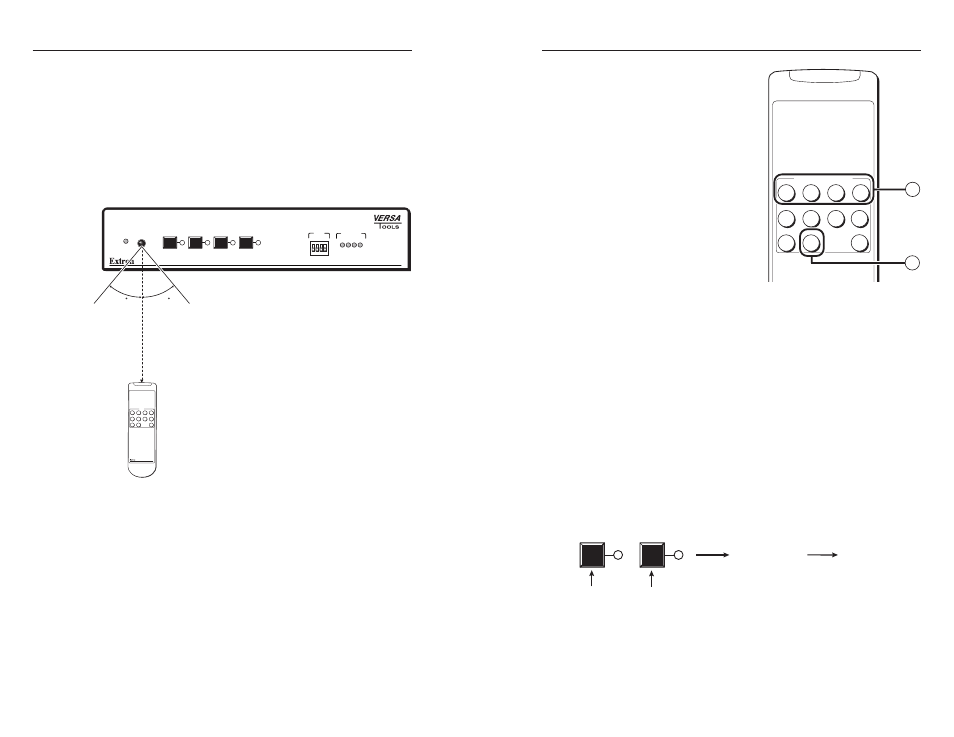
Using the IR 102 remote control
The hand-held IR 102 Remote Control lets you remotely perform
functions that are also available through the front panel buttons
and SIS commands.
The IR receiver port on the front panel is located to the right
of the Auto Switch Active LED. It receives signals from the
remote control if they are sent from within a 40 degree arc to the
right or left of direct line of sight between the remote and the
switcher’s receiver, and from no more than 30 feet (9 m) away.
(See the illustration below.)
AUTO
SWITCH
ACTIVE
SW4 DVI A
1
2
3
4
INPUT
EQ
SIGNAL
PRESENCE
IR
1
1
HIGH
LOW
2 3 4
2 3 4
SW 4 DVI A
40
40
30 feet
maximum
IR 102 Remote
Channel
IR 102
0
1
2
3
4
5
6
7
8
9
+10
Universal Remote
Area for remote signal reception
IR remote control is disabled when autoswitching is in effect.
Remote control buttons
On the IR 102 Remote
Control, buttons 1 through 4
select inputs. Button 0 mutes
(deselects) all inputs.
a
Input Selection buttons —
Press one of these buttons to
select an input to tie to the
output. (Only buttons 1 and
2 are used with the SW2.)
b
Input Mute button — Press
this button to deselect all
inputs, effectively muting the
output.
Locking IR remote access
The SW2/SW4 can be set to lock out users from using the IR 102
Remote Control to control the switcher. Remote access can be
enabled and disabled via SIS commands (see chapter 4, “SIS
Configuration and Control”). When remote access is set to off,
all switcher controls remain available through the SW2/SW4
front panel.
Enabling front panel lockout (executive mode)
Executive mode disables all front panel controls, locking out
the user from those functions. Putting the switcher in this
mode enhances security by protecting against inappropriate
or accidental changes to settings. When the SW2/SW4 is in
executive mode, RS-232 and IR control remain available.
To lock or unlock the front panel, press and hold Input buttons
1 and 2 simultaneously for 3 seconds, then release. The front
panel LEDs blink three times, indicating that executive mode
has been enabled or disabled.
1
2
Release buttons.
Press and hold simultaneously
for 3 seconds.
LEDs blink 3 times.
Setting executive mode
Universal Remote
INPUT/OUTPUT SELECTION
1
2
3
4
5
6
7
8
9
0
+10
IR 102
1
2