Replacing the connectors – Extron Electronics RJ-11 User Manual
Page 11
RJ-45 to RJ-11 Conversion Kit • HSA 800, 802 Installation
RJ-45 to RJ-11 Conversion Kit • HSA 800, 802 Installation
HSA 800, 802 Installation, cont’d
2-5
2-4
Mounting
Surface
Clamshell
Full Thread
Mounting Bolts
AAP Cables
Flat Washer
IEC Power Cord
RJ-45 Connectors
Shroud
HSA 802
Remove 16
screws.
125 - 50/60 Hz 0.5A
CO
MPU
TER
INP
UT
SEL
ECT
AU
DIO
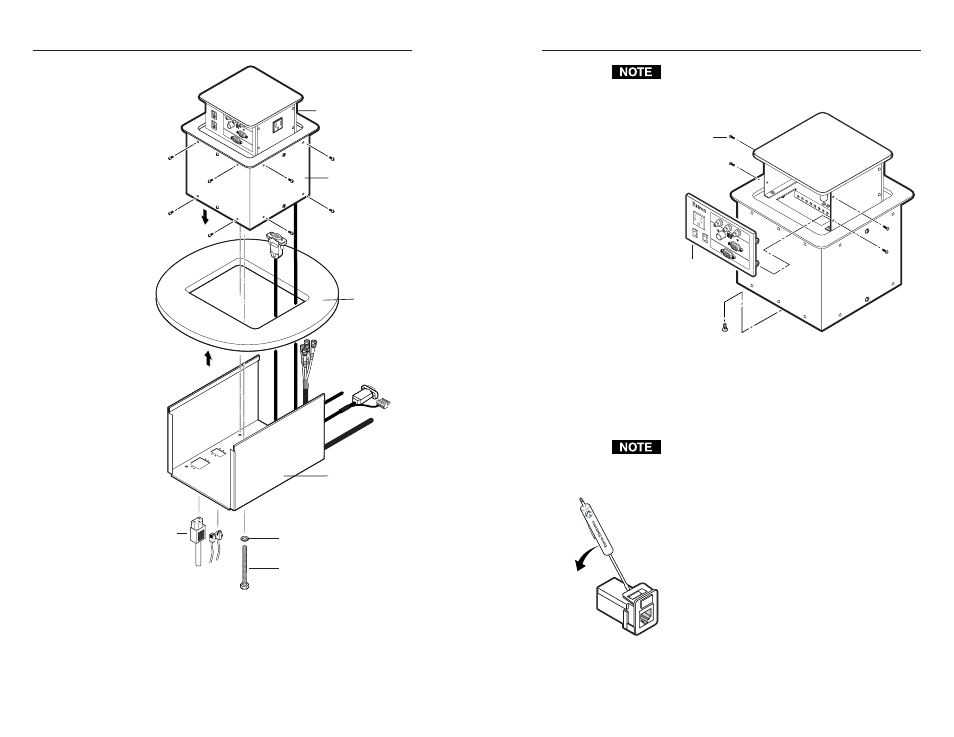
Figure 2-2 — Removing the HSA 802 from the table
5
.
On all connector/AAP panels, remove the four screws on
the right and left sides of the front panel (figure 2-3).
Retain the screws. Lift the panels away from the enclosure
as far as the connected cables allow and then allow the
panels to dangle, supported by their connected cables.
Ensure that the edges of the connector panels do not
scratch the finished surface of the top panel flange when
removing the panels.
Remove panel
from enclosure.
Remove two
Screws ea. side.
125 - 50/60 Hz 0.5A
CO
MPU
TER
INP
UT
SEL
ECT
AU
DIO
HSA
800
Replacement Face Plate
Screws (4) Under Enclosure
Figure 2-3 — Removing the connector/AAP panel
Replacing the Connectors
1
.
Remove and retain the four screws in the corners of each
side surface of the enclosure “cube”. Remove the two
halves of the shroud.
Do not remove the screws in the center of each side.
They do not secure the shroud in any way; rather, they
provide structural support to the enclosure.
2
.
Cut the tie wraps that bundle the CAT 6 cable to be
replaced.
3
.
Inside the front panel, identify the RJ-45 connector to be
replaced. With a tweeker, push down on and gently twist
on the front of the RJ-45 connector detent to disconnect the
connector from the rear of the front panel bezel plug-in.
4
.
Inside the bottom frame, identify the RJ-45
connector to be replaced. With a tweeker,
push down on and gently twist on the front of
the RJ-45 connector detent to disconnect the
connector from the bottom frame bezel plug-
in.
5
.
Note how the disconnected CAT 6 cable is routed inside
the HSA and then gently pull the cable free.