2 setting up ad-hoc with setup utility -13, 2 setting up ad-hoc with setup utility – Asus M2N32-SLI Deluxe User Manual
Page 29
3-13
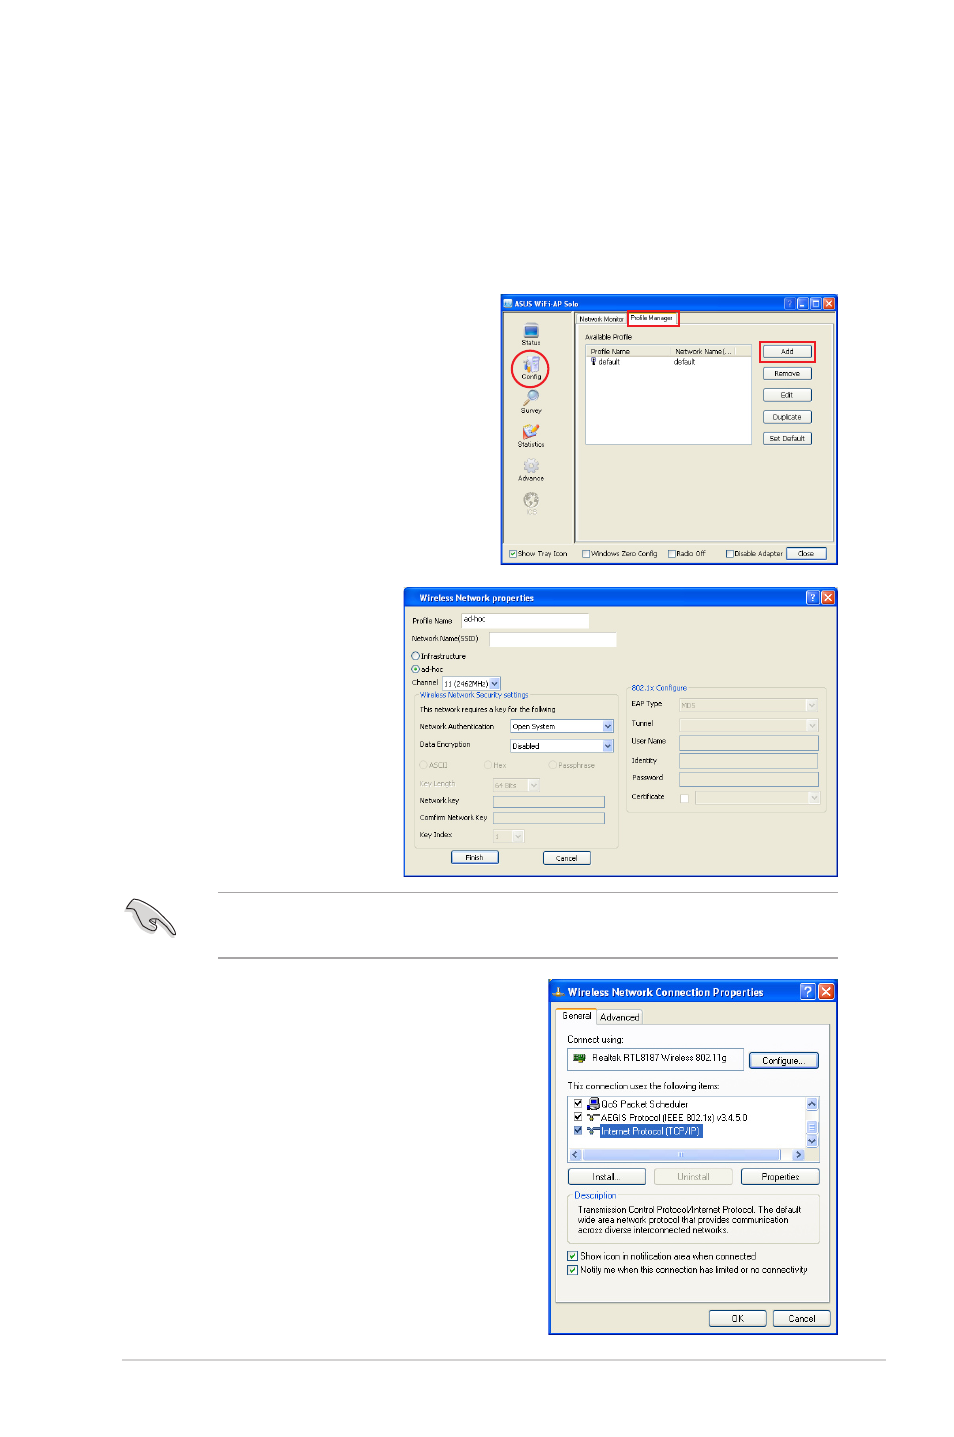
3.4.2 Setting up Ad-hoc with setup utility
This section describes how to set up WiFi-AP Solo™ as an Ad-hoc node and let
other wireless station to connect, and how to connect an existing Ad-hoc node.
Setting up WiFi-AP Solo™ as an Ad-hoc node
1. Open the setup utility and
click the
Config button. Select
Profile Manager tab. Click Add
button to create a profile.
2. Setup the
operation
channel and the
wireless network
security settings.
When configuration is
complete, click
Finish
to apply the settings
and return to the utility.
The WiFi-AP Solo™ is
an Ad-hoc node now.
3. The default IP address of WiFi-AP
Solo™ is 192.168.0.1. To modify the
IP address for your WiFi-AP Solo™
, double-click the wireless icon in the
system tray -> click
Properties ->
double-click Internet Protocol (TCP/
IP).
Refer to Appendix-A for the available wireless LAN channels in your country
or region.