Item description, Trunk mount 3 bike carrier – Pro Series 1370600 BIKE CARRIER AXIS 3 User Manual
Page 2
:
:
1370600
Cequent Performance Products
47774 Anchor Court
Plymouth, MI 48170
Technical Service: (888) 521-0510
1370600N Rev A 09-09
Printed in Taiwan
Trunk Mount 3 Bike Carrier
Page 2 of 12
Mounting Rack to Vehicle:
1.
Loosen lower support tube adjustment knobs and rotate lower support tube to open position. Tighten
adjustment knobs.
2.
Rest lower support tube on vehicle bumper, on vehicle license plate, or a vertical portion of trunk or
hatch. Find most solid position as possible. DO NOT rest against glass, plastic bumper without
support, vehicle badges, or thin flexible sheet metal.
3.
Loosen upper support tube adjustment knobs and rotate upper support tube so that it contacts vehicle.
Main support assembly arms should be at a slight angle upwards (10 -20 deg) Tighten adjustment
knobs.
4.
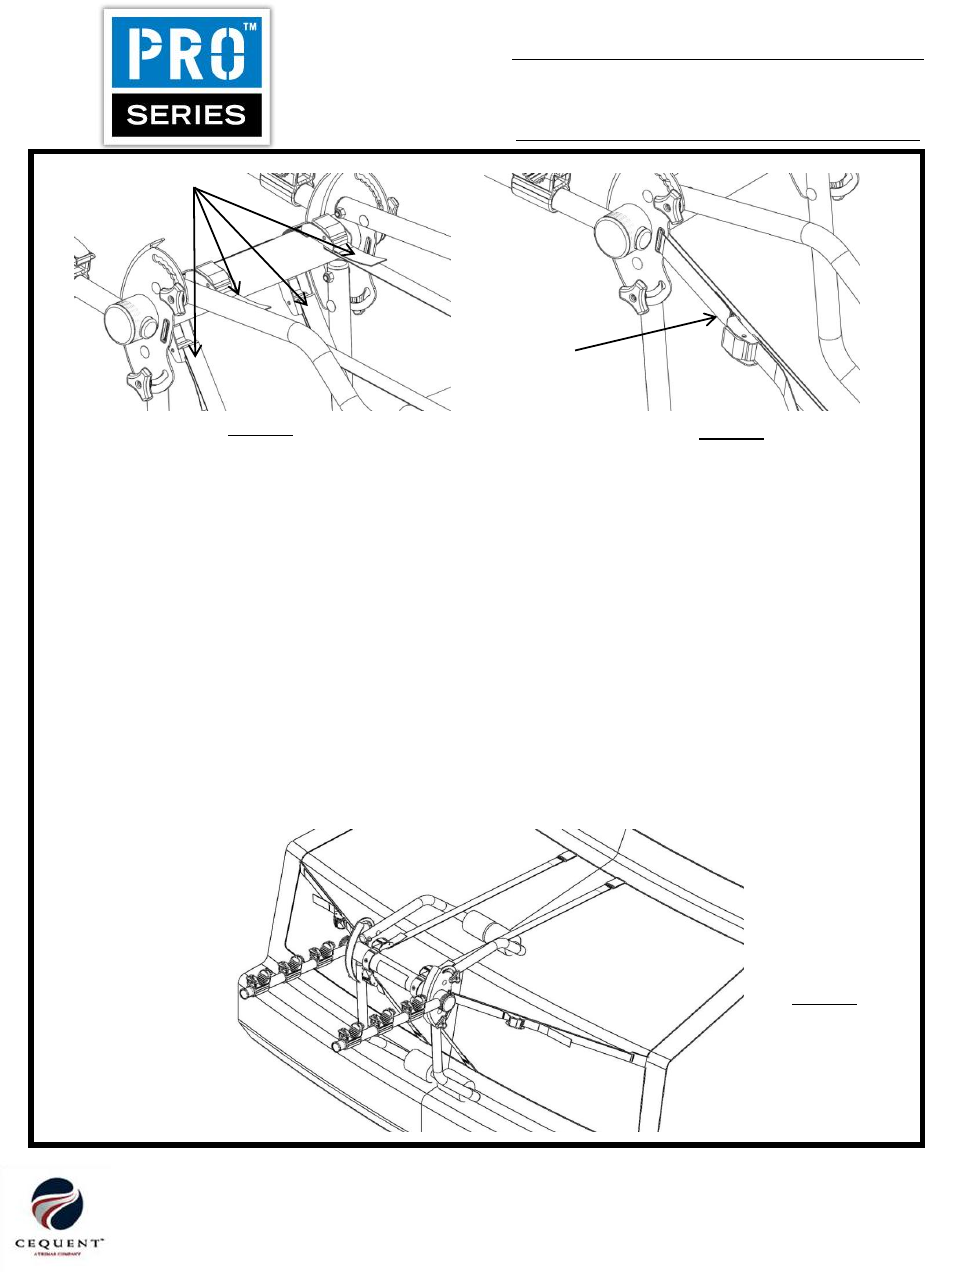
Attach upper hook straps to top edge of trunk or hatch. If a spoiler is present, straps should be routed
under spoiler if possible. Never attach to glass, plastic or trim.
5.
Attach lower hook straps to bottom edge of trunk or hatch.
Ensure strap is not close to vehicle
exhaust.
6.
Center rack on vehicle and slowly tighten each strap evenly, alternating as you tighten (top left, lower
right, lower left, top right).
7.
Attach side strap hooks to side edge of trunk or hatch. Evenly tighten, alternating from side to side.
FIGURE 2
FIGURE 3
FIGURE 4
UPPER / LOWER
HOOK STRAPS
SIDE STRAPS
ITEM
DESCRIPTION