Turbosmart WASTEGATES – EXTERNAL - Internal Wastegate Actuator (universal & model-specific) User Manual
Page 3
www.TURBOSMARTONLINE.com
3
IMPORTANT: A press or clamping device must be used when removing or installing the collar as clamping the cap down removes the
load off the collar from the diaphragm and allows the collar to be removed.
1.
If the engine has been running, allow it to cool down before removing the actuator from its bracket.
2.
Use and press or a vice to clamp down the cap to the body and remove collar.
3.
Remove the actuator from the clamping device carefully as the cap is under spring load.
4.
Remove cap, diaphragm and upper spring support with rod.
5.
Change the springs making sure that they sit in the right grooves in the lower spring support
6.
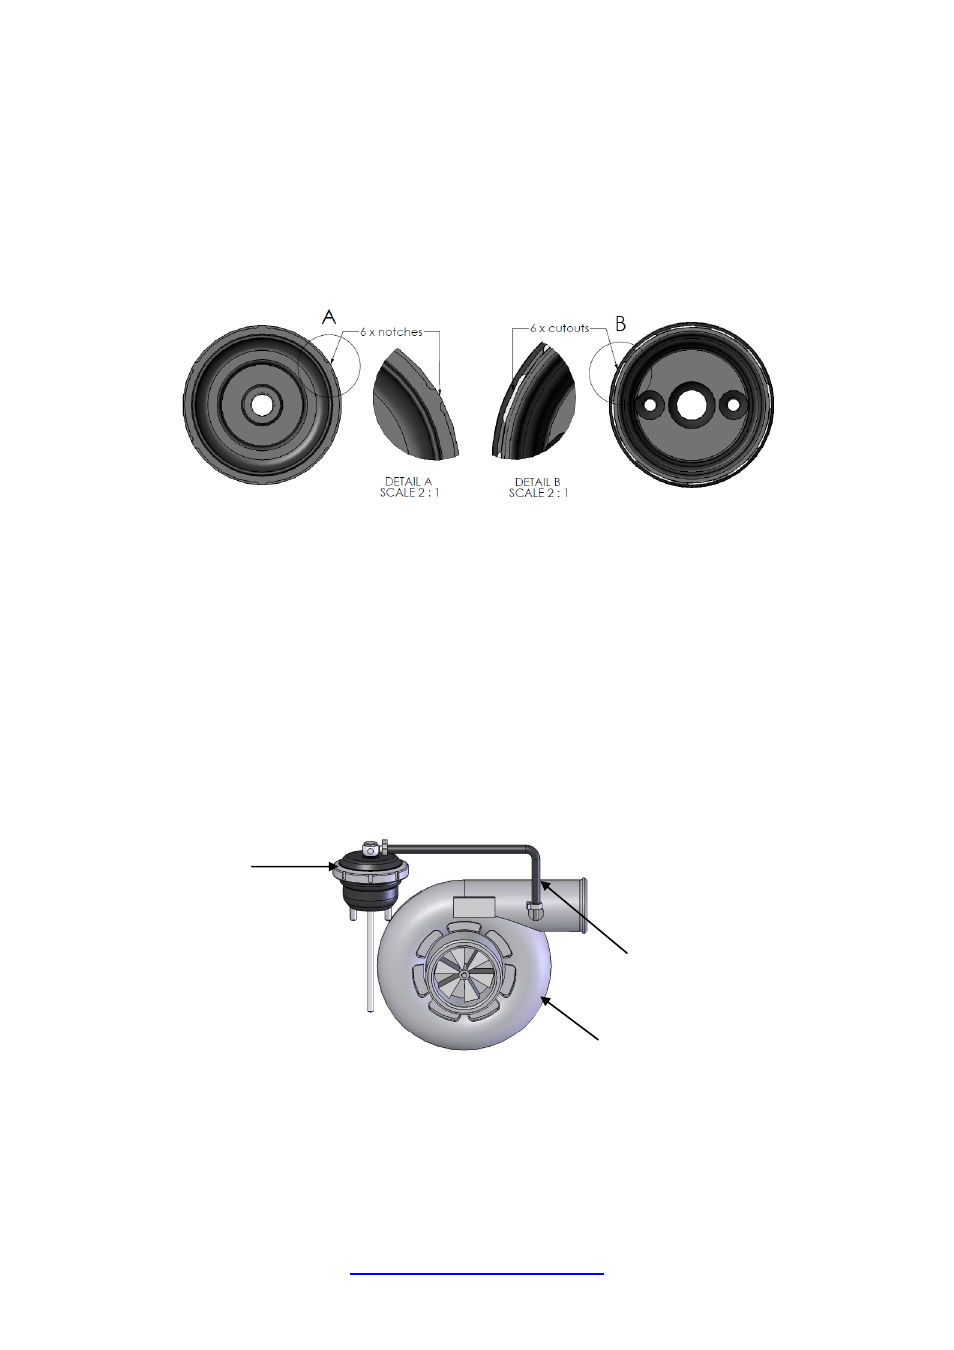
Reassemble in reverse order. Ensure that the diaphragm is installed in the centre of the upper spring support and when
installing the cap, make sure that the cap and diaphragm are centred and that the locating notches on the cap match the
cutouts in the lower housing. When installing the clevis, make sure that there is 2mm worth of preload.
NOTES ON BOOST CONTROL HOOKUP
WARNING! Changing your connection method can cause a higher than expected increase in boost pressure. Turbosmart recommends
adjusting your boost controller back to its minimum setting and measuring the new minimum boost pressure achieved by the new setup
before increasing your boost again.
*Note* OEM Boost control hook-ups: The OEM boost control system normally contains a restrictor
“pill” in one of the lines to improve
response from the turbocharger. This pill can normally be found by pinching along the boost control pressure lines until you find a small
lump. If you are retaining the OEM boost control system, you must leave all of the restrictors in place in the correct lines as removing
them will reduce response.
*Note* Aftermarket Boost control hook-ups: For aftermarket boost control systems, please refer to its user manual for hook up
methods to the IWG75.
Basic setup (For replacement of an OEM actuator with 1 pressure nipple)
If no boost controller is being used connect the BOOST PRESSURE ONLY SOURCE to the wastegate actuator pressure nipple as
shown.
Wastegate actuator
pressure nipple to
pressure only source
Turbocharger
Wastegate
Actuator