Rough Country 244.20 User Manual
Page 15
55. Install the new none torsion bar drop brackets into the control arms as shown then install torsion bar. Install the tor-
sion bar cross-member onto the brackets using the supplied 7/16” x 2.75” bolts, washers, nuts, and bushing using
the stock washers off of old bolt. (note the new bushing will be very tight on the new bolt Tighten bolts using 5/8
socket and wrench. Install torsion bars and keys make sure keys are all the way on the torsion bar and load bars
using a torsion bar tool. Set torsion bar set bolt to measurement taken at the beginning. See Photo 61 & 62.
56. Install transfer case skid plate if equipped with stock hardware.
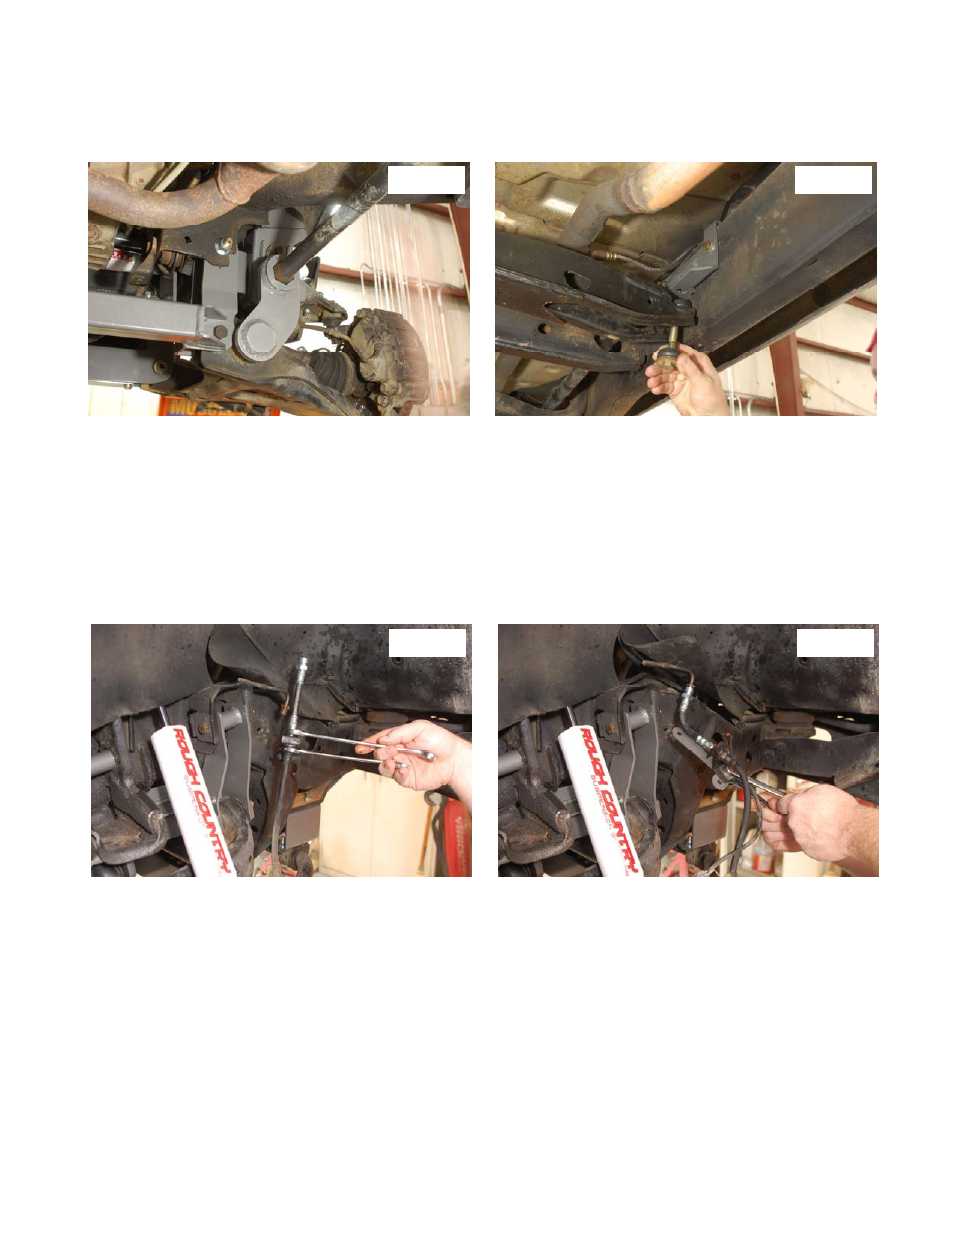
57. Using a 9/16 line wrench and a 5/8 wrench remove the rubber brake line from the hard line. Take care when doing
this the line maybe brittle. Install the new brake line ext. to rubber line first using two 5/8 wrenches to tighten. Note
97 and down models use the 3/8”-24 fitting lines and the 98-up models use the 7/16”-24 fitting lines. Then brake line
ext. to hard line using 9/16 line wrench and a 3/4 wrench. See Photo 63. (Note wrench size may be different on
some year models)
58. Install new brake line bracket to the stock brake line bracket using the 5/16” x 1” bolt, washer, and nut. Tighten using
a 13mm wrench. Attach the new brake line bracket to frame using stock hardware and a 13mm wrench to tighten.
Reinstall ABS wire and brake line to upper control arm with stock hardware using 13mm wrench and 10mm wrench.
See Photo 64. Make sure lines are out of harm way. Bleed the brakes and check for leaks.
59. Reinstall battery tray using stock hardware and a 13mm socket to tighten. Install battery and battery holder use a
13mm socket to tighten. Reinstall battery cable using a 8mm wrench. Reinstall grill if it was removed.
60. Install the front tires and wheels and remove truck from jack stands.
Photo 63
Photo 64
Photo 62
Photo 61