Rough Country RC800 User Manual
Page 8
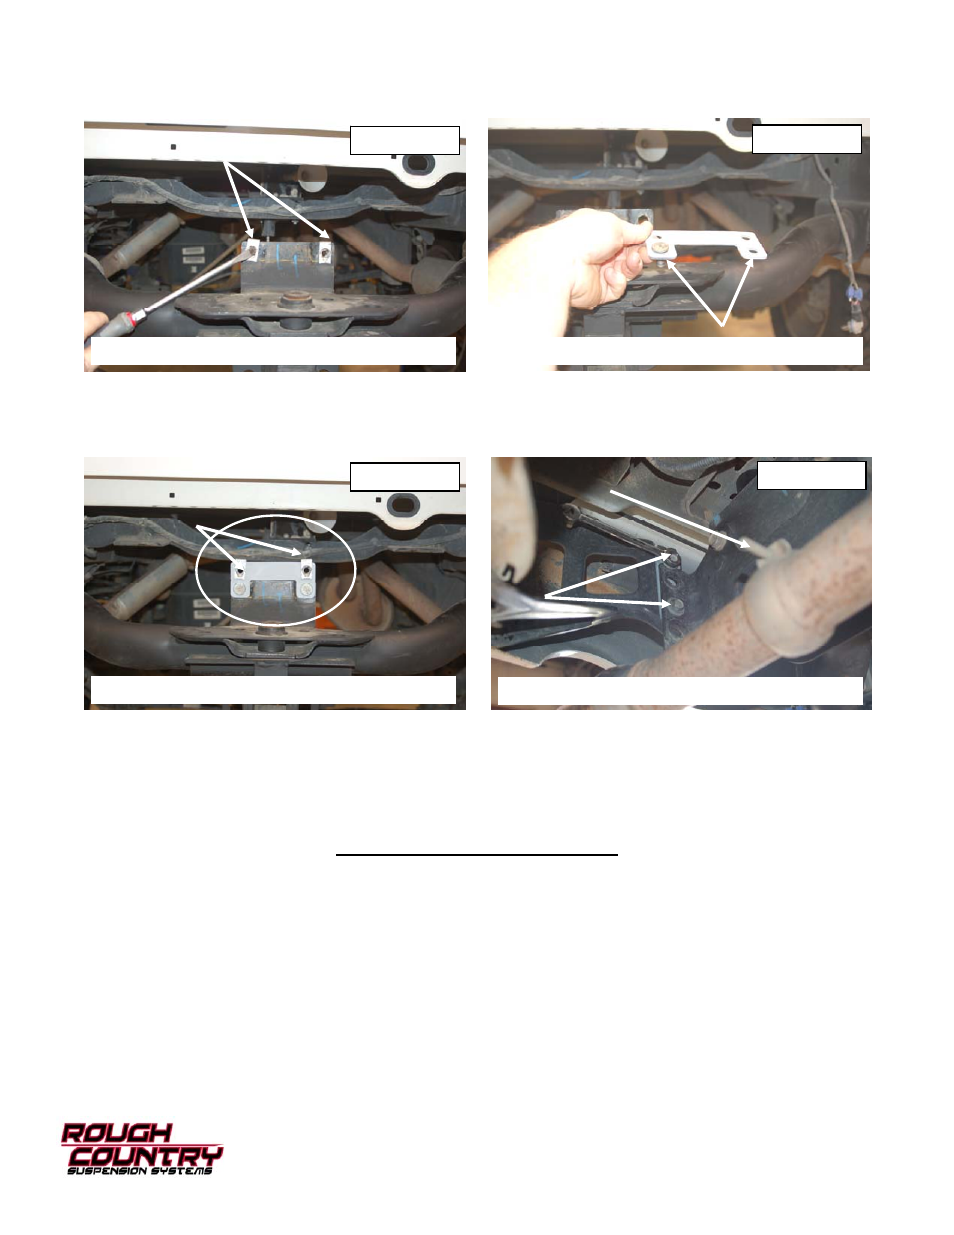
16. Remove the 2 clip from center of hitch using a screwdriver. See Photo 15.
17. Install 2 studs from front body mounts that where removed into new center bumper bracket with hammer or a socket
and a hammer. See Photo 16.
18. Install center bumper bracket as shown using 16mm to tighten. Reinstall clips. See Photo 17.
19. Install bumper back onto truck using stock center bolt first but do not tighten. Make sure cut out goes around hitch.
20. Install new side bumper brackets using stock bolts.13mm and 15mm wrenches. See Photo 18.
21. Make sure bumper is centered on truck. Tighten all bumper bolts.
22. Plug in trailer and lighting wiring harness. Install license plate and spare tire.
23. If factory equipped, loosen exhaust tips as shown using 13mm and move to the desired location and retighten. Do
not get tips too close to bumper. See Photo 18
24. Reconnect battery using 10mm.
PHOTO 15
PHOTO 16
PHOTO 17
PHOTO 18
POST INSTALLATION INSTRUCTIONS
1. Check all fasteners for proper torque. Check to ensure for adequate clearance between all rotating, mobile, fixed,
and heated members. Test and inspect brake system.
2. On some vehicles the front lower skirting will need to be trimmed if using certain wheel /tire combinations and with
heavy offset wheels. Trim only as needed.
3. Activate four wheel drive system and check front hubs for engagement.
6. Perform head light check and adjustment to proper settings.
7. All kit components must be retightened at 500 miles and then every three thousand miles after installation. Periodi-
cally check all hardware for tightness.
8. Install “Warning to Driver” decal on sun visor.
REMOVE CLIPS
INSTALL STUDS IN BRACKET
REINSTALL CLIPS
REINSTALL BUMPER BOLTS